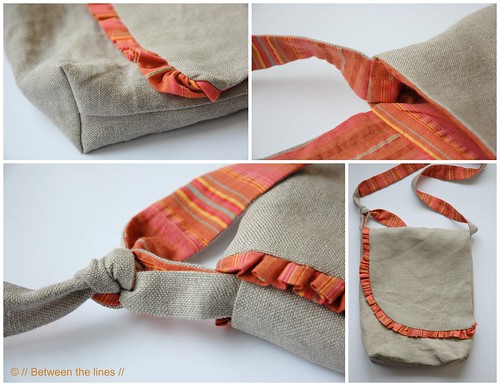
Last Friday, I mentioned there possibly was a tutorial in the works for little H.'s bag. It's been tested now over the weekend and she loves it - and so do I!
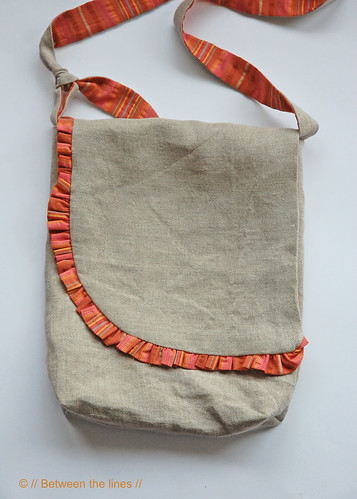
So, here's a tutorial for a fancy ruffled messenger bag!
This bag sort of happened. The only requirements were it had to be a messenger bag and the strap needed to be adjustable. And it definitely needed frills of some sort as little H. is a girly girl. Hence, the ruffles. All I used was my imagination and some scissors. I didn't even bother to take out a ruler or measurement tape (well, I did - afterwards, in order to write the how-to). The rounded flap and matching strap "happened" as I went.
In case you want to give it a try, here's a short description. The measurements given are approximate and include seam allowance.
For this bag you'll need:
two sets of fabric, one for the outside of the bag, one for the lining, cut as follows:
in each fabric:
- a 65x30cm rectangle, for the body,
- another 30x25cm rectangle for the flap, (long end determines the height of the flap, while the short end determines the width of the flap. The latter should be slightly less than the width of your bag pieces)
- a 4x15cm rectangle for the loop,
- a 5x105cm strip for the strap.
lining only:
- a long strip measuring roughly 7x140cm, for the ruffles
Step 1: Body of the bag
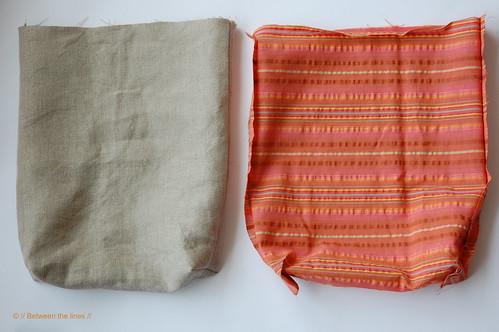
Fold the fabric in two, pin the sides, and stitch the sides closed.
Next, in order to make the boxed corners at the bottom, fold open the corner so that the side seam matches up with the bottom fabric fold, pin and mark as shown in the picture, about 4cm from the side. Stitch on the line. Repeat with the other corner. Note: it's really important to have side seam and bottom fold coincide perfectly, in order to get perfect 90° corners.

Now repeat with the lining, but leaving an opening in one of the sideseams, for turning in the last step. You should end up with two bag pieces looking like this:
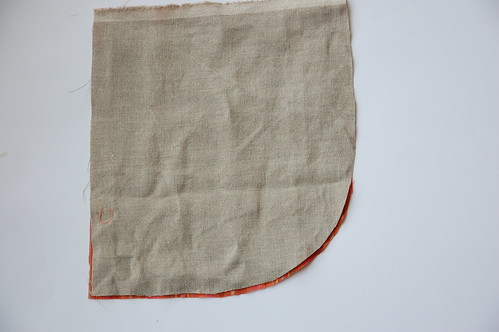
Step 2: Flap
2a. Take the flap and cut curvature going from the left hand side lower corner to the right hand side upper corner.
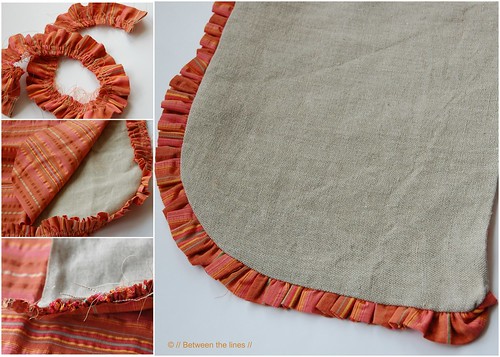
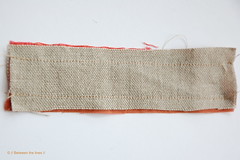
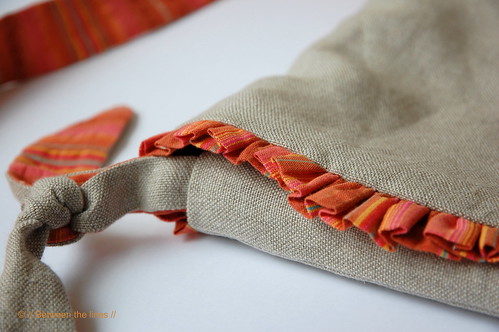
2b. Ruffles: Fold the strip in two and iron flat. Next, on your sewing machine sew two parallel seams in a not too small stitch. Knot the four thread ends at one end to secure. At the other end take the two upper threads and start pulling on them, while pushing the fabric down. Your fabric will start ruffling. Keep going until you've reached the desired length, being the length of the curved side of the flap.
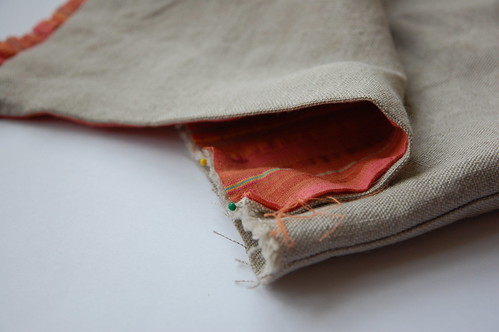
2c. Pin the ruffles to the outer fabric, such that the ruffles face inward (see picture). Secure by stitching them together really close to the side.
2d. Put the lining on top of the outer fabric, right sides facing, sandwiching the ruffles inside. Pin and next stitch the seams all the way around except for at the top (for turning). Clip the corner, turn inside out, press flat with an iron. It will look like this:
Step 3: Loop and strap
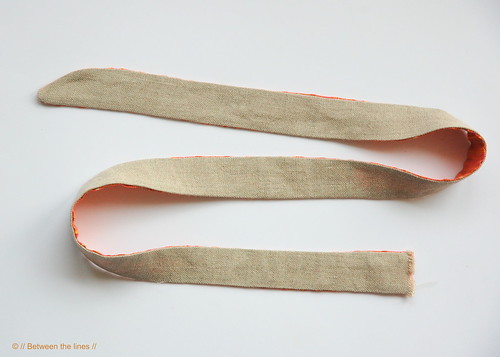
3a. Put the two strips you cut for the loop on top of each other right sides facing and stitch together. Next, turn inside out and press flat.
3b. Do the same with the strips you cut for the strap. Note: As I wanted the strip to match with the rounded flap I cut a slight curve at one end.
Step 4: Putting the bag together
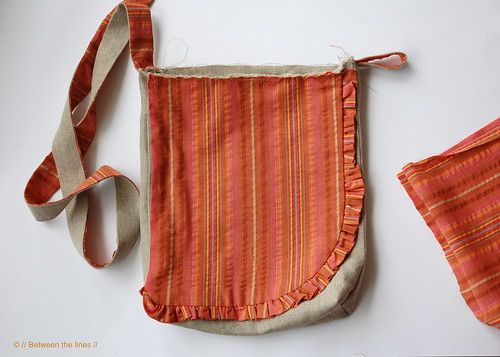
4a. Pin the flap to the outer bag right sides facing while making sure to have it perfectly in the middle of the back of your bag.
4b. Fold the strip for the loop in two and pin to the left side of the bag, right sides facing and having the loop face downwards (it will face up once the bag is turned in the last step).
4c. Pin the strap to the bag at the opposite side, right sides facing.
4d. Secure everything, by stitching close to the sides.
4e. Pin the lining to the outer bag, right sides facing, and keeping the flap, the loop and the strap sandwiched inside. Stitch closed, about 1cm from the edge.
4f. Turn the bag inside out, through the opening you left in the lining. Press all seams flat. Close the gap in the lining, pull the strap through the loop and tie a knot at the desired length... and done!
I hope I made myself clear, if not just let me know!
Good luck!
Please note, these tutorials are intended for personal use only. Therefore, do not reproduce, sell or commercialize in any form without permission. Thanks for understanding!

