Some of you might remember my free style crochet experiment from earlier this year. If not, just head over to this post (but make sure to come back after!). At that time I already played with the idea of decorating a coat hanger that way. I even tried, but I wasn't patient enough at that time and it didn't work out too well, so I tore the whole thing down and put the idea and the hanger on hold. Until some of you mentioned their crochet-decorated coat hangers in the comments on my last tutorial, that is! As a matter of fact, I used to have one of those when I was a kid - with a red and blue pattern if remember well. So, you had me going again! Thank you so much! Only this time I wanted it to work out. And it did!
Sure, it took me a fair part of my Friday afternoon (the other part I took the kids to the local pool) but I do like the result a lot - and so do my girls "Can I have it mommy?".
What did I do different this time to make it work, you wonder? I guess I was less time-constrained (even though we went to the pool) and the tying of some string as a guide-line made a huge difference. And here is a - very - short description in case you want to give this a try as well.
What you'll need:
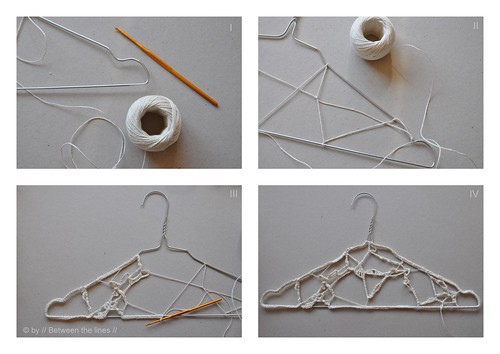
- a wire coat hanger
- yarn, string or... kitchen twine, aka butcher's twine. Since I couldn't find any yarn that I found suited for this project, I used the latter. It was the first thing that I could find that came close enough to yarn and its slightly rough texture with pieces sticking out here and there is just perfect for this project.
- crochet hook
- optional: buttons, ribbons, beads, colored thread
Steps:
1. Attach the end of the twine to the hanger and now start going criss cross with it, wrapping and tying as shown in picture II. This net will form the structure for your free style crochet. Don't over do it as you will need "space" to work around and add detail.
2. Stop knotting somewhere on the wire, make a loop, slip your crochet hook through it and start crocheting around the wire using a simple crochet stitch (picture III). You don't need to go all around the hanger at once - this project is a little wild and crazy. Consider it like a road trip where you take little side roads whenever you grow tired of using the high way. So, start to work around the net that you created inside the wire, using the different stitches you know (chain stitches, single crochet, double crochet, ...), and alternate by doing parts on the wire and on the inside of the hanger.
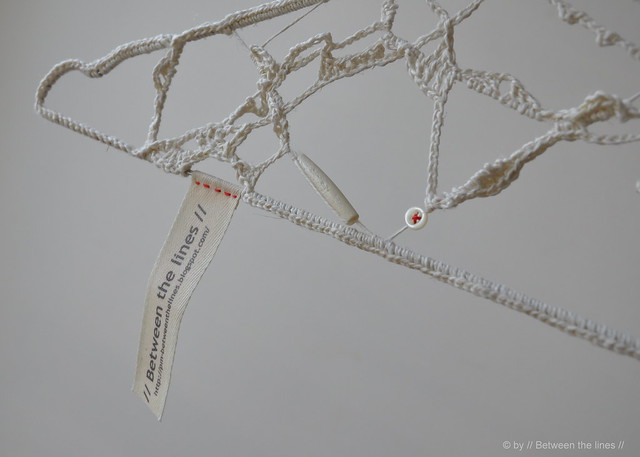
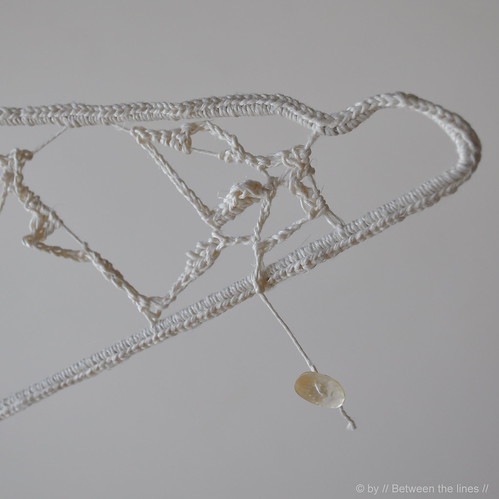
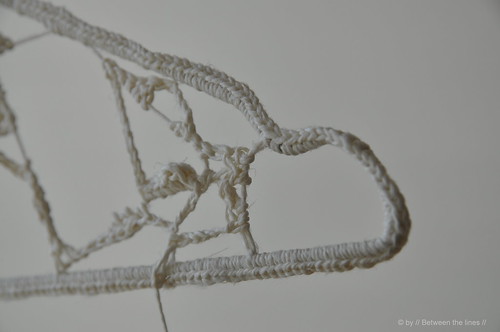
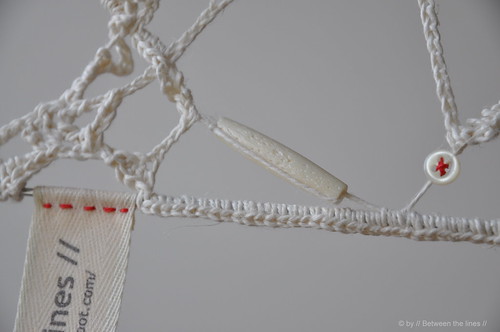
3. Optional: As you can see in picture IV (and the many other pictures below), I didn't cover all of the wire nor the entire net. I wanted to keep it "airy" and it left me some room to further adorn it with little treasures. I used little buttons - I intentionally didn't cut off the end of the twine but attached a mother of pearl button to it instead - a silk ribbon, a tag with my blog's name on it which I found lying around, a bead, some red thread... You could add many other things like pieces of wood or sticks, shells, dried flowers... I found this to be the fun and relaxing part.
I hope I made myself somewhat clear. If not, let me know.
I clearly couldn't get enough of my new clothes hanger as I kept on photographing it from different angles... So, here are some more pictures.


Note: Did you make something with the help of a // Between the lines // tutorial? Post your pictures here! I'd love to see your creations!

