November is almost halfway through. The first Christmas decorations are showing up in town, and I try not to see them. Because I'm a procrastinator and it reminds me of all things still to be done. And because, somehow, the whole holiday craze makes me feel uncomfortable - more and more - every year. "Do we really need to spend that much to get through the holidays and to make everyone happy?" is the question that comes to my mind when I see all this extravaganza. This DIY Gift Ideas series is an attempt to do things a little differently this year - and at low cost. All it takes is a tiny bit of creativity and a little bit of time. I truly hope to inspire at least some of you to craft along!
Ok, I promised I would kick off this series with last weekend's project. It's finished - I like it, but I'm waiting for better light and more time to take a couple of pictures.
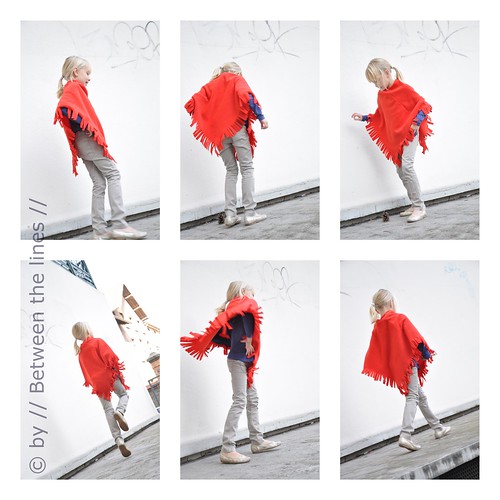
So, why don't I get you started with a polar fleece poncho instead! I made this poncho a while ago after seeing a girl wearing a more luxury - hooded - version of it. The weather has gotten too cold and wet here to wear it outside, but little H. likes to cuddle up in it here at home and wears it as that little layer extra in the mornings and evenings. Just like the other poncho's, it is super easy to make. With only a couple of seams and the use of an easy to work with material like polar fleece, this project is accessible to even the most inexperienced sewer - a kid literally could make this. So, maybe this might be a good idea to keep your child busy on a rainy day as well.
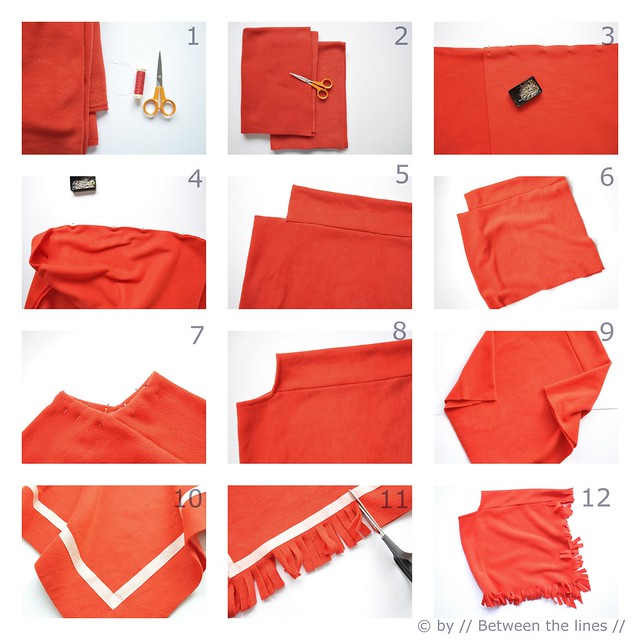
About the fringe: I used masking tape to set outlines for cutting - if you want to perfect this you could even make marks on the tape to space them out evenly. I didn't go through the hassle of doing this, I didn't even bother to work myself all the way around with the scissors - I simply folded the poncho such that front and back were perfectly aligned on top of each other and I cut through both layers at once.
What you'll need
- polar fleece: it usually comes in 1.50m width, so half a meter would do for a poncho for an 8-10 year (adjust for bigger sizes)
- matching thread
- masking tape
- good sewing scissors
- sewing machine (note: depending on the machine being used, it might be useful to test the machine on a little swatch first to see how it's behaving in terms of tension and needle.)
Step-by-step instructions
- Pattern: make a paper pattern of a 63cm x 44cm rectangle. This includes seam allowances. This should fit an 8 – 11 year old. You can adjust the dimensions accordingly for bigger sizes (to check hold the rectangle across your body, the short end being one of the shoulder seams). Make sure to have a difference of at least 18-20cm between the width and length of the rectangle as this will determine the size of the opening of the poncho for the head.
- Cutting: fold your fabric in two, pin the pattern to both layers of fabric. Next cut your fabric. You obtain two identical rectangles.
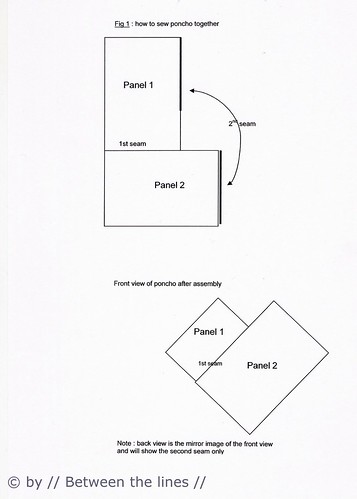
- Assembling: (see also Fig. 1) With the right sides of the fabric facing each other, pin the short side of one rectangle to the longer side of the other. Sew with sewing machine. Do the same with the other two ends. In the middle you’ll have the opening to put your head through.
- Hemming the collar: With the right side of the poncho facing you, turn the top 1.5cm of the opening inward and do this all the way around. Pin while you’re going, to secure. Next, topstitch on the machine.
- Cutting the fringe: place your poncho in front of you such that front and back are perfectly aligned on top of each other. That way, you’ll be able to cut through both layers of fabric. Now, using some masking tape, define the size of the fringe you want (6cm in the poncho shown). Start with an incision at the center tip, and than gradually shift over the next couple of incisions until it becomes perpendicularly upon the tape. Then continue to cut parallel on both sides, left and right from the center tip.
- Optional: you can further decorate the poncho, using ribbons, buttons, appliqué, sequins, embroidery… Use your imagination!
Did you make something using a tutorial found on this blog or did you get inspired by something you found here? Then make sure to post your pictures here!

