School has just started - about what? three weeks ago - and we all went through our first colds and/ or first sore throats. The weather has been up and down, lately - more up than down, to be honest - but the mornings are definitely cooler. Not cool enough for digging up our woolen scarves - but a light scarf might be welcome, I thought. And since I still have a couple of K.'s favorite but worn out (according to me, not to him) T-shirts left and a couple of stitches on my machine which I haven't tried yet, I thought a homemade, light weight infinity scarf might be worth a try! And that's exactly what I did.
I didn't chrono but this is an under half an hour project for sure (rummaging through your closet for a t-shirt not included) and it couldn't be easier. So here's a quick how-to for a simple yet fun infinity scarf!
What's needed:
- an old t-shirt (a sweater might do as well)
- scissors
- pins
- thread in contrasting color (I used a contrasting yellowish green thread to offset the brownish/grey faded color of the T-shirt.
- sewing machine or needle

Instructions
1. Lay down your T-shirt on a flat surface and cut off the bottom hem part. Snip-Snip. (pic.2) Do the same at the sleeve insert level, cutting from one side to the other (pic.3)
2. Fold in half and cut again along the fold - snip snip - to obtain two identically sized tunnels. (pic.4)
3. Cut away the side seams (4 times) - snip-snip - to obtain 4 identically sized rectangles. (pic.5.)
4. Lay one rectangle on top of another rectangle, right sides facing up, and with a 1/2 inch overlap. Pin together - pins-pins (which happens to be the palindrome of snip snip, by the way, how cute is that!). Repeat for the remaining pieces and close the circle by placing the first rectangle on top of the last one (pic.6).
5. Sew together by hand or on your sewing machine with a jersey stitch. And done!
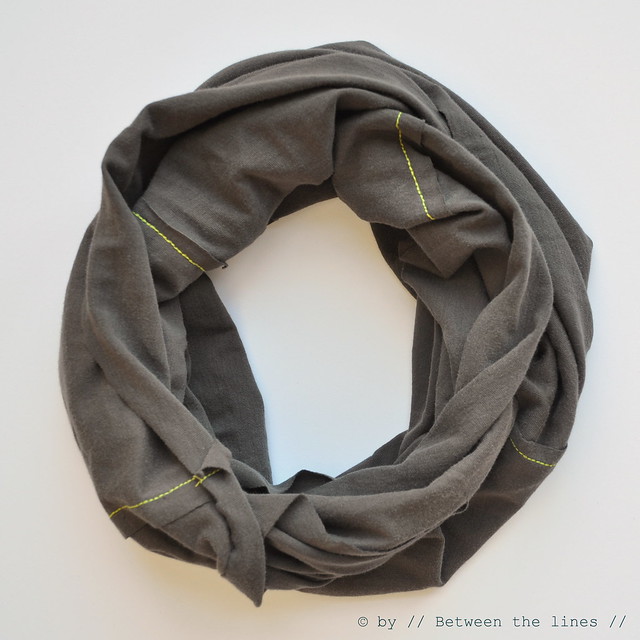
You have now obtained a wonderful light weight infinity scarf and no cost. So, now you can start experimenting with it - wear it twisted around your neck a couple of times, or just once and knotted... You probably could wear it as a head band as well... or as why not, as a belt (as a maternity belt even). A versatile addition to your wardrobe, that is!
Note: As I was finishing this tutorial here I came across this one in my reader at The Purl Bee - a very nice and luxurious infinity scarf, if you ask me...
As with all of my tutorials, please note, this tutorial is intended for personal use only. Therefore, do not reproduce, sell or commercialize in any form without permission. Thanks for understanding!
If you made something using a tutorial found on this blog or if you got inspired by something you found here, make sure to post your pictures here.

