Yesterday, I felt like sewing a new bag. Only problem: I didn't have any of my favorite oatmeal colored linen left. It took me some rummaging through my stash to come up with something else: an old pair of jeans. We like a little challenge once in awhile!
Since our last move, I keep a whole stash of jeans in a box in my crafts cabinet. Originally, the idea was to keep the jeans until I had enough for making a quilt. However, with one quilt still waiting for the binding to get finished and the quilting as well, I must admit I'm not much of a quilter. Not when it comes to the bigger projects, anyway. Too intimidating, I'm afraid....
Anyway, since that quilt probably never is going to happen, I figured I might as well cut one pair to pieces for another project without doing much harm. This particular pair was a high-rise (!) that never really felt comfortable - probably because of its high-rise but mainly because of its unreliable zipper. Very annoying, even with a long shirt!

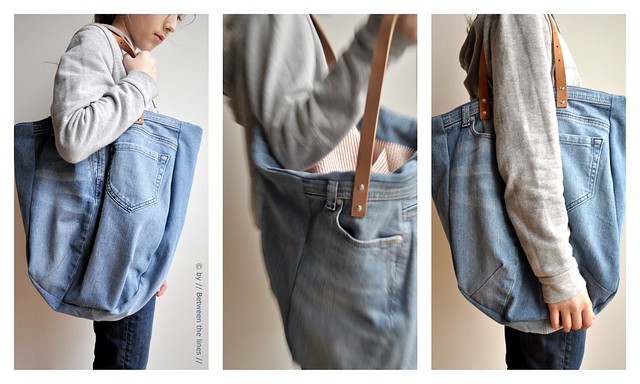
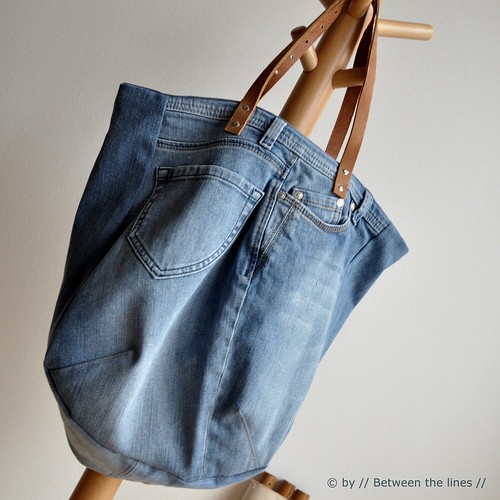
So, I cut the ugly thing to pieces and made this - not so ugly, if I may say so myself - tote. I used the same bag pattern as for this one, this one and this one. Its shape basically comes down to a rounded slightly trapezoid rectangle with darts at the bottom corners, combined with a rectangular panel in between the front and back panel.
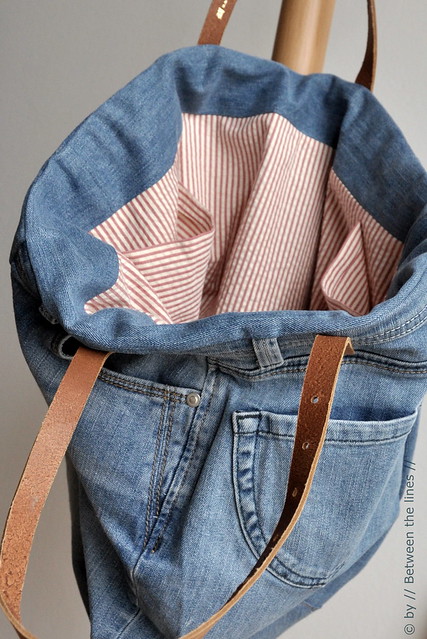
For the handles, I cut a cheap natural leather belt to pieces (H&M) which I still had lying around from when I was doing this tutorial. The lining is a left over from this project and this one as well. So basically, I didn't have to leave the house or spend another dime on this project, which is rather unique as usually there's always something missing. Not this time - instead, I got rid of something - a total win-win! How cool is that!

Now, in case you want to try this. Here are some notes on how I proceeded, which might be helpful.
- cutting the jeans: I cut mine open from front to back to separate the two legs. Next, I cut each leg open along the inner leg seam, to obtain two flat pieces of fabric. I used the top part of each leg to cut the front panel and back panel, the front pockets and back pockets nicely centered. I was extremely careful not to cut the inner pockets to pieces while cutting each panel. That way all pockets are still fully operational! From the lower leg parts I cut the bag's middle panel (2 pieces joined together, about 15cm wide), as well as a strip for the facing of the bag (2 pieces joined together, about 7 cm wide). There was enough fabric left to make handles as well, but I decided to go with leather handles instead.
- lining: originally, I intended not to line the bag, and finish the seams off with some bias tape. However, with all the seams already there, and the new ones and the inner pockets this would have looked rather unfinished, something I do not like. And I needed to hide the handles' rivets in some way or the other. So, I went for a lining instead. I'm not sure I chose the best way to do this, with a facing and lining, however. Because of the thickness of the fabric the top looks a bit bulky - it doesn't bother me, I own a bag from GAP with that same kind of bulky finishing, matter-of-factly, but it might bother the perfectionists amongst you. One might opt for a lining going all the way up, without the facing, and whip stitch it to the denim instead.
- the handles: the main reason I went for leather handles is because I like the denim - natural leather combination and because I happened to have the right color of hardware (rivets) to go with it (sewing wasn't an option given the thickness of both the denim and the leather). This is the first time I used this type of rivets. I didn't exactly have the right tools (no rivet gun) but I managed to get them in using pliers (a hammer didn't work and was too loud anyway - I did this past 10:00p.m. - not sure if the neighbors would have liked it). This is what I learned:
- you'll hardly ever find the right size of rivets matching the thickness of leather and fabric. You can solve this problem by adding a small piece of leather (or fabric) in the back. Additionally, this will make it more sturdy as well as it reinforces the fabric of the bag.
- prepare both the fabric and the leather by making the appropriate holes in them with a punch, corresponding to the rivet's parts (top part is wider than the bottom part) - this will reduce the effort needed to secure the rivet and makes sure you get them in at the exact right spot.
- in order not to damage the rivets while using your pliers make sure to use at least a cloth in between. I found a piece of cork to be extremely helpful. Never put the pliers directly to the rivets!
I guess I'll have to take out that box one more time... What else can I say to a sweet little request like that...?