I don't know how your week has been, but mine was weird. And short.
Flat tire on Tuesday, right when we were supposed to head off to gymnastics. Had to go by bus which we missed, so we had to wait and hence M. was late.
Wednesday, I had to get the tire fixed besides everything else on a usual Wednesday . Thursday, I was supposed to prepare samples of crafts activities for an upcoming school event - I wasn't in a crafty mood, apparently, since nothing seemed to work out the way I wanted. On top of that a big photo frame came down from a shelf, shattered to pieces, glass everywhere and me almost having a heart attack from all the rumpus it made. It took me awhile to pick up the pieces and while I was vacuum cleaning the last bits, I decided to quickly do the kitchen floor as well. That's when I noticed a big puddle of water under the washing machine... It was close to pick up time from school and I was trying to find a leak... No way I could move the heavy machine on my own. So, it had to wait until K. got home. Nothing wrong with the machine - thank goodness - just one of the joints in the water pipe running behind the machine that gave up. The leak got fixed on Friday morning - no harm done.
And that was my week, sort of.
Good thing at least the weather was nice, which allowed a short stop at the park after school almost every day.
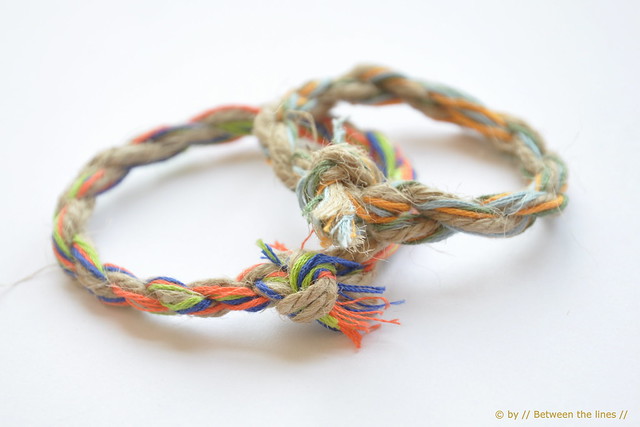
Anyway, yesterday while I was still thinking about bracelets for the upcoming school event, I came up with this twisted rope/embroidery floss bracelet. Easy to make and at very low cost. Make it longer, tie a knot at both ends and you have nice rope handles for a summer tote... I might try this actually, if I find a spare moment.
In the meantime here's a short how-to for the bracelets. The rope blends perfectly in with the new styles for summer: espadrilles, rope wedges... If you want a more finished look, instead of tying a knot attach a clasp.

All you need is embroidery floss, hemp rope, a pencil for twisting, and something to hold the rope while twisting (I used a piece of wood with a nail, a ring binder will work equally well).
1. Cut several strands of embroidery floss and one strand of rope, of equal length. Tie them all together to form a closed loop.
2. Place loop over the nail, or ring of the binder and slip your pencil through the loop at the other end.
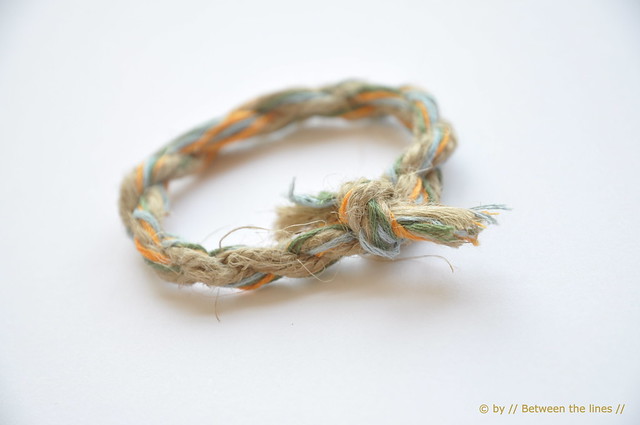
3. Start twisting and continue until the twisted rope starts twisting onto it self. Redistribute where necessary to get a nice twisted rope. Tie a knot through the loop and done!
Make a bunch to cover wrists, ankles,... Make them smaller and you obtain perfect napkin rings for that first spring garden party (or autumn outdoor gathering if you happen to live on the other half of the planet). Just play around with it and have fun!
Well, it's not my best idea ever, but at least I have the feeling I did something creative this week!
Wishing you a nice weekend!
xo, Pascale

