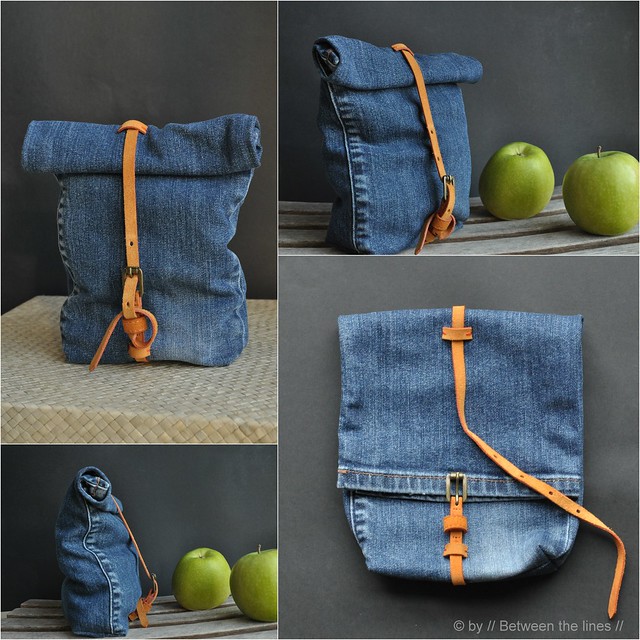
I'm maybe not very original with this project. You can find tutorials for this kind of (snack) bags everywhere on the net. Derived from the paper brown bag, they're very simple to make. When using old pants, however, they're even simpler to make, is what I thought.
I used an old pair of jeans, which were ripped at the knees, and let's face it, which also got a little too tight around the waist... For the strap, I used a thin, orange leather, partly torn belt (the top and bottom layers got separated beyond repair this time).
The project is kind of straightforward and summarized in the pictures below. I probably won't use my bag as a snack bag but rather as a make-up bag. The second leg will be transformed in a similar way, and will hold our adapters, cell phone loaders etc. when traveling.
Just one remark before you get started: the size of the bag obviously is determined by the width of the pants' legs. Hence, I do not recommend using slim pants. Straight leg pants and boot cuts, however, are just perfect for the job!
You will need: an old pair of pants, an old belt, needle and thread, and a sewing machine (although you could do this project entirely by hand).
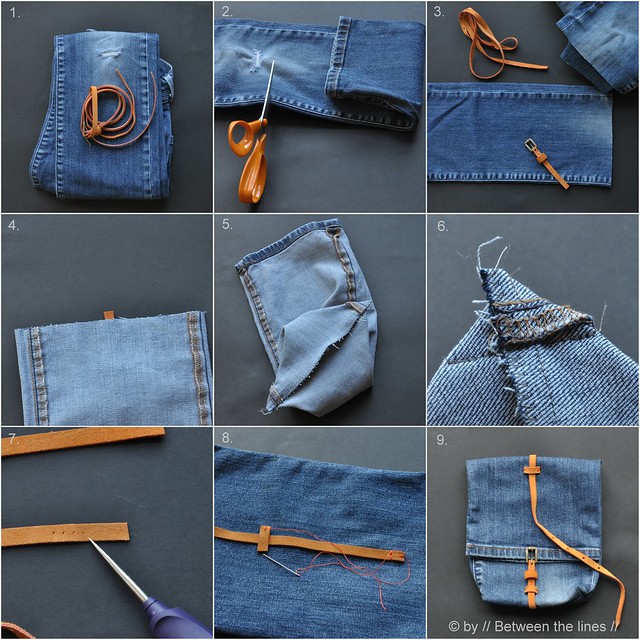
Instructions:
1. Cut off one leg, just below knee, with adult size pants, about 40cm.
2. Prepare your belt by cutting the following:
- one strap of about 10 cm, buckle included and still attached
- another strap of about 40 cm, starting to measure from the other extremity of the belt (so this part has the holes)
- two strips of about 3cm, each.3. Turn the leg inside out. Since the bottom seam will become the top of the bag, we will close the other end. Insert the belt part with buckle, at that end, making sure it's positioned right in the middle. Close the seam, and run a zigzag stitch to prevent fraying.
4. Make boxed corners as shown.
5. Attach the other strap, nicely centered in the back. To make the sewing easier, prepare the leather by making holes using an awl. Next, add the short strips with a couple of stitches. If you're smart, unlike me, you attach the strap and strips before sewing the bottom seam...
And that's it! Hope you like it...
Cheers,
P.
PS: If you made something using a tutorial found on this blog or if you got inspired by something you found here, make sure to post your pictures here.

