I got this idea when I walked into one of my girls' rooms the other day. Both girls have their snowflake garland still up. Hence: "Why not make a valentine's heart garland?"
So, that's what I did last night and part of this morning.
Again this is a fairly simple little craft.
This time I used some left over wrapping paper -- though only two really tiny pieces left, I saved them because I really liked the print. And see! I already made use of it!
Also, some colorful origami paper and felted beads . The latter is totally optional and any bead would do. Though mainly decorative, by adding a bead at the bottom you weigh down the garland a little. And finally, I also used a heart template, which I found here -- lazy as I was. Although the template is a full heart, you can use just half of it and place it to the fold of your paper to get a full heart. But I guess that's pretty obvious. The nice thing about the template is that the heart comes in two sizes which saves you some time if you want to combine small and big hearts as I did.

Now for the cutting part, I used two folding techniques (ooohhh! big word: technique). As you can see in the picture above, one way to go is by folding the heart starting from the center (the green heart). The blue heart shows what it looks like when you fold from the bottom tip. Please, let me know if this doesn't sound clear - I guess I could add a little sketch. My initial idea was to cut out the words: "I love you". I thought I had it figured out - I even made a template with folding lines etc. But it didn't entirely work out the way I wanted for the simple reason the capital letter "L" isn't symmetrical. And since I wanted to have this little craft posted, I just gave up for the time being. I'll try it again and will let you know (as I'm writing this: you might as well cut out the "L" without any folding - why didn't I think of that...). Important note, though, when working with words: if you do want to cut out words and don't want to trace on the front of your paper but rather on the back, don't forget to trace the letters in mirror view - I know what I'm talking about...


After cutting out your hearts and snipping away the pieces, take your hearts to the ironing board and iron on a low setting -- for imprinted paper iron on the back and put something underneath in order to avoid the print rubbing of onto your iron or ironing board - I know what I'm talking about (the board now has a slightly red-ish flowery print in one particular spot - don't tell anyone). I'm not clumsy - I'm just a little tired!
Once done that, take everything to your sewing machine and stitch everything together. If you want to thread beads onto it, make sure to leave a long enough end of thread on either side you want the beads and at the top also include a margin to tie a loop for hanging.
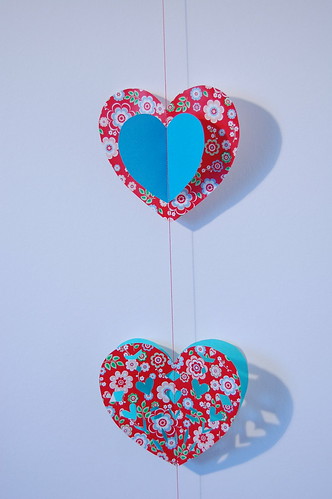
Final step: you've just ironed everything flat, now you're going to fold the hearts a little closed again. This will allow the light to shine through and will give a nice twirl to your garland as well - as to the nice twirl, I know what I'm talking about as I'm the one who tried to make pictures in the light studio...
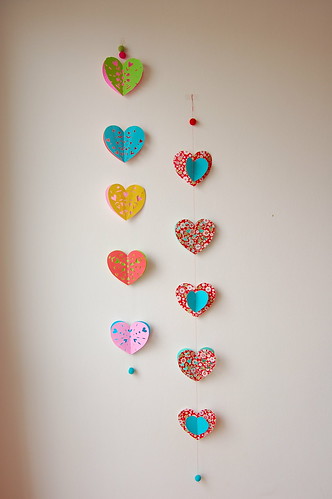
 See them twirl...?
Et voila! A valentine's garland! The girls really liked the garlands and have already decided who get's which one...

