Showing posts with label tutorial. Show all posts

July 31, 2013

T-shirt yarn macramé puppets

T-shirt yarn macramé puppets

Sitting on a mountain of old T-shirts?
Bought some T-shirt yarn but never got around crocheting or knitting that rug?
Or did you make that rug but you still have yarn left?
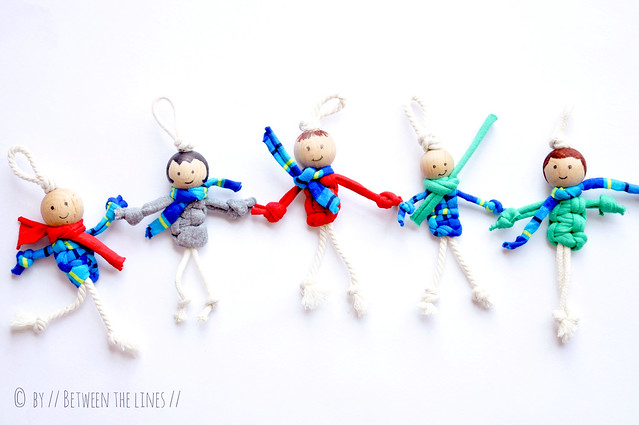
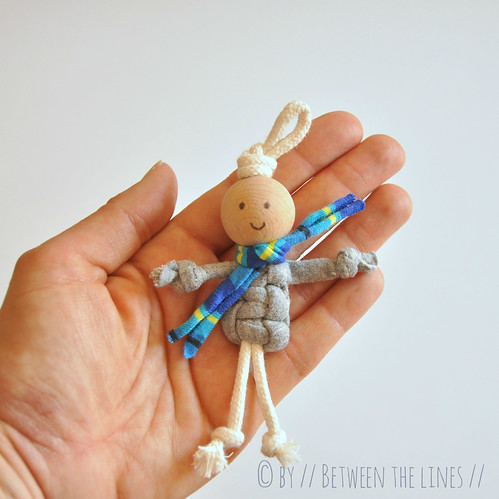
Here's a fun craft making use of T-shirt yarn.
T-shirt yarn macramé puppets


These T-shirt yarn puppets were part of our school's Spring fair activities last June and I can immediately add that they were a big hit among all ages.
It's a nice introduction to macramé as well.
If you don't have T-shirt yarn you can cut your own from old T-shirts (you can find how to do this online). Or you could use fabric strips, bias tape, cord, ribbon, ...

Slip the puppets on a key chain, use them to personalize school bags or make a bunch to make a cute mobile or garland for the nursery.

Recommended age: 5+
Required skills: ability to tie a knot
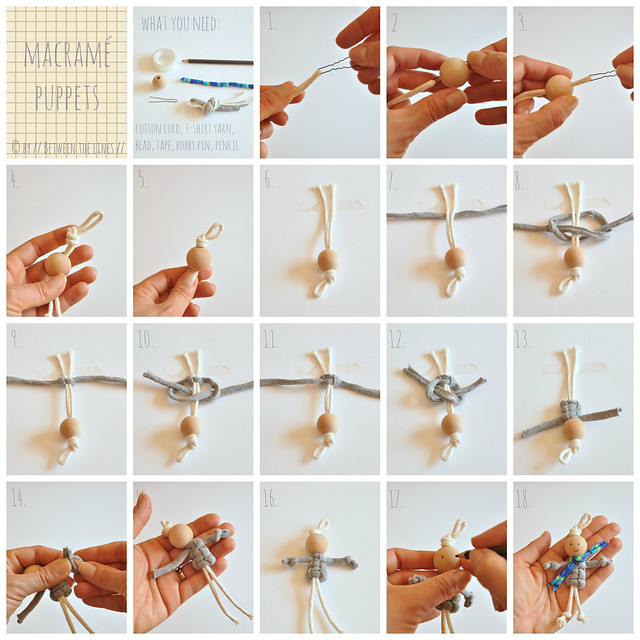
Click here to download written instructions.
T-shirt yarn macramé puppets

Note: inspiration for this craft was found here. Just now, I also found this tutorial online.

As with all of my tutorials, please note, this tutorial is intended for personal use only. Therefore, do not reproduce, sell or commercialize in any form. Thanks for understanding!

If you made something using a tutorial found on this blog or if you got inspired by something you found here, make sure to post your pictures here.


June 30, 2013

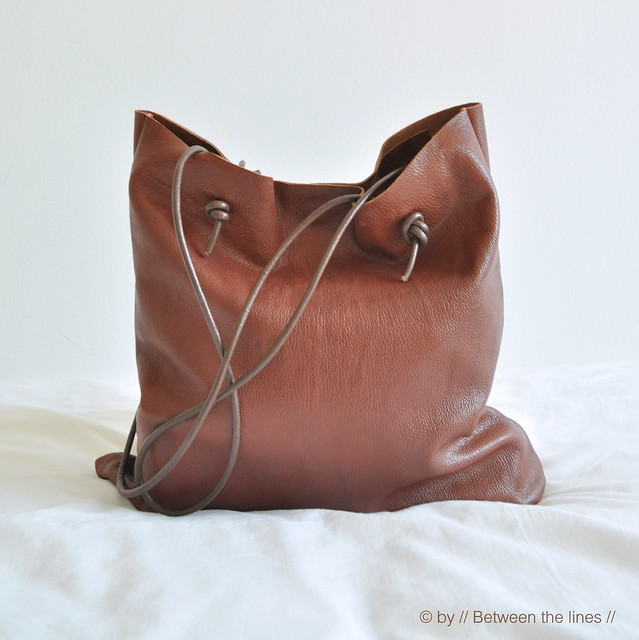
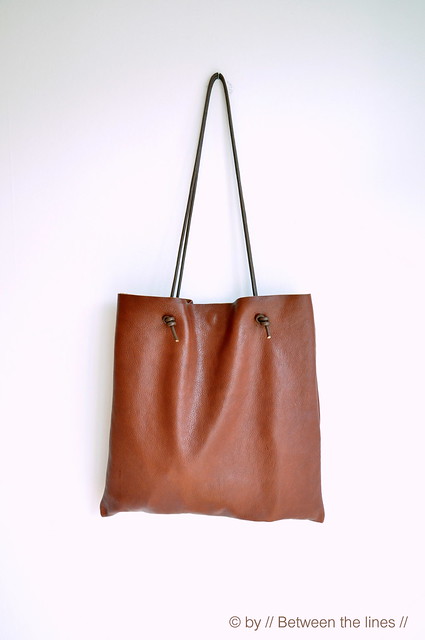
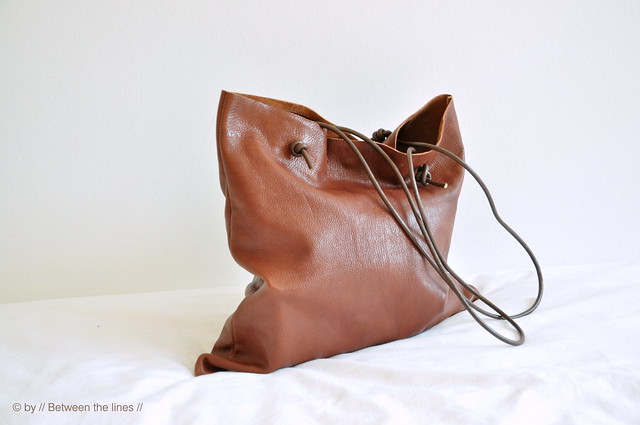
Simple leather bag tutorial

Simple leather bag tutorial


I just finished another leather bag this afternoon and I love it.
As a matter of fact, I just put it to the test and I find it perfect - very basic - very simple - just the way I like it.
And you know what?!
The instructions are down below, so you can make one too!
This is an entry level project, so no special skills, nor tools are required.

Simple leather bag tutorial


Simple leather bag tutorial

Simple leather bag tutorial


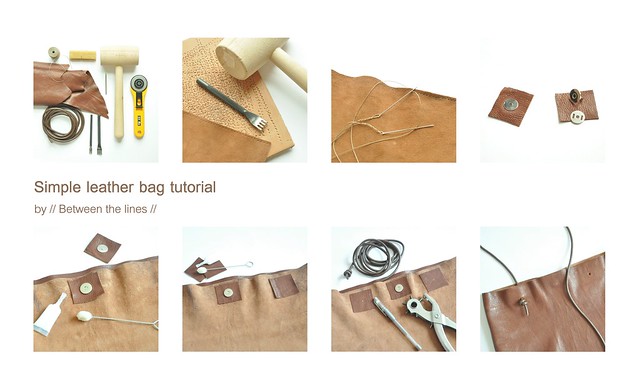
Here's what you will need:

The dimensions of the finished bag are: 38 cm by 40 cm

- leather - I used a leather hide of approx. 0.55 m² but any large (combined) piece of leather would do
- leather cording for strap (determine how long you want your straps to be, and add an extra 15 cm to each strap for knotting - so, if one strap measures x you will need 2(x + 15 cm) in total.
- thread, linen or nylon, as long as it's strong
- magnetic snap
- 2 needles
- pricking iron or a stitching awl
- mallet, rubber or wooden hammer
- hole punch
- glue, a standard crafts glue is fine
- optional: beeswax to wax sewing thread

Simple leather bag tutorial


Instructions:


  1. Cut a rectangle (or two rectangles of equal size if working with smaller pieces of leather) - in my case the rectangle was 39 cm x 80 cm. Next, make stitching holes along the long side for the side seams using a pricking iron, stitch punch or awl, about 0.5 cm from the side.
  2. Cut a piece of thread about 5 times the length of the seam you're going to sew. Thread a needle at each end and 'lock the needles' as is very well explained here. Next, sew the side seams using a saddle stitch, explained here. Note: in most stitching videos you'll notice people are using a stitching pony. I don't, for the simple reason I don't own one and I don't find it necessary. However, you could squeeze your leather in between two hardcover books held together with a a rubber band or belt. This should work equally well in my opinion.
  3. From the left over leather, cut six 5 cm squares.  Put four aside. Attach male and female part of a magnetic snap to the two remaining squares. If you don't know how to fix a magnetic snap check out this tutorial. Next, generously apply glue to the back of the magnetic snap squares and glue them into place onto the wrong sides of the bag, perfectly in the middle and about 3.5 cm from the top (measuring from the center of the snap). To make sure the glue/ square adheres, lightly hammer the square. Dab away any excess glue. Let dry.
  4. Determine where you want the straps to come. Then, position and glue  into place each of the four other squares which will serve to reinforce the leather where the strap holes come. Hammer lightly, dab away excess glue and let dry. 
  5. Mark the center of each square. Next, punch a hole with the leather punch. Repeat for the other squares. 
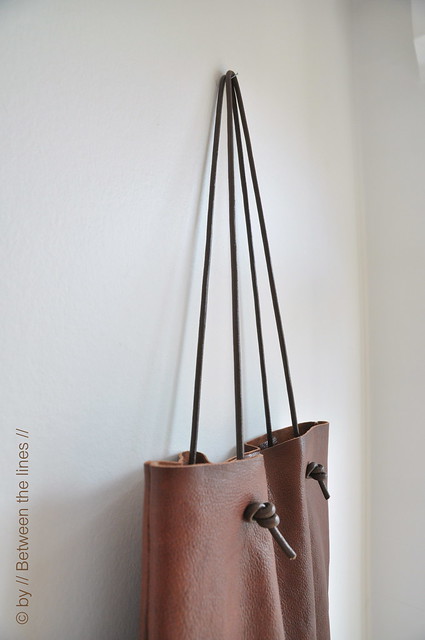
  6. Cut the leather cord to size, to make two straps. Tie a  double fisherman's knot at one end, thread through the hole as shown, thread through the other hole and finish off with another double fisherman's knot. Repeat with the second strap. And that's it!
Simple leather bag tutorial


As with all of my tutorials, please note, this tutorial is intended for personal use only. Therefore, do not reproduce, sell or commercialize in any form. Thanks for understanding!

If you made something using a tutorial found on this blog or if you got inspired by something you found here, make sure to post your pictures here.

June 10, 2013

Friendship bracelets with a twist :: a DIY

Friendship bracelets with a twist :: a DIY

I can't believe how fast time is going. It feels like I've been on a speed train lately.
The school year is almost over and this comes with a lot of activities and busy schedules.
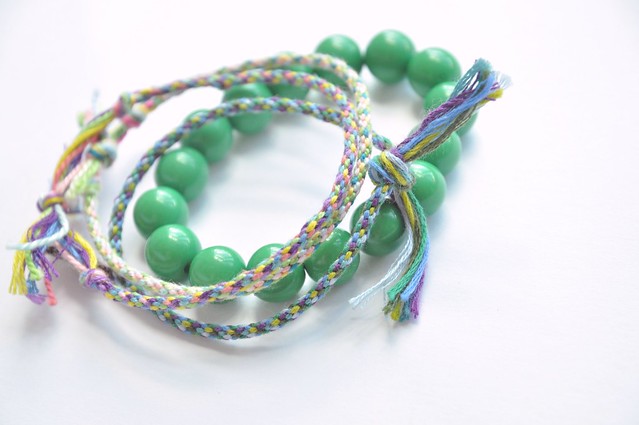
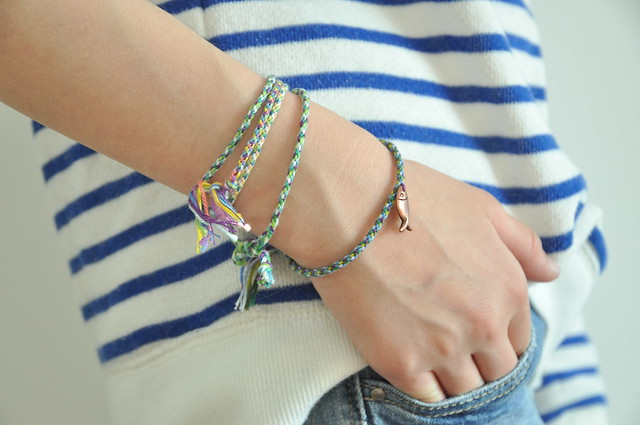
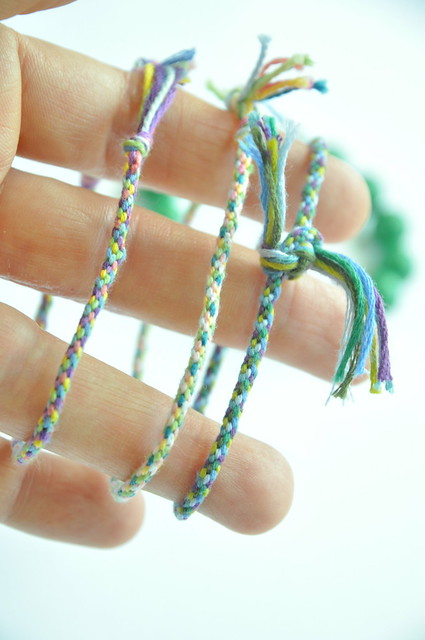
One of the things I have been busy with is helping organize the crafts activities for our school's Spring fair. The bracelets I'm showing today, were one of the activities I was responsible for and they were a huge success!  I originally found the technique here. They're simple to make and turn out to be really pretty when made with embroidery floss. Contrary to the usual friendship bracelets these are made in the round, which makes them look a bit like shoe laces. The nice thing about this method is that when you get tired of it you can just tuck it away to resume whenever you feel like it.

The girls and I have made a bunch of bracelets already (one is traveling right now in little H's suitcase as a little surprise... ). It's a perfect activity for those boring and long train/ plane rides, to do while relaxing on the beach, or why not, while waiting at the doctor's office.  No special skills are required besides being able to count to three, which makes this an activity suited for even the little ones - as a matter of fact, this might be a fun way to help develop fine motor skills.

This is what you'll need:

  • a piece of card board
  • something round to trace a circle (I was lucky to have a 1 3/4" punch, but a compass or glass work just as well)
  • scissors
  • embroidery floss
Friendship bracelets with a twist :: a DIY

Instructions: 

Click here for the full instructions in English and here for the full instructions in French.


Friendship bracelets with a twist :: a DIY


May 20, 2013

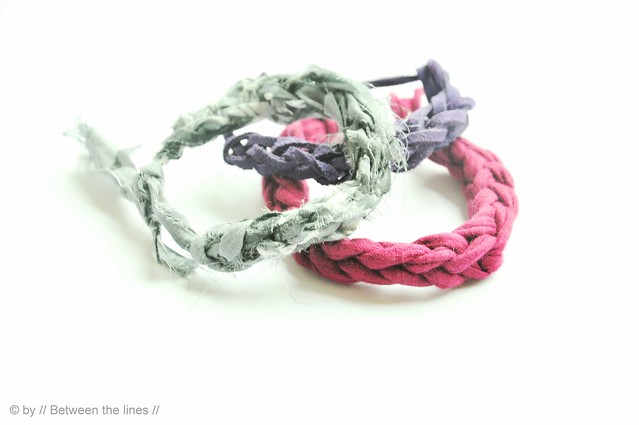
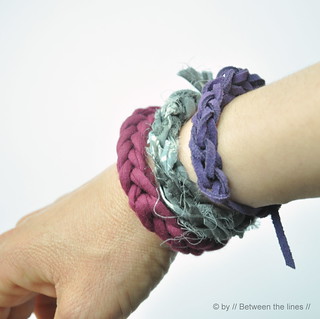
Knitted summer bracelets :: a DIY


Knitted summer bracelets

I'm not sure these bracelets will become as popular as my 2010 summer bracelets, but they sure are equally fun to make!

When I was looking for friendship bracelet ideas for our school's upcoming summer fest, I came across a 'knitting fork'.
Since I don't have a knitting fork but liked the technique, I wanted to try and make a fork with what I had.
Coincidentally, I made a Popsicle-stick-catapult just a couple of days ago, also for our school's craft fair and I figured that was the way to go.
A Popsicle-stick-catapult turned into a knitting fork! Why not?!
Talking about a multipurpose tool!
The only change I made here is that I used two sticks for each leg to make it a little sturdier and I re-positioned the sticks slightly to get a fork-like tool. I limited myself to bracelets but the possibilities are of course endless. I'm thinking of necklaces, belts, bag handles... Use your imagination!

Both, making the fork and the knitting, are very simple which makes this a perfect craft for keeping your kids, even the youngest ones - and yourself - busy on those long summer vacation car rides!
The instructions, including a video I made, are below!

Knitted summer bracelets


Here is what you'll need:

for the fork: (or catapult, if you like)

- 8 popsicle sticks (for a catapult you will need 2 less)
- 4 rubber bands

for the bracelet:

- yarn, T-shirt yarn, strips of fabric, leather lace, ... whatever you have on hands which could be turned into something bracelet like


Instructions:

1. Fork assembly

Knitted summer bracelets

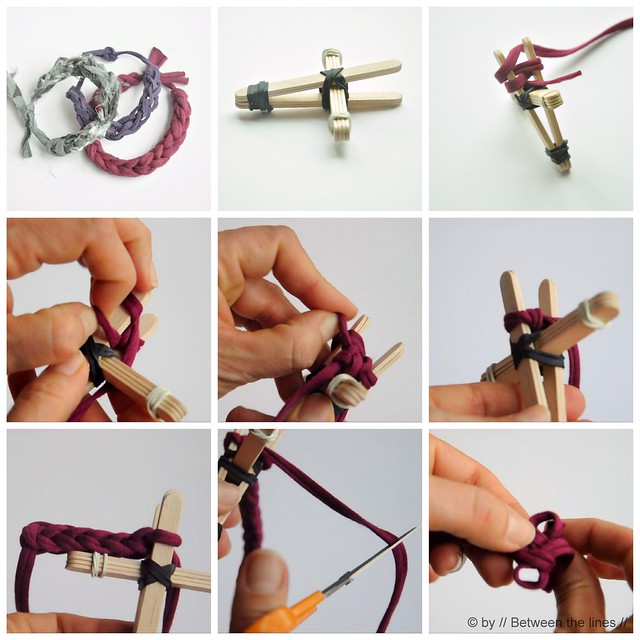
2. Bracelet knitting

To see the video in HD quality, click the settings wheel in the right hand corner of the black bar displayed at the bottom of the movie - select quality 1080p for the highest resolution.


And here once more summarized in step-by-step pictures:


Knitted summer bracelets

As to the lengths of the strands of yarn to use: it all depends on the thickness and flexibility of the material you'll be using, so knitting a sample may be in order.

Keeping my fingers crossed now for a long hot summer!

Have fun fork knitting!

Cheers,


P.


As with all of my tutorials, please note, this tutorial is intended for personal use only. Therefore, do not reproduce, sell or commercialize in any form. Thanks for understanding!

If you made something using a tutorial found on this blog or if you got inspired by something you found here, make sure to post your pictures here.
February 20, 2013

Triangular bag :: a tutorial

Triangle bag :: a tutorial

You can't look past the Martin Margiela triangle bags on the net lately. I had seen this type of bags before, pre-Margiela, I mean, and a lot cheaper too. I liked the minimalism - they reminded me of Japanese bag folding, furoshiki. The ingenuity is striking - a good example of how to optimize under constraints (this is the economist in me speaking) or translated in sewing terms: how to make the largest bag possible given only a small piece of fabric.

Triangle bag :: a tutorial


Anyway, as I was trying to figure out how to make one of these, I found out you can do so in a couple of different ways (I figured out at least 3 different methods). It all boils down to basic geometry, combining shapes in one way or another. I made several and I find the method described below to be the easiest one. All it takes is a rectangular piece of fabric, some folding and basic sewing skills. And if you prepare your fabric by hemming it all the way around, you can make this bag in under 15 minutes. As fast, almost, as furoshiki folding, except that this one's permanent.

What you need:

Note: this bag can be finished in many different ways. I won't go into detail here, but you could add lining, pockets, add a longer strap, finish it off with boxed corners, etc. Just know that when you add something you'll need more fabric.

- a rectangular piece of fabric, where the length of the fabric equals three times the width. To give you an idea of the dimensions: a 50 cm x 150 cm piece of fabric results in a 65-70 cm wide bag (which is really big!) depending on how you finish the seams.
- sewing machine, thread, pins
- Iron

Triangle bag :: a tutorial


Instructions:

1. Hem the fabric all the way around.
2. Place the fabric in front of you, right side facing up, and start folding as shown in the pictures.
3. Pin the fabric together where it says 'sew' on the picture. Flip over and repeat on the other side.
4. Sew together both seams on the machine. Turn inside out. Press.
5. Handle: Join the tips by overlapping them and sew into place.
A nice detail: before joining the tips I slipped on a piece of leather - a detail I was really proud of. It's only while looking at the Margiela pictures, right now, as I was writing, that I noticed they did the exact same thing...


That's all there is to it! I hope you like this bag as much as I do...


Cheers,


Pascale


As with all of my tutorials, please note, this tutorial is intended for personal use only. Therefore, do not reproduce, sell or commercialize in any form. Thanks for understanding!

If you made something using a tutorial found on this blog or if you got inspired by something you found here, make sure to post your pictures here.
November 29, 2012

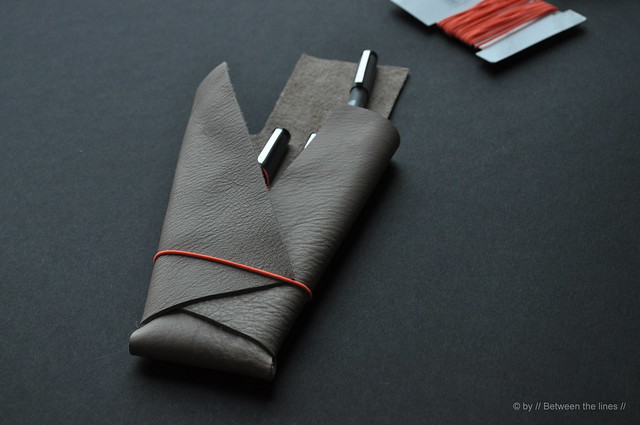
No-sew Leather Pencil Case :: a DIY

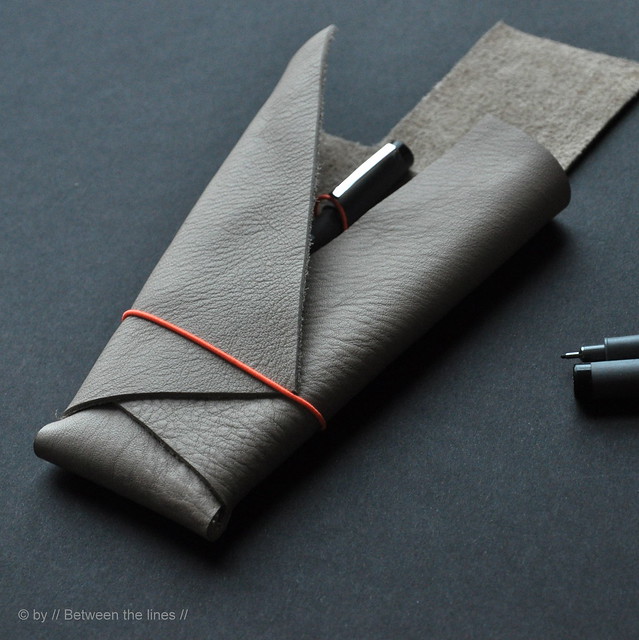
No-sew Leather Pencil Case
I have been feeling slightly under the weather this week. A lack of energy, a cold, sleepy, headachy... and I got slightly frustrated about it. So many things I wanted to do. So many unfinished projects on my table and in my head...

No-sew Leather Pencil Case

At least, yesterday, I managed to get this one out of the way. Taking pictures, scanning and transferring the template actually took me much longer than finishing the project. [I actually enjoyed taking the pictures. Yesterday was a dark and grey day, a bit of a challenge if you want to take natural light pictures. Especially, when doing so past five o'clock. An opportunity to get my Lastolite screen out, which had been collecting dust ever since I got it, about two years ago. A shame, really, as this thing works!!] But let's get back to the pencil case:

No-sew Leather Pencil Case

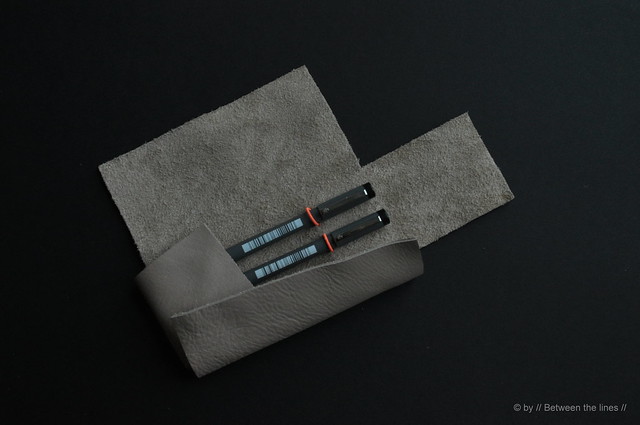
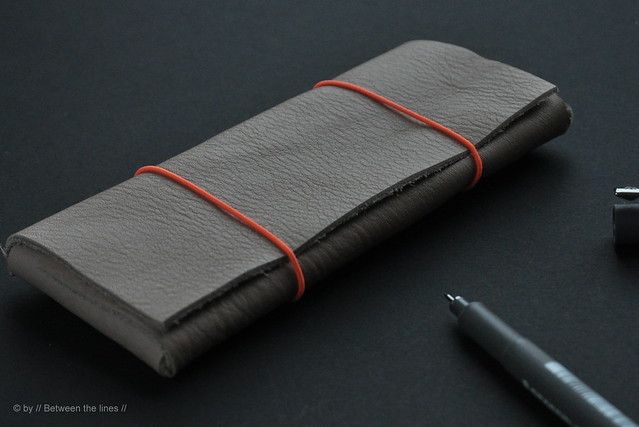
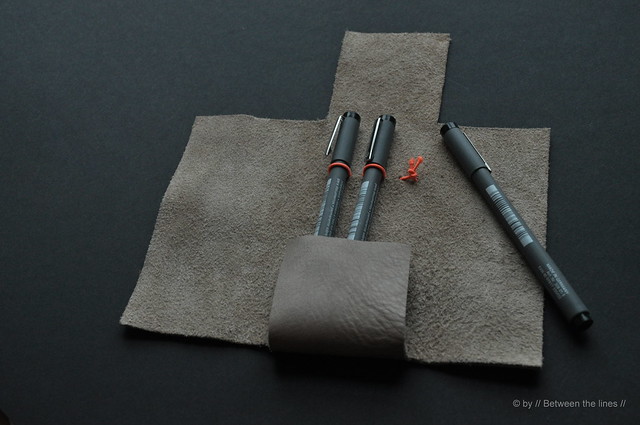
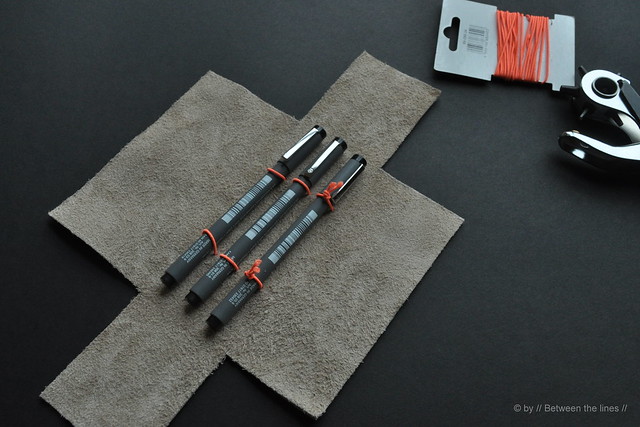
This no-sew leather pencil case makes a perfect last minute gift. As usual, I chose for a minimalistic and sleek design. I used a sample of coffee with cream heavy weight leather and added my favorite fluo elastic thread (Rayher Gummifaden)to spice things up a bit. And it turned out just the way I like it, holding my favorite drawing pens! The elastics have a double function: they hold the pens into place as well as keep the pencil case closed. You can alter the template to fit bigger pens, or only two pens, you can add a slot to hold an eraser... You can just play around with it.

If you want to make one too, here are the - very brief - instructions.

No-sew Leather Pencil Case

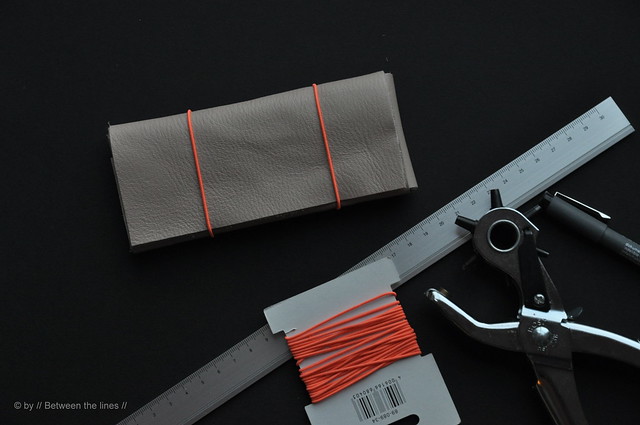
You will need:

- a piece of leather, big enough to fit the template (note: if you can't find leather, you could also use heavy weight felt, a sheet of foam or vinyl)
- a hole punch or awl
- elastic thread
- a rotary cutter or scissors

No-sew Leather Pencil Case

Instructions:

1. Print and cut out template, which you can find here.
2. Transfer template onto leather and cut out.
3. Using template, transfer the positioning of the holes. Next, make holes with hole punch.
4. Thread elastic through the holes and tie a knot. And done!!

Ok and now let's get moving and catch up!!

Cheers,

P.

No-sew Leather Pencil Case

No-sew Leather Pencil Case

November 21, 2012

Ombre bunting flags

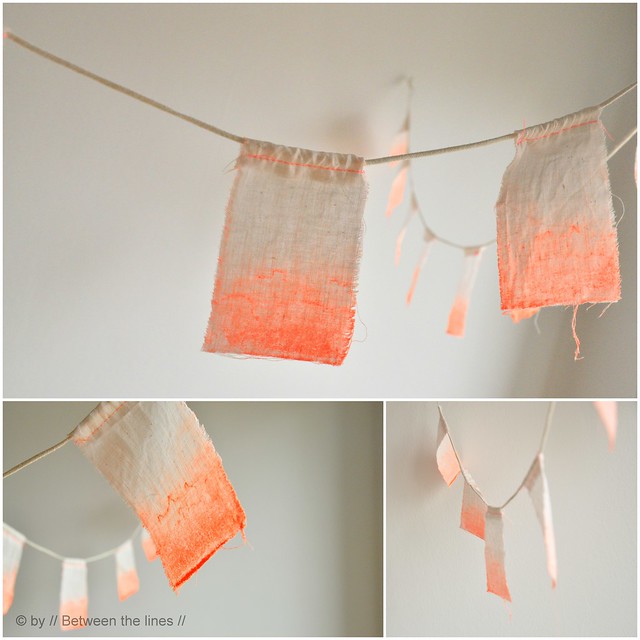
fluo ombre

I haven't been here for a while, which doesn't mean I haven't been busy. Quite the contrary, actually.
I'm working on what I believe will be a very cool, fully leather bag. Venturing hand sewing leather, using sharp and scary needles... Yikes! But if everything continues to go as planned, it will be a nice bag. One to be proud of. And I hope to be able to show you the result soon...

fluo ombre

In the meantime: a fun, fast, cheap and easy craft - just the way we like it.
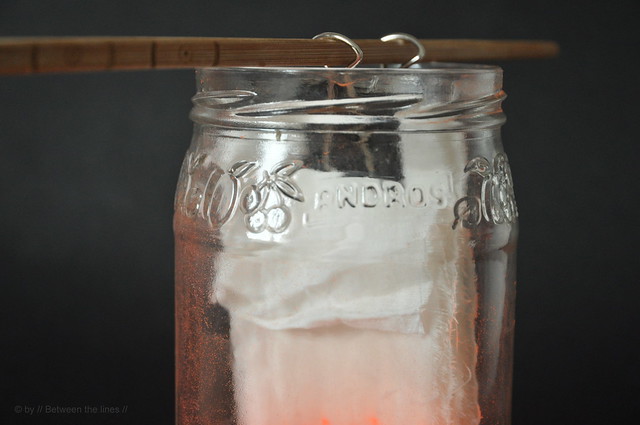
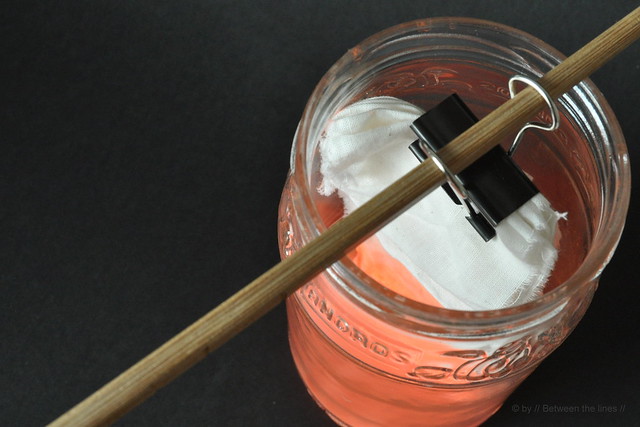
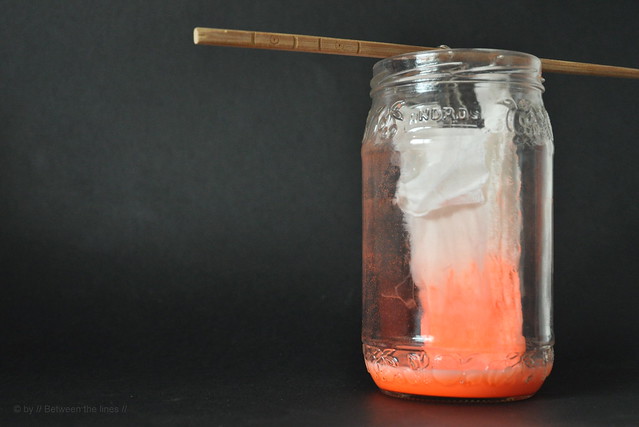
I had some fluorescent paint left from my previous project and decided to dilute it to see if it would work to get the lately much wanted ombre effect.

fluo ombre

fluo ombre

I ripped a band of flimsy cotton, folded it accordion-wise and hung it in a jar which I filled with about an inch of the water-paint mixture. I let it sit for a while (I actually enjoyed watching the fabric soaking up the paint), next hung it to dry. Once dry, I cut it in small rectangular pieces (at the folds), sewed a tunnel with fluorescent thread and threaded the rectangles onto some cotton rope.
I didn't bother to cut of loose ends as I like a slightly ragged look.
And that's it!

And now, back to work!

Wishing you a great rest of the week and a happy Thanksgiving for those of you celebrating!

Cheers,

P.

November 10, 2012

Fluo linen bag DIY

Fluo linen bag :: a DIY

Looking for a simple but rewarding project or a DIY gift idea?
Then keep on reading as I may have something for you!

On my last trip to the craft store I finally found the fluorescent orange fabric paint I had been looking for! I desperately needed some after seeing some really nice printed home textiles in a boutique here in Paris.

Fluo linen bag :: a DIY

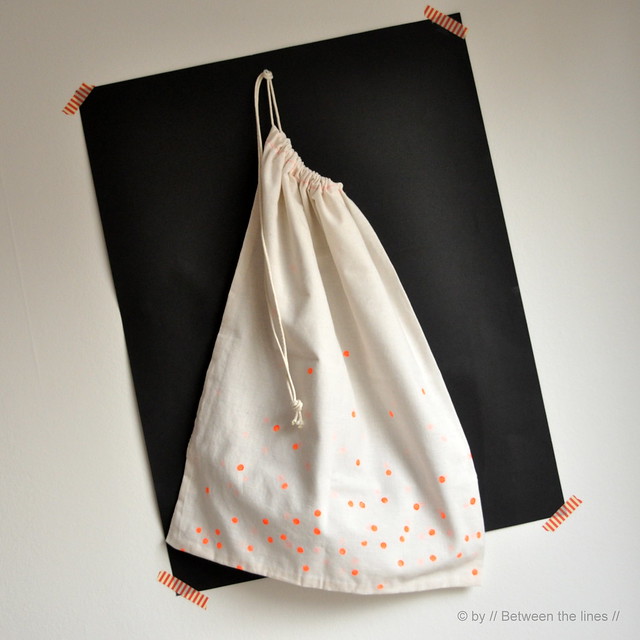
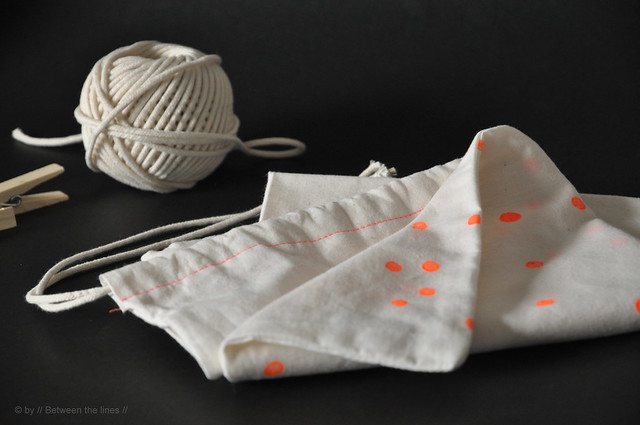
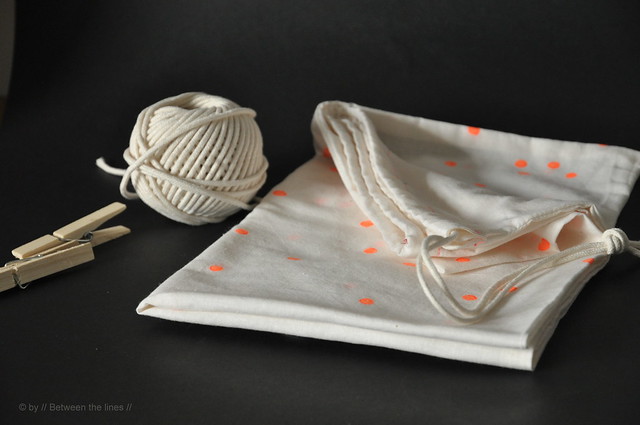
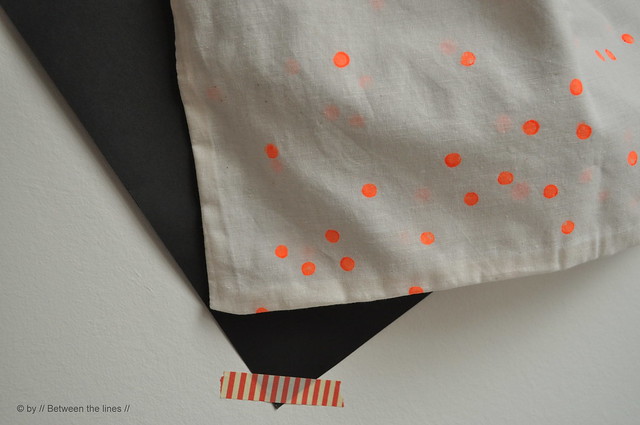
With a simple pencil eraser I printed a random pattern of dots on some almost sheer natural cotton muslin. It took me about half an hour to finish the job. Once dry, and ironed to set the dye, I took the piece of fabric to my sewing machine and made a simple drawstring bag. From beginning to end, another 15 minutes, I guess. The result is a cute linen bag, or anything bag if you like.
Make them smaller and you have the cutest gift bags. The same printing technique would work well to decorate pillow cases, kitchen towels, napkins. Anything really. If you're running out of time you can have your kids do the printing part. Or, why not, the entire project!

Fluo linen bag :: a DIY


What you'll need:

- a piece of fabric, pre-washed
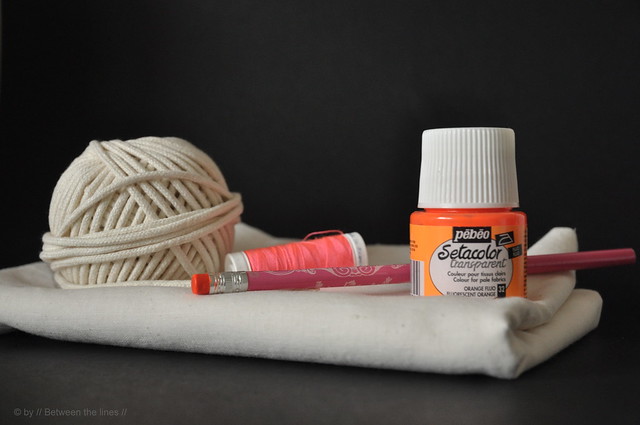
- fabric paint, like Pébéo Setacolor, transparent fluorescent orange, #32
- pencil with eraser at the top
- plastic sheeting to protect your working surface
- painters tape to tape fabric to plastic
- rope for drawstring
- optional: fluorescent sewing thread
- sewing machine

Fluo linen bag :: a DIY

Instructions:

1. Tape your fabric to the plastic sheet protecting your working surface, to prevent the fabric from shifting around creating unwanted smudges.
2. Dip eraser in paint, next onto fabric (do a few test prints on a piece of scrap) and do so in a random pattern.
3. Let dry. After, iron to set the paint (or follow your paint's instructions).
4. Make a drawstring bag as explained here. I used some contrasting fluorescent thread for sewing the drawstring tunnel. And that's all there is to it!


The things you can do with a simple pencil eraser... Have fun!

Fluo linen bag :: a DIY

October 24, 2012

Denim snack bag :: a recycling project

denim snack bag :: a recycling project

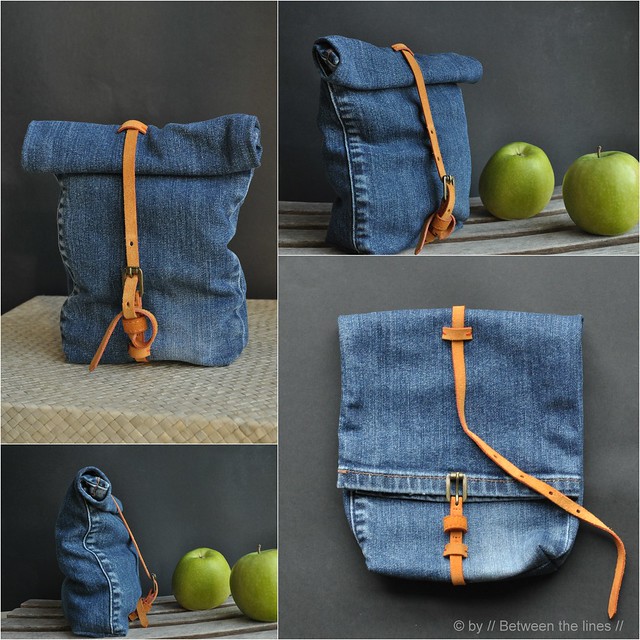
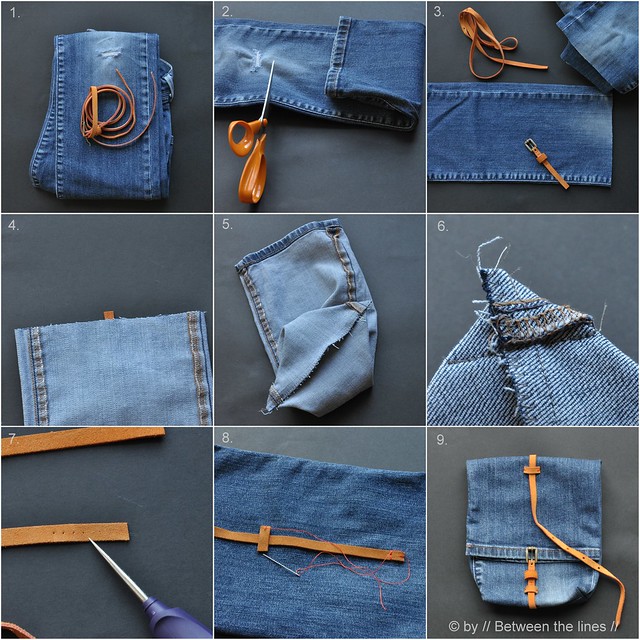
I'm maybe not very original with this project. You can find tutorials for this kind of (snack) bags everywhere on the net. Derived from the paper brown bag, they're very simple to make. When using old pants, however, they're even simpler to make, is what I thought.

I used an old pair of jeans, which were ripped at the knees, and let's face it, which also got a little too tight around the waist... For the strap, I used a thin, orange leather, partly torn belt (the top and bottom layers got separated beyond repair this time).

The project is kind of straightforward and summarized in the pictures below. I probably won't use my bag as a snack bag but rather as a make-up bag. The second leg will be transformed in a similar way, and will hold our adapters, cell phone loaders etc. when traveling.

Just one remark before you get started: the size of the bag obviously is determined by the width of the pants' legs. Hence, I do not recommend using slim pants. Straight leg pants and boot cuts, however, are just perfect for the job!


You will need: an old pair of pants, an old belt, needle and thread, and a sewing machine (although you could do this project entirely by hand).

denim snack bag :: a recycling project

Instructions:

1. Cut off one leg, just below knee, with adult size pants, about 40cm.

2. Prepare your belt by cutting the following:
- one strap of about 10 cm, buckle included and still attached
- another strap of about 40 cm, starting to measure from the other extremity of the belt (so this part has the holes)
- two strips of about 3cm, each.
3.  Turn the leg inside out. Since the bottom seam will become the top of the bag, we will close the other end. Insert the belt part with buckle, at that end, making sure it's positioned right in the middle. Close the seam, and run a zigzag stitch to prevent fraying.

4. Make boxed corners as shown.

5. Attach the other strap, nicely centered in the back. To make the sewing easier, prepare the leather by making holes using an awl. Next, add the short strips with a couple of stitches. If you're smart, unlike me, you attach the strap and strips before sewing the bottom seam...

And that's it! Hope you like it...

Cheers,

P.

PS: If you made something using a tutorial found on this blog or if you got inspired by something you found here, make sure to post your pictures here.
October 11, 2012

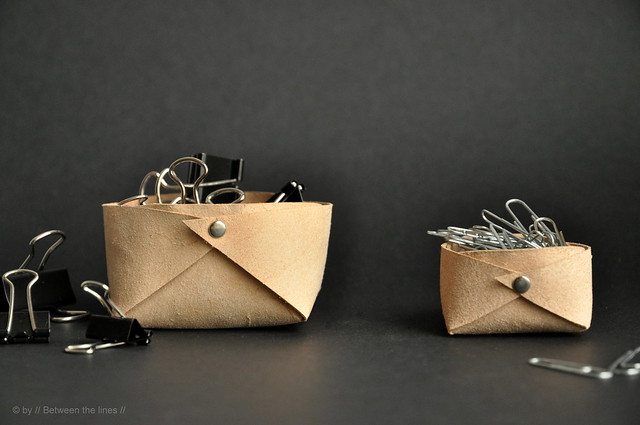
Folded leather basket :: a minimalistic DIY

Folded leather basket :: a minimalistic DIY

I love minimalism, as I truly believe less is more.
I have always loved geometry.
I love figuring out how things are built.

Lately I have been drawn into building shapes, going from something flat to something three dimensional and functional with the least steps involved. The teddy bear key chain is one example.

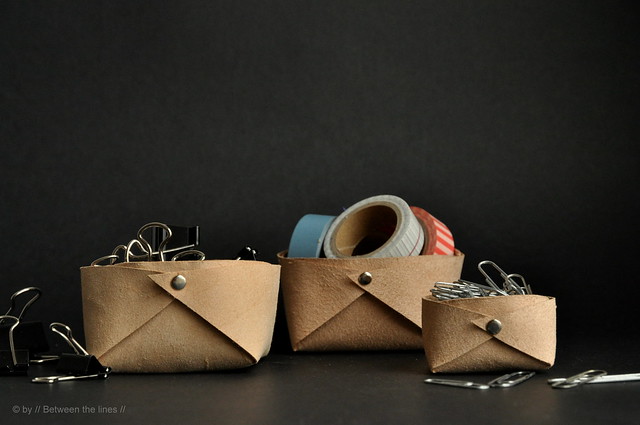
So, when I came across this fabulous basket and DIY on Pinterest, I couldn't get to my craft's table fast enough. In no time, I made a bunch of leather mini baskets based on the same principle, but instead of using a hexagon I made use of squares. And leather - what else!?

Folded leather basket :: a minimalistic DIY

This is an easy and fast craft, which requires minimal supplies:
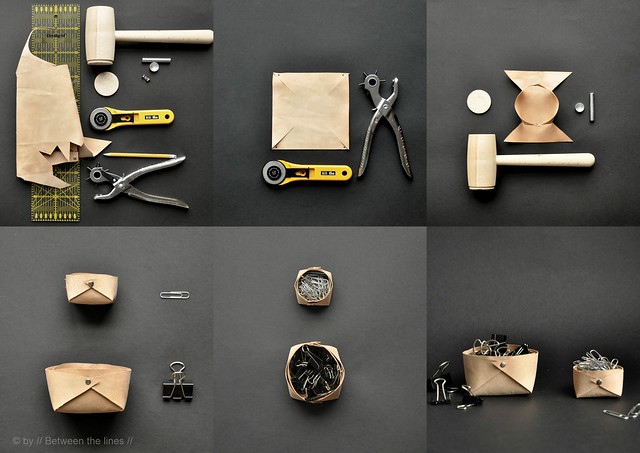
a (small) piece of leather, a hole punch, rivets and rivet setter, a cutting tool, and a ruler and pencil.

Now if you don't have access to leather, try using heavy weight felt as in the original tutorial, or use foam sheets. Or with the holidays just ahead of us why not try making some baskets out of nice and heavy card stock, replacing the rivets with eyelets or brads. These baskets would make perfect packaging for those homemade cookies.

Before you get started and especially when using precious materials like leather, I recommend making a paper version first, just to make sure you got the dimensions right.

I made two sizes of baskets:
- a 15 cm square results in a 7 x 7 x 4 cm basket
- a 10 cm  square results in a 5 x 5 x 2,5 cm basket

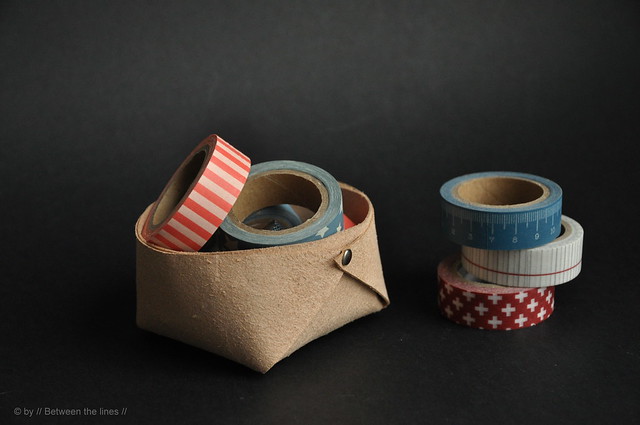
To give you a rough idea: one of the larger baskets is holding (part of my) washi tape collection and the other one a bunch of large paper clips. The small one holds quite an amount of small paperclips. 

Folded leather basket :: a minimalistic DIY

Instructions:

1. Make a paper template or download the template here.
2. Cut the leather and make the diagonal incisions as shown (for a 15 cm square, cut 6cm diagonals; for a 10cm square this would be 4cm diagonals)
3. Punch 4 holes as shown in the picture and template.
4. Set rivets (I found the table corner to be very useful for this, but make sure to protect your table appropriately). Shape your basket by inserting the two remaining flaps.

Folded leather basket :: a minimalistic DIY

September 28, 2012

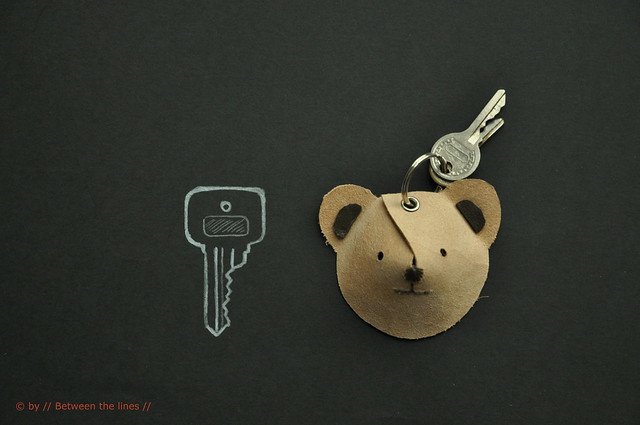
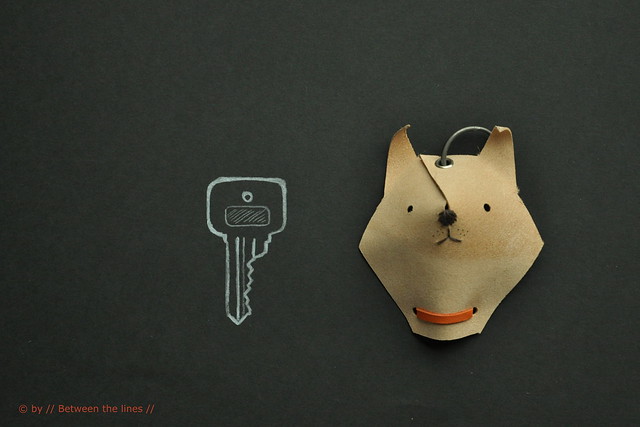
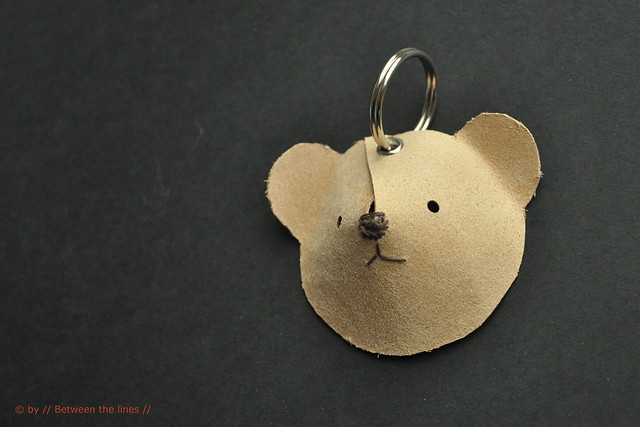
Animal Key Chain :: DIY

Animal Key Chain :: DIY


Last week, while I was working on the leather key holder, I had an aha-moment. On top of one of H's birthday presents, last summer, sat a cute 3D card stock bear head/tag. Because I thought it was so cute I rescued the little bear from the recycling bin and it'd been sitting on my desk ever since. Until last week, that is.

Animal Key Chain :: DIY

All of a sudden, I new what I wanted to do with it - make a replica in leather and use it to hang on a key chain. And that's exactly what I did. I tweaked the design here and there and even came up with a little fellow critter. So easy to make and according to my girls very cute (do I need to tell the little critters have been claimed already ?).

Animal Key Chain :: DIY

Use sturdy leather for this project (I used low grade but rather stiff leather for mine). Besides leather, you will also need a (leather) needle and thread, an eyelet and eyelet setter, and a key ring. Skip the sewing and have your little ones decorate their bear or dog head with markers, if you like. Punch a couple of holes for the eyes. To keep everything together and give the head its 3D shape, slam an eyelet through the top as shown in the template, attach a king ring and you're done.

 Animal Key Chain :: DIY

Wouldn't these make cute party favors? Or how about making a whole bunch of them to decorate your Christmas tree. And if you're good at drawing (which I'm not), try making different animal heads. If you do so, feel free to post them in my Flickr group - I'd love to see which animals you come up with!

Note: if you can't find leather, try using other materials like vinyl, or foam sheets, heavy weight felt, ... as long the material used has a certain stiffness this should work!

September 23, 2012

Leather key chain holder :: a tutorial

Leather key chain holder :: tutorial


 Leather key chain holder :: tutorial

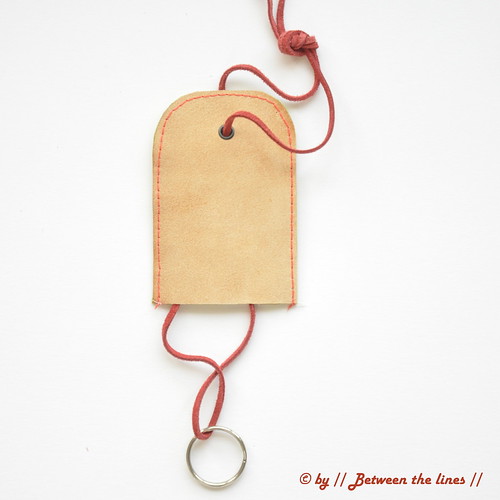
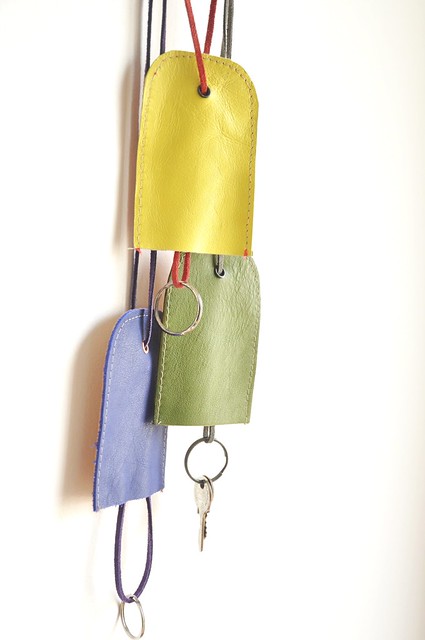
Quite some time ago, I got M. a cute leather key chain. The design was very simple. What made it special was the combination of materials: leather and rubber, and the color: tomato red. I immediately regretted I only bought one and of course when I went back they were all gone. A good reason to try to make something similar myself. It took me a while before I found the time, but this week I finally got to it. I made several in different colors and color combinations. Since they're really easy to make, I decided to share this project with a short how-totutorial. It's a perfect beginner's project for sewing leather on the machine.


Leather key chain holder :: tutorial


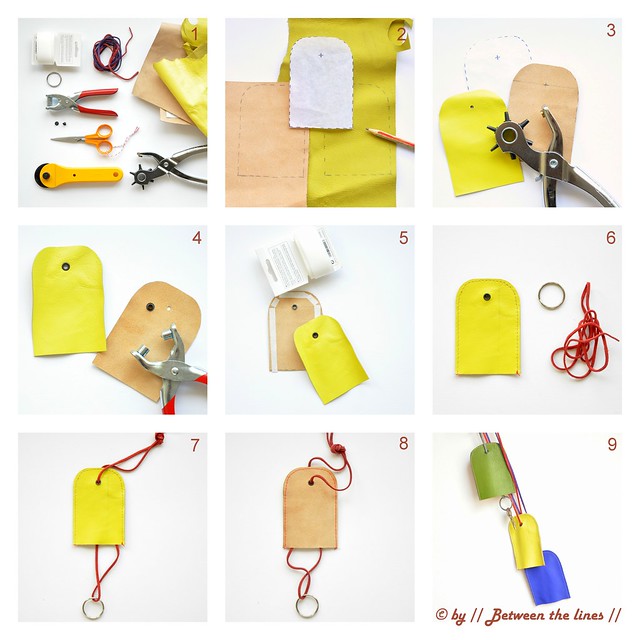
Here's what you need:

- small pieces of leather (or faux leather or any other material which doesn't fray)
- (leather) shoe lace, ribbon, ...
- key ring
- 2 metal eyelets + setting tool
- hole punch
- adhesive hemming tape or vliesofix
- rotary cutter, scissors, cutting mat
- sewing machine, equipped with a special leather sewing needle
- iron

Leather key chain holder :: tutorial

Instructions:

1. Print and cut out the template, which you can download here.
Note: the precise dimensions are given on the template. Make sure the scale of the print-out corresponds to the measurements given, before cutting leather.
2. Trace template on the back of the leather and cut (x2).
3. Punch holes in each piece according to template.
4. Set eyelets.
5. Cut small strips of hemming tape and iron onto one of the two cut pieces. The hemming tape will keep the pieces into place while sewing. Remove paper strips. Position the second piece on top of the first one - make sure to align precisely and iron into place. Next stitch the two layers together, about 0.5cm from the edge. Trim edges if necessary.
Note: (i) if you work with leather pieces of different thickness, iron the tape onto the thickest quality.
 (ii) ironing leather: test on a piece of scrap first or use a cloth to protect leather from the heat of the iron.
6. Thread shoelace through the eyelets while slipping on ring. Attach keys and done!

Optional: you can add a closure at the bottom, if you like (snap closure, button, ...).

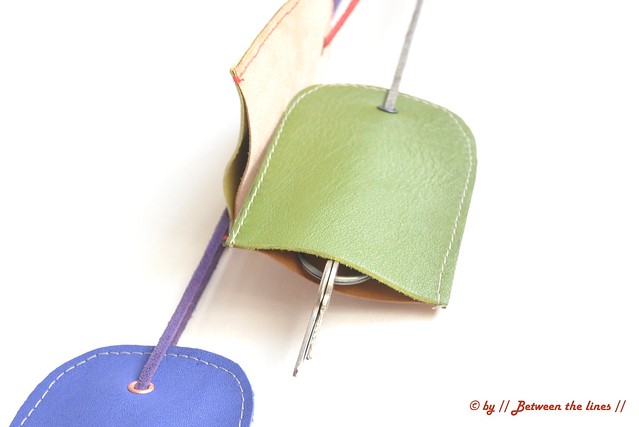
Note: From the comments and messages I received, I realize I should have explained how to use this key holder. The design is such that you can wear it around the neck - the keys don't show as the leather pouch covers them. To get to the keys, just slip the leather cover up while still wearing or take off and give the holder a shake so the keys come down... I hope this helps!

Leather key chain holder :: tutorial

As with all of my tutorials, please note, this tutorial is intended for personal use only. Thanks for understanding! 

If you made something using a tutorial found on this blog or if you got inspired by something you found here, make sure to post your pictures here.
Related Posts with Thumbnails