Showing posts with label Valentine's Day. Show all posts

February 14, 2010

Happy Valentine's Day

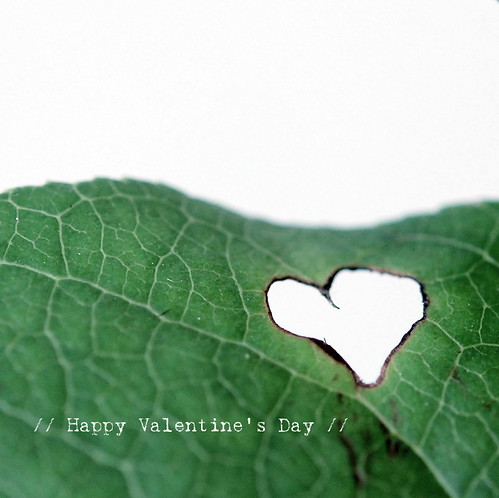
// Happy Valentine's Day //
Couldn't believe my eyes when I spotted this heart in one of the leaves of a bouquet of roses I bought. The bug who did this must have been madly in love, for sure...

Wishing you a day full of love and happiness...

xo, P.

February 10, 2010

Valentine's Day :: DIY wire wrapped photo holder


Only four more days to go for Valentine's Day!
Here's another craft I whipped together yesterday. A simple wire wrapped photo holder. Time needed? 15 minutes approximately!

And here are the step by step instructions, just in case:


1. Needed: two ends of metal wire (25cm, but could be of any size really, depending on how tall you want the photo holder to be), rounded nosed pliers, flat nosed pliers, cutting pliers, clay

2. Take a piece of clay and shape as shown in the picture

3. - 6. Bend the wire to form a heart - secure as shown in pic. 5. Repeat with the second end.

7. Twist the two stems around each other

8. Cut one end off about 10cm measured from the bottom

9. Push the longer end through the clay, until the shorter end meets the clay.

10. With pliers bend the end to form a loop and cut off excess. Push the loop into the clay.

11. Smoothen the clay where needed (wet your fingers if necessary). Shape the hearts where needed so a picture, photograph or greeting card will stay put between the two hearts. Let air dry. And done!

Note: If you don't have clay, a large potato might do, or a cork (for tiny holders, that is), a rock (in that case you wrap the wire around the rock, instead of going through the rock), ... Also, because of the tools needed and the potentially sharp ends of the wire, this craft (or at least the part where you work the metal wire) is not recommended to be done by kids. Once assembled though, let your kids paint the clay once dried and further decorate the holder!

Good luck!

February 6, 2010

Valentine's day :: another how-to

Still in need of a Valentine's Day surprise or just another fancy way to wrap that present? Then keep on reading as I might have something for you.

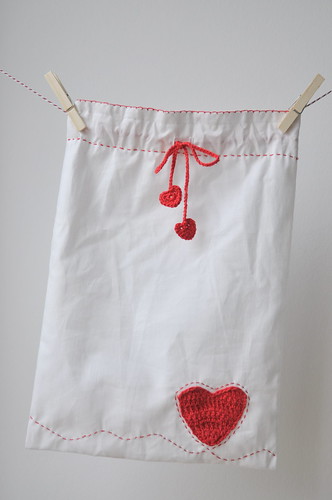
I still had a crocheted heart left I wanted to use. I decided to make a little drawstring bag - very simple with a couple of details added to give it a sweet little touch. This what it ended up looking like.


The good news is - if you like this little bag, that is - that I have some instructions ready for you, so you can make one of your own.

What you need:

- red yarn enough for crocheting a drawstring, a big heart, and two tiny ones
- a crochet hook
- an embroidery needle
- embroidery floss
- an old white sheet or any other piece of fabric for the bag
- sewing machine


Instructions:

1. Cut a rectangular piece of fabric corresponding to the size you want the bag to be (don't forget to add seam allowances on the sides and at the top). Cut the fabric such that you'll have the fold of the fabric at the bottom of the bag - I used a 35cm by 90cm piece.

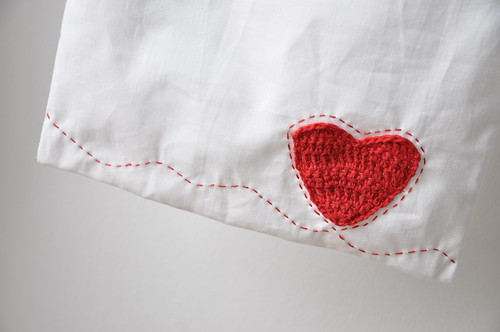
2. Position and pin the heart, for which you can find the instructions here, onto the front of the bag. Stitch into place either by hand or with the sewing machine.

3. Close the side seams using the French seam as explained here.
Note: close the side seams all the way up to the top.

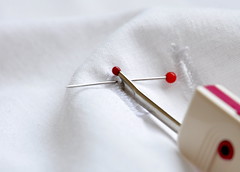
3. Button holes for the drawstring: at the front of the bag, mark where the two button holes will come (you'll need two, 1cm high and about 1cm from either side of the center and 7cm from the top). Make the button holes with the sewing machine and cut open. Here's an "astuce" - a hint - for cutting open button holes. If you put a pin at the other inner end of the button hole that pin will keep you from cutting too far and hence cutting the stitches as well.


4. Fold the fabric over, on the wrong side, to make a tunnel of about 2.5 cm wide for the drawstring (the button holes nicely centered in the middle of the tunnel) and sew on the machine.


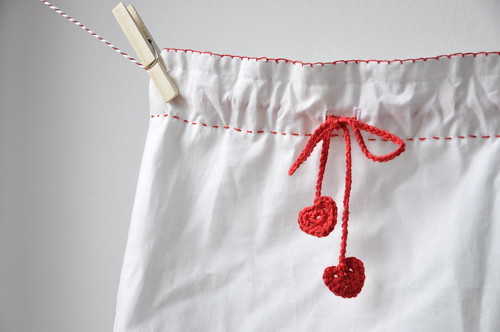
5. With the red yarn, crochet a drawstring in chain stitch. Put a safety pin through one end and pull the drawstring through the tunnel.

6. Crochet two tiny hearts (found through Whip Up here) and attach to each end of the drawstring.

7. Now you can further decorate the bag with some embroidery. You might prefer to do this before you start sewing, but I prefer to do this in the end because it's easier for me to visualize the end result.

And that's it!


You could use these bags for about anything, from wrapping presents to protecting the finest lingerie...

February 2, 2010

Valentine's Day :: zakka inspired zippered pouch


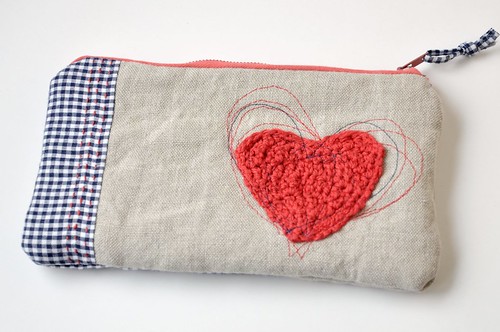
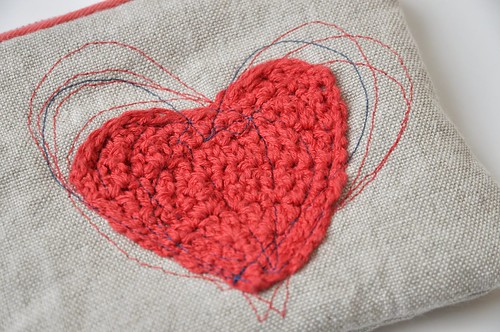
I finished my little project today: a zakka inspired zippered pouch. It was fun and easy to make. For the past week or so, I had been thinking of something to use my crocheted hearts for. It was only when I visited Eloleo's blog and saw her latest creation with free-style embroidery, that all pieces fell into place. A zippered pouch with the heart free-style embroidered onto it! So here it is!


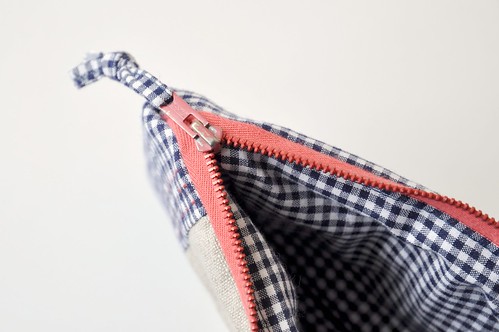
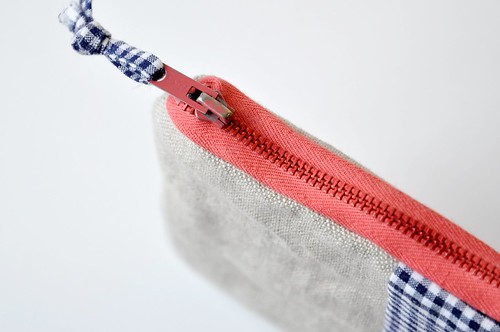
The part I like best? The zipper! A vintage zipper found at our local "mercerie". The girls start laughing as soon as I even mention that store. It's ran by three ladies. And all three they have in common they do not always appreciate the presence of kids at their store. And they're very conservative. Like with the zipper today - Ok, maybe in this case I was the one being conservative. I took the little pouch with me and I had a certain idea of the kind of zipper I wanted: a metal one. I spotted a nice red-ish one. "Oh non! Red wouldn't work, beige is what I needed. A beige polyester one, that is.". Well, I didn't agree. And I did not only buy a red zipper but a whole array of zippers, all in faded candy colors. At a bargain price, because these were old zippers nobody else wants anymore. Again according to the ladies at the store. Good thing I'm conservative when it comes to zippers...


And the second best part are the three little hearts in the back.


January 30, 2010

Valentine's Day :: Crocheted hearts tutorial - part 2

Crocheted Valentine's Day Heart

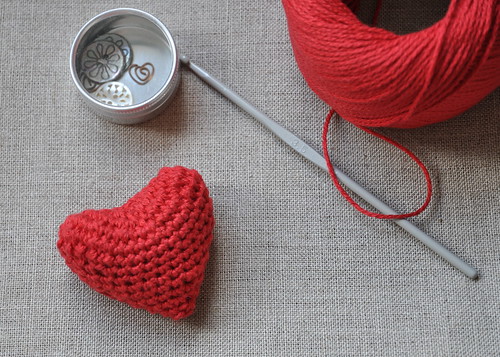
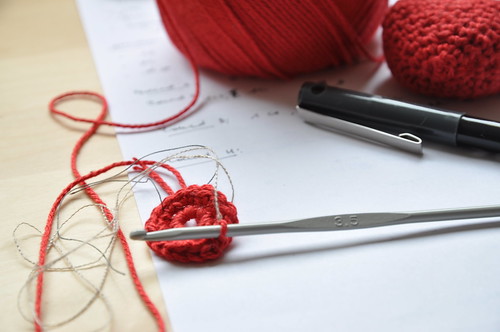
I got really nervous about this particular crocheted heart. After I did the first three-dimensional one, I had to make another one in order to write the tutorial (why didn't I anticipate this?!) and I started panicking I wouldn't be able to replicate. But, as you can see I managed to do so and if you look really carefully, you'll notice this one actually looks better than its fellow over here. That's probably because this time I had to pay attention to what I was doing. Hence, no mistakes in this one. It's perfectly symmetrical and looks much more like a heart than the first one - though anatomically I would say the first one's probably a better match.

Anyway, if you want to make one of these goodies, this is what you'll need:

- a crochet hook
- red yarn
- 2 pieces of thread of different color for marking stitches or stitch markers if you would have any of those
- roving or fiber fill (I was lucky to still have some red roving left from previous needle felting projects)

Stitches used and abbreviations

cs = chain stitch
sc = single crochet
slst = slip stitch
st = stitch

Pattern

round 1: 5cs, close loop with a slst

round 2: 1 cs, 8 sc = 9st

Mark first stitch using one of the colored threads or a stitch marker.

round 3: 1 cs, 1 sc, increase by making 2 sc in every underlying stitch of previous row, finish round with 1 slst = 18 st.

Mark with the other colored thread or a stitch marker after stitch number 9.
Note: make sure to move up the stitch markers as you go - the markers split the work exactly in half which will help you in making the heart perfectly symmetrical.

round 4: 1 cs, 1 sc, 2 sc in every next stitch, 1 slst = 36st

round 5: 1 cs, 1 sc, * 1 sc, increase 2 sc, 1 sc, increase 2 sc *, increase 3 sc, increase 2 sc, increase 3 sc, repeat * * backwards, increase 2 sc, 1 sc, 1 sc = 26 st.
1 cs, * 1 sc 6 times, increase 2 sc, increase 3 sc *, increase 2 sc, repeat * * backwards, 1 sc = 26 st.
Repeat this sequence on the other half of the stitches. You should end this round with 52 st.

round 6: 1cs, * 1 sc 10 times, increase 3 sc in next stitch, 1 sc *, repeat * * backwards. Repeat this sequence on the other half. You should end with 58 st.
1cs, * 1 sc 11 times, increase 2 sc in next stitch, 1 sc *, repeat * * backwards = 29 st. Repeat this sequence on the other half. You should end with 58 st.

round 7: 1 sc 5 times, decrease by making 1 sc every other stitch 9 times, 1 sc 5 times. Repeat this sequence for the other half. You should end with 38 st.

round 8: 1 sc 5 times, decrease by making 1 sc every other stitch 5 times, 1 sc 5 times. Repeat for the other half. You should end with 32 st.

round 9: 1 sc 5 times, decrease by making 1 sc every other stitch 2 times, 1 sc 5 times. Repeat for the other half. You should end with 26 st.

round 10: 1 sc 5 times, decrease by making 1 sc every other stitch 2 times, 1 sc 4 times. Repeat for the other half. You should end with 22 st.

round 11: 1 sc 4 times, decrease by making 1 sc every other stitch 2 times, 1 sc 4 times. Repeat for the other half. You should end with 18 st.

You can start stuffing the heart with the roving or fiber fill and shape if needed. Continue to add as you go.

round 12: 1 sc 2 times, decrease by making 1 sc every other stitch 1 time, 1 sc 3 times. Repeat on remaining stitches.

next rounds: continue to decrease like in previous rows until you have 1 st left. Bind off and hide the remaining end inside the heart with a needle.

Just a final note: the first couple of rounds look kind of weird - ruffled - and I'm sure you'll wonder how this ever could become a heart. Don't worry about this. As you soon as you'll start decreasing stitches the heart shape will come.

Good luck!

January 29, 2010

Valentine's Day :: Crocheted hearts tutorial - part 1


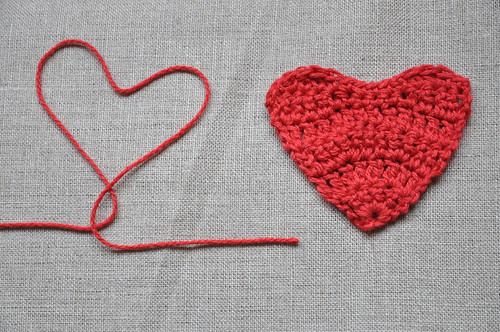
As promised yesterday, here's the Valentine's heart tutorial - part 1: a flat heart.

Needed: 1 crochet hook and some red yarn. I prefer cotton for this, but any yarn should work.

Stitches used and abbreviations:

cs = chain stitch
sc = single crochet
dc = double crochet
slst = slip stitch
st = stitch

Pattern:

row 1: cs 5 and make a loop with a slst through the first cs

row 2: cs 3 (makes the first stitch of the row), dc 5 through the loop = 6 stitches

row 3: cs 3; * 1 dc in first stitch of previous row, increase by making 2 dc in underlying stitch previous row *; repeat * * once, 1 dc, 1 dc = 9 st

row 4: 3 cs; * 1 dc, 1 dc, increase 2 dc *, repeat * * once, 1 dc, 1 dc, 1 dc = 12 st

row 5: 3 cs, * 1 dc *, repeat * * 4 more times, increase 2dc, repeat * * 5 more times, 1 dc = 14 st

row 6: 3 cs, * 1 dc *, repeat * * 4 more times, + 1 sc +, repeat + + 3 more times, repeat * * 4 times, 1 dc = 15 st

row 7: 1 sc, * 1 sc, 1 dc, 1 dc, 1 sc, 1 sc *, 1 slst, 1slst, repeat * * backwards, 1 sc, 1 slst - cut off yarn and pull end through loop to bind off. And done!


When you think this is complicated try to read it out loud - now, that's complicated!! LOL!

And now I'm off to make another three dimensional heart, because, of course when I made the first one, I just went on and on instead of writing down everything I did... So, wish me good luck and then hopefully you'll find part 2 here tomorrow!

January 28, 2010

Valentine's Day :: something to crochet


I seem to be in a crochet mood, lately. I'm still working on the granny squares. I have about 14 ready now - I'm taking it slowly, one at a time. It seems I'm not the only one with granny squares on her mind. For a nice overview and inspiration, check out Mon Ami's blog. Granny squares not only work great for blankets and pillows. The other day, I saw a lady on the metro with the most exquisite granny squares scarf draped around her neck, in soft angora wool, earth tones combined with purples and blues. So beautiful! Too bad winter is too far along otherwise I would have started on one. Maybe something to keep in mind for next year...

Now, in between the granny square oohing and aahing, I did some Valentine's day inspired crocheting as well. I whipped two hearts together: a flat one and last night a three-dimensional one.

In case you fancy to make some of your own, I plan on having a how-to together, hopefully by tomorrow. So, if your in the mood for some Valentine's Day inspired crocheting, stay tuned and get out crochet hooks and red yarns...

February 22, 2009

Birds of a feather...


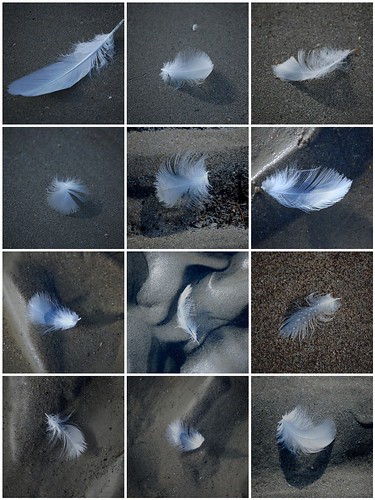
We're back from our little trip to the seaside! And apart from one of our girls ending up having a gastro (which luckily didn't last too long and from which she recovered really well), it was great! We had only one day of rain, otherwise the weather was really nice, sunny even! I promised my girls I would take my camera with me only once...which I did on Wednesday, the sunniest day of the week as it turned out. We went for a long walk, had the beach to ourselves, and spotted all kind of things... like feathers. I got really inspired by these tiny, soft, perfectly white, seagull feathers, some of them having droplets of water sitting on them, every single one totally different, the gentle movement of the little hairs with the wind... I thought they were simply beautiful!

Birds of a feather

And shells! Lots of them. We collected some to take home as little H. wants to show them in class. And although Valentine's Day has past already, we thought these looked like Valentine's Day hearts...


But there was more on the beach... like art (and I mean real Art), of which I'll show you some pictures later...
The kids have one more week off from school and it looks like it will be another busy week, but I'm sure I'll be able to check in from time to time and hope you'll do the same!

Cheers!
P.

February 14, 2009

Quote of the day...

Little H. this morning: "Mommy, mommy! Come and look! The Valentine Rabbit came!!"

Have a Happy Valentine's Day!

P.

created with Wordle

February 12, 2009

Valentine :: wrapping up!

With only three more days to go and one project completely gone wrong, I felt a little pressured. That was until last night! I still didn't have a little mommy-made present for little H. after the Black-Apple-Doll-mishap. So, I had to come up with something new - and preferably something fast as well! And I did.
So, here' a little sneak-preview. I'm not completely done yet, but it's just a matter of minutes now. A colorful braided necklace with portrait...

February 7, 2009

A gift...


... from me to you. A downloadable calendar for February!
I need to admit this wasn't entirely my idea. I had been thinking of making one for a while now, and then I stumbled upon this post at Chocolate and Zucchini - a great blog, with great recipes, and great pictures! You should check it out - yes, Mom, I have the feeling you'll just love it! I'd love to try making my own vanilla extract - among all the other yummy things there! A good resource to boost my culinary performances a bit, as I haven't been doing great in the kitchen lately... You should ask my kids about it!


Now, a little more about the calendar. I've made two versions: a desktop version (shown at the very top of this post) as well as a printable version (right above here) which provides space to write in. Both will be available from the sidebar, as off tonight or tomorrow morning, under the label "February 2009 calendar". Let me know what you think of it! It's a try-out. If you like it I'll make one available every month. I'd better start making pictures, then... When I look outside now and see the snow that's coming down, I can't actually believe I took this picture with the clear blue sky yesterday!

I hope you'll have a wonderful weekend, snow or no snow!

February 6, 2009

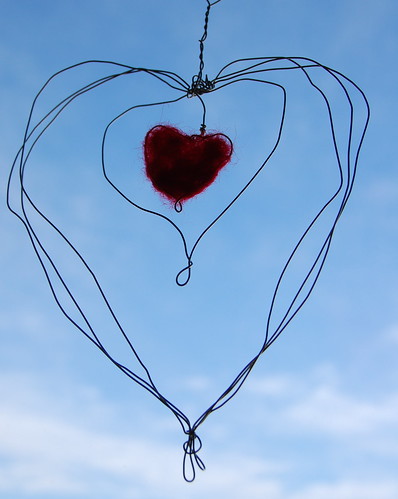
Valentine :: Wire wrapped felted heart

Looking for a last minute Valentine's craft? Well, maybe I have something for you then!
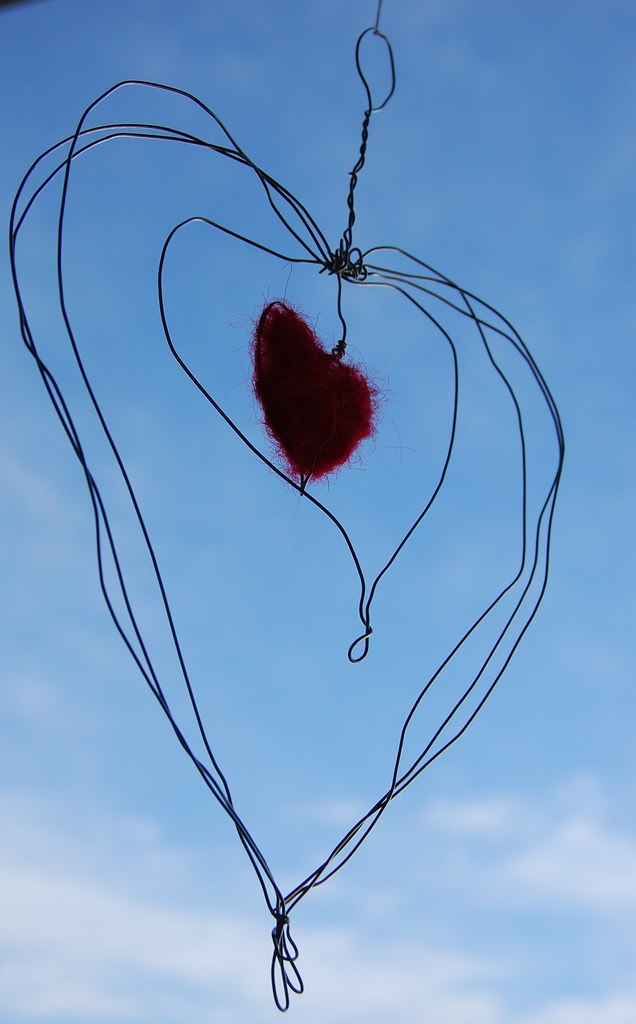
How about a wire wrapped felted Valentine's heart? Easy and fast. What else would you want?

Wire wrapped needle felted heart 2

This is what you'll need for this project:

- wire (I used a 0.7 mm gauge)
- pliers to cut the wire
- flat nosed pliers to help you shape the wire
- a tiny little bit of red carded wool
- needle felting needles
- needle felting foam pad

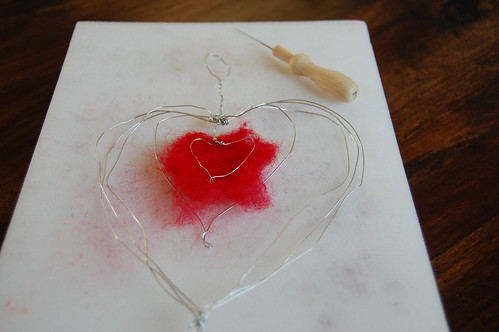
Step one: Shape the heart (see diagram), starting by leaving a long end at the top where later on you will make a loop, and ending with the center heart. This is a free-style exercise! Cut with pliers and correct the shape where needed by bending here and there, using the flat nosed pliers. Make a loop at the top for hanging.


Step two: Needle felt the heart.

Wire wrapped needle felted heart 3
First, on your foam pad start needle felting a bit of wool (slightly bigger than the heart), flipping it over once. I typically use a medium sized needle to start with. Next position your wire wrapped heart on top and fold the wool over the wire while punching with your needle. This shouldn't be too precise - it's actually even nicer when the wire shows. Make sure to flip over your piece a couple of times to avoid your project gets stuck to the foam pad. Also be careful not to hit the wire, as this might cause the needle to break. Switch to smaller sized needles (fine, ultra-fine) as you move on. Continue to punch until you're satisfied with the result. You can add wool if needed or pull out some if there's too much. You can't go wrong with this project!

Some alternatives to needle felting the center part:
If you don't know how to needle felt, you could cover the heart with small strips of paper instead (this is something I came up with as I was writing - newspaper strips would work well for that). You could also wire wrap a piece of colored glass or use a colorful bead... Just use your imagination and whatever you have available!

And that's all there is to it! Easy, not?

Wire wrapped needle felted heart 1

February 5, 2009

Valentine :: something old


This is another Valentine's day gift I made a couple of years ago. This one just "happened" as I was trying to make one of these. I remember I found I had made the neck part way too long. Next, I turned the neck part into a body, added some pipe cleaners to the back to make arms and legs, as shown in the diagram. I cut the pipe cleaners to the right size and bended them to form hands and feet. The hands, I covered with the same skin-colored fabric as I used for the head.

The rest you can see in the photo: I gave the little guy some pants, little boots, a pointed hat, a scarf and a jacket (for the buttons I used French knots - you can check here for a nice how-to) - all felt. No patterns involved, all very intuitively! I just added the details as I went along. I drilled some holes in a little piece of wood to make the swing, and as it was close to Valentine's Day I added the heart... I didn't do this, but when you want to make sure the little guy stays put, you can glue him onto the swing. All this maybe took me a couple of hours at most.

If you're not familiar with making Waldorf dolls, you can find some instructions for making the head here (as this puppet is kind of small, I would leave out the nose, though). For a small puppet like this one you can use tubular gauze (finger splint padding) to be found at the pharmacy section of your supermarket.
A final note, maybe: since this puppet has a lot of small parts it's not intended to be given to young children to play with. We have ours hung up by the window in one of our girls' room...

January 31, 2009

A little bit of everything

First of all I want to share something with you that made me really happy. Remember the Valentine's Day garland from a couple of days ago? Well, it made it into the Valentine's Day Round-up at One Pretty Thing! If you don't know One pretty thing yet - which I doubt - go check it out! It's the place to be if you're looking for inspiration, tutorials, seasonal crafts or crafts and pretty things in general. And I'm not just telling you that because my Valentine's hearts showed up there! The light-box I made last week: found the instructions through One Pretty Thing! The Obamicon-posters (here and here)? Found them through - yes! - One Pretty Thing! So, go over there and take a look!


As you might have noticed, I changed the // Between the lines // heading again. This time, it's a detail of a woven basket I bought earlier this week (I actually bought two...). At the Monoprix of all places! They're made of rolled-up newspaper strips - a nice way of recycling newspaper! I intend to use these baskets to organize some of my craft supplies. I really love them and so did the girls, who actually tried to claim them... These baskets made me think again about trying to weave, something I've been wanting to do for a long time. I got a nice book with weaving projects for kids a while ago - time to take a look at it! And as I was thinking about all this, I found these cute little Valentine's heart shaped baskets at Maya*Made ( maya*made: woven hearts: modernizing a classic). I've tried to make one yesterday and it looks like this technique might work well for making party hats, too. To be further investigated!


Also today, I started taking pictures of spices - make use of the light studio, of course! About ten years ago, on a short city trip to London with some friends, we ended up at Soho Spice for dinner, a (at that time) trendy Indian restaurant. I can't remember what we had for dinner, but I do remember their colorful walls and the place mats which were essentially pictures of spices on colorful backgrounds. I fell for these place mats and got a set from the waiter to take home. I framed them and had them up on our kitchen walls until we moved. They're probably still in a box somewhere on my in laws' attic. I definitely want to check next time we go. Anyway, when photographing the vegetables last weekend, I thought of those place mats and hence the spice-pictures. Work in progress...

January 29, 2009

Valentine :: a gri-gri

Gri-gri 2

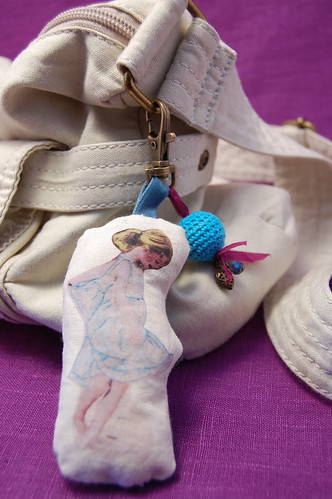
I mentioned this project a while ago and I also said I wouldn't disclose until after Valentine's day. Well, I changed my mind as I'm too excited about this one. I really like the way it came out! It's one of my favorite projects, so far. I keep my fingers crossed M. won't read my blog in the coming days...

I got the idea for this one on "one of my walks through Paris" (you've heard that line before), when I ended up at the boutique "Les Fleurs" -- they've got some really nice stuff there, though a little expensive in my opinion -- where I spotted these lucky charm dolls. Somehow, these stuck to my mind and then I came up with this "gri-gri"-idea. These are the kind of things that keep me from falling asleep at night or going to bed at a decent time... but this totally aside.

This is how I made it:

I used:
- a small piece of light colored fabric for the front - it needs to be light colored in order for the transfer to work
- another small piece of fabric for the back (did you recognize my backing fabric? - it's the same one as I used here)
- a clasp or key-chain ring
- a photograph to transfer onto the fabric
- iron-on transferring paper (freezer paper might work too I guess, though I have no experience using it as I can't find it around here)
- markers, pencils, crayons, soft pastels...
- needle and thread or sewing machine
- a photo-copier-printer
- a small amount of fiber fill
- a little piece of ribbon (mine is blue-ish velvet)

for the decorations (optional):

- a small end of narrow ribbon (I used embroidery silk ribbon), or anything else that might work to attach the decorations to - use your imagination
- a large bead (mine is crocheted, but you could use a felted bead as well, glass beads,.. again, that's totally up to your own taste and liking)
- a glass bead
- a little heart-shaped charm
- two headpins and jewelry making pliers


That may seem a lot of things, but it isn't, really. I had everything here except for the clasp and the crocheted bead.

For the first and most important step: choose a picture. This could be anything. Just make sure it has a good resolution. I chose a color photograph and changed it to sepia. I did this because I wanted the final picture to have a vintage look and I wanted to color it in. I've tried both, sepia and B&W, but sepia seemed to work best in my case. Print your picture, bigger than you intend to have it transferred later on. I used 8x10. This allows you to color it in more easily, as that's the next thing you'll need to do. So, take your markers and start to color in the accents you want to show up (I did mouth, hair and the details of the dress in marker, the cheeks with soft pastel.) This step is critical and a bit trial and error. When you're satisfied with the result, copy the picture, but this time reduced to the size you want to end up with on the gri-gri. You might have to repeat the coloring step a couple of times (if you don't want to waste too much paper and ink, print on the back of the paper and use a low print quality setting - this should be OK, except for your final print out). When happy with the result, cut out the outlines of the picture and next copy again, but to a white background this time. Check again for the result. Next, print onto some iron-on transfer paper. A little note here: if your picture has words or letters in it, don't forget to print in mirror-view (this is an option available on most printers these days). Cut out along the edges of your object. When done, take a deep breath as you've just finished the hardest part of this project!

Next, take the light colored fabric and iron-on the transfer you've just printed (read the instructions on the package for the right temperature settings and time needed!). Cut out the desired shape, taking into account a margin for sewing. Do the same with the fabric for the backing.

Time to start sewing, now. Put the pieces together as shown in the diagram below, the right sides of the fabric facing, and the loop with clasp sandwiched in between. The reason I have the clasp sewn in that way is because it didn't come with an opening to slide on the loop after assembling - unfortunately, I found this out the hard way... If you're using a regular key-chain ring you can leave it out while assembling and slide it on after. You can do the sewing either by hand or on the sewing machine. I used the sewing machine as it's faster. Also, I stitched back and forth a couple of times at the level of the loop to secure. Make sure to leave an opening at the bottom so you can turn inside out the gri-gri. If your piece is curvy, make sure to make little cuts perpendicularly to the stitches on the curvy parts.


Now, fill up with the fiber filling. Whip stitch the bottom closed.
We're almost done!
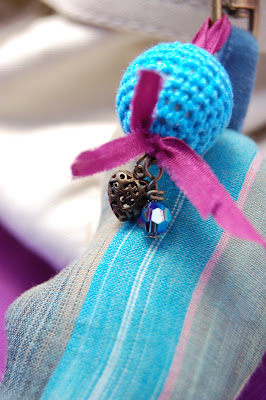


Now, comes the decoration, which is totally optional and up to your imagination. I used a crocheted bead, a glass bead and heart-shaped (Valentine's day!) charm.
If you don't know how to make a wire-wrap loop using headpins and pliers check here for a tutorial.
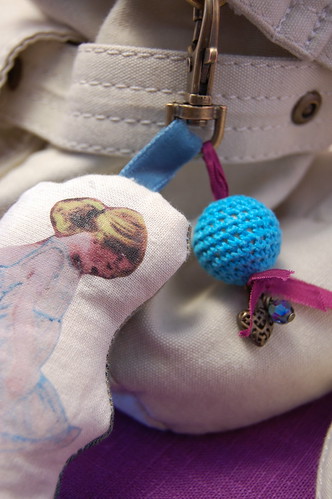
Gri-gri 1

Tie, slide or loop the decoration around, on or through the key-chain ring.

Et voila! A gri-gri!

For the photographs, I borrowed M.'s little purse so you can see what it looks like when attached.
I'd better go check if I took it back off again...!!


A little note on the photograph I used for this project. The original picture was taken by the photographer Nancy Trapp-Chen, a couple of weeks before we moved from California to France. The pictures she made not only represent a nice memory of our life in California, but have been a great source of inspiration to me, as well. I've incorporated them in some of my favorite crafts... Thanks, Nancy!
January 28, 2009

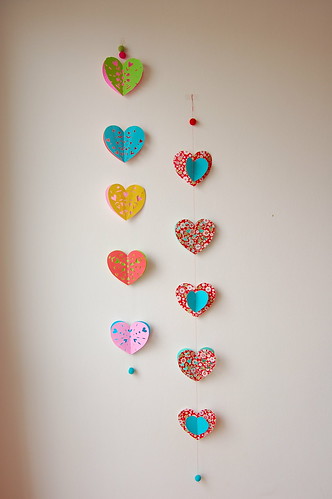
Valentine :: a garland

Valentine garland 5

I got this idea when I walked into one of my girls' rooms the other day. Both girls have their snowflake garland still up. Hence: "Why not make a valentine's heart garland?"
So, that's what I did last night and part of this morning.
Again this is a fairly simple little craft.

This time I used some left over wrapping paper -- though only two really tiny pieces left, I saved them because I really liked the print. And see! I already made use of it!
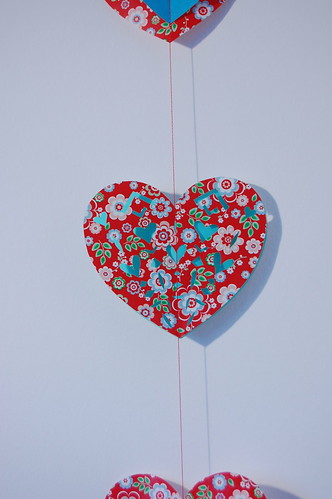
Also, some colorful origami paper and felted beads . The latter is totally optional and any bead would do. Though mainly decorative, by adding a bead at the bottom you weigh down the garland a little. And finally, I also used a heart template, which I found here -- lazy as I was. Although the template is a full heart, you can use just half of it and place it to the fold of your paper to get a full heart. But I guess that's pretty obvious. The nice thing about the template is that the heart comes in two sizes which saves you some time if you want to combine small and big hearts as I did.

Valentine garland 2

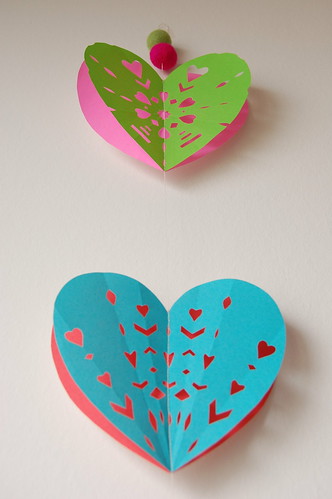
Now for the cutting part, I used two folding techniques (ooohhh! big word: technique). As you can see in the picture above, one way to go is by folding the heart starting from the center (the green heart). The blue heart shows what it looks like when you fold from the bottom tip. Please, let me know if this doesn't sound clear - I guess I could add a little sketch. My initial idea was to cut out the words: "I love you". I thought I had it figured out - I even made a template with folding lines etc. But it didn't entirely work out the way I wanted for the simple reason the capital letter "L" isn't symmetrical. And since I wanted to have this little craft posted, I just gave up for the time being. I'll try it again and will let you know (as I'm writing this: you might as well cut out the "L" without any folding - why didn't I think of that...). Important note, though, when working with words: if you do want to cut out words and don't want to trace on the front of your paper but rather on the back, don't forget to trace the letters in mirror view - I know what I'm talking about...

Valentine garland 4

Valentine garland 3

After cutting out your hearts and snipping away the pieces, take your hearts to the ironing board and iron on a low setting -- for imprinted paper iron on the back and put something underneath in order to avoid the print rubbing of onto your iron or ironing board - I know what I'm talking about (the board now has a slightly red-ish flowery print in one particular spot - don't tell anyone). I'm not clumsy - I'm just a little tired!

Once done that, take everything to your sewing machine and stitch everything together. If you want to thread beads onto it, make sure to leave a long enough end of thread on either side you want the beads and at the top also include a margin to tie a loop for hanging.

Valentine garland 1

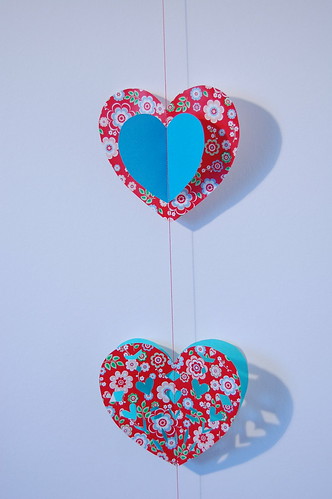
Final step: you've just ironed everything flat, now you're going to fold the hearts a little closed again. This will allow the light to shine through and will give a nice twirl to your garland as well - as to the nice twirl, I know what I'm talking about as I'm the one who tried to make pictures in the light studio...

See them twirl...?

Et voila! A valentine's garland! The girls really liked the garlands and have already decided who get's which one...

January 13, 2009

Valentine :: Be ready!

I know it's a bit early to start about Valentine's day, but this time I want to be prepared. No last minute gift making! For the past five years or so I have crafted a little Valentine's gift for each of my girls. And yesterday I worked on my first Valentine project for this year. No pictures yet, as I'm not completely done with it and because M. happens to read my blog from time to time. All I can tell is that it involved fabric, ribbons, a photo, iron transfer paper, colored pencils and markers and a couple more things that I can't remember right now. One hint maybe: gri-gri. No, I'm not taking my girls rock climbing -- I'm too afraid of heights! Because of its clutch, gri-gri in French also refers to an accessory mainly women or girls attach to their purse or bag. Voilà! That's all I can tell right now.

But I can show you some of my previous creations. Last year, I made a personalized collage on canvas for each of my girls. They absolutely loved it and still do!


More pictures of previous projects will follow, I promise.
Related Posts with Thumbnails