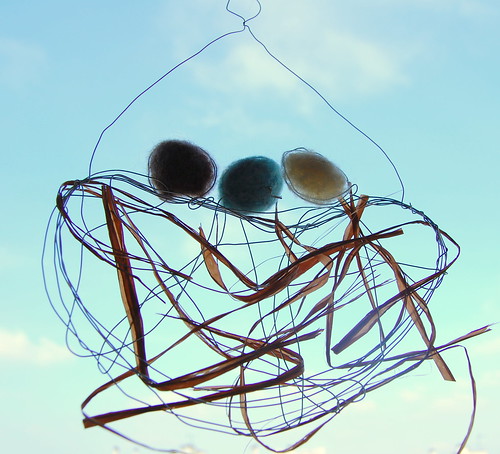
Was it the feathers on the beach or just me longing for spring, but as I was cleaning up my little craft corner and came across a bobbin of metal wire, I had this Aha-moment: a bird nest with felted eggs! (Some of you might remember the wire-wrapped felted heart from a while ago). I didn't do much crafting over the past two weeks (to the extent that I feel a little deprived...) since the kids are on winter break, but last night I had a go at it. And here's the result with a short how-to. Hope you'll like it as much as we do!

For this craft you'll need:
- metal wire, round nosed pliers and cutting pliers
- a small amount of roving, felting needles and a foam pad for needle felting the eggs
- some raffia, or other bits and pieces (newspaper, fabric, burlap, yarn, grass, twigs,...) for weaving into the nest
Step 1: Wire-wrap the nest and eggs.

Try to do so without cutting the wire - keeping the wire in one piece. Start at one side of the nest and bend, twist, turn, ... ending with the loop part for hanging. Don't worry about the wire popping up or not staying put while you go. You can correct this later with your round nosed pliers. Cut wire with the cutting pliers and wrap the end around somewhere on the side, to secure. Now, using your round nosed pliers you can perfect the wire-wrapped nest, shape the eggs,...
Step 2: Needle felt the eggs
I've used soft tones for this project, but of course the possibilities are endless. You could try to do colorfully decorated Easter eggs, for one thing. Use your imagination! First felt a little piece slightly bigger than the egg on your foam pad. Next, put the nest with eggs on top and wrap the excess over the wire and felt to secure. Keep punching those needles, flipping the project a couple of times to avoid everything getting stuck to the foam pad and in order to have both sides nicely and evenly felted. Don't worry about the wire showing, this actually adds to the charm of the project. As I wanted the eggs to look like eggs (well, sort of...) I added a little roving as I went, to give them some "body".
Step 3: Weave in some raffia or anything else you have at hand.
Other options: I think this project would work well with papier-mâché eggs, which you could paint then. This would make it a suitable project for kids (which needle felting certainly is not!!).
Need to try this with my girls!


