When we arrived in France, almost two years ago now, one of the first things I noticed - well, not literally of course, but still - were these cute little headbands made out of fabric which all little French girls seemed to be wearing. We got a couple of those and as I was repairing the seam on one of them recently, I realized how easy to make these headbands are. It won't be a huge cost saver to make these oneself, as they tend to be rather cheap. But on the other hand: wouldn't it be nice to accessorize your little girl's new homemade spring outfit with a matching headband?
No tremendous sewing experience is required for this easy project...
This is what you'll need:

- two rectangular pieces of fabric: a big one of 40cm x 12cm and a smaller one of 20cm x 6cm (seams included) - Note: you might want to change the dimensions depending on the size of the head, the type of fabric you chose and the elasticity of the elastic. The sizes given here, worked fine for my 5 and 8 year olds. Also, you might want to try to make a wider one. I've seen them in a wider version, which is especially pretty with long or very curly hair.
Note: my oldest one tried on this new headband when she got home from school and found it a little tight. Although I used the same dimensions on all of the headbands, I used a different brand of elastic. To avoid disappointment, better cut the elastic a little longer - it's easier to make the headband smaller than the other way around...
- about 12cm of wide elastic
- matching sewing thread
- safety pin and needle pins
- iron
- sewing machine
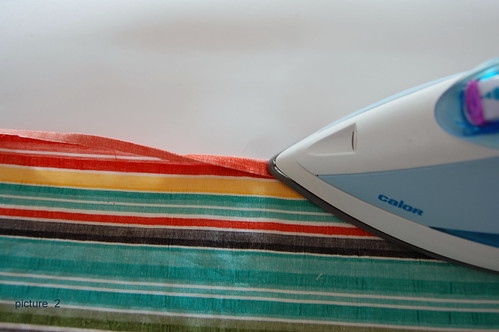
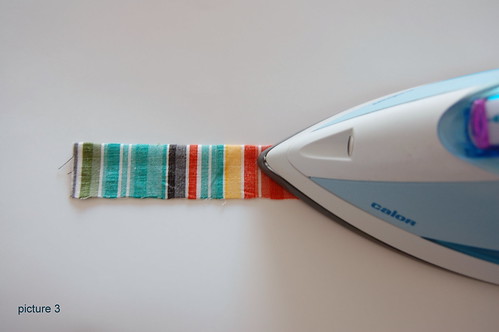
Step one: Lengthwise, iron in the seams of the bigger piece, folding over the fabric twice (about 7mm). Next, with the right sides to each other fold the smaller piece in two, lengthwise and iron flat. (pic. 2 and 3)
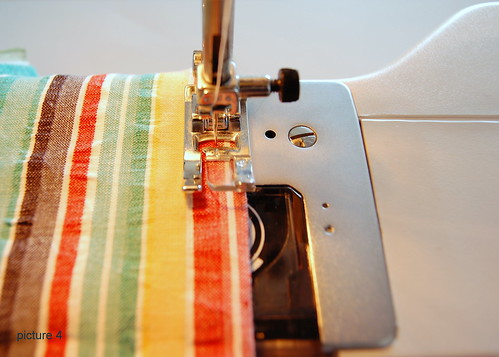
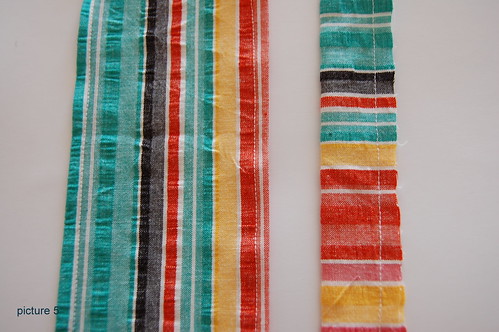
Step 2: Sew the seams about 5mm from the edge. (pic. 4 and 5)
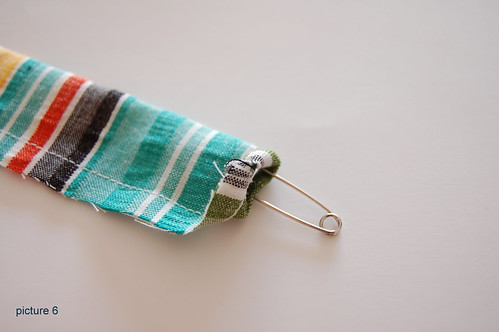
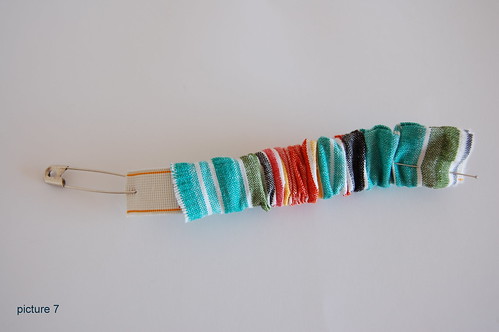
Step 3: Turn inside out the smaller piece, using the safety pin (pic. 6). Slide in the elastic, also using the safety pin (pic.7). Secure with pins on both sides and then sew to secure (pic.8).

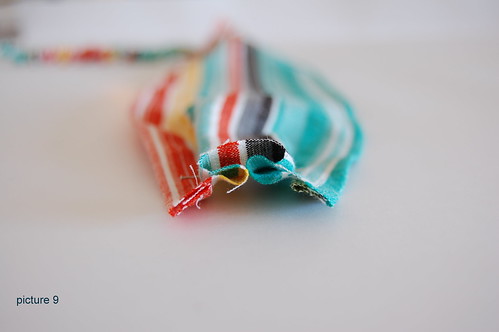
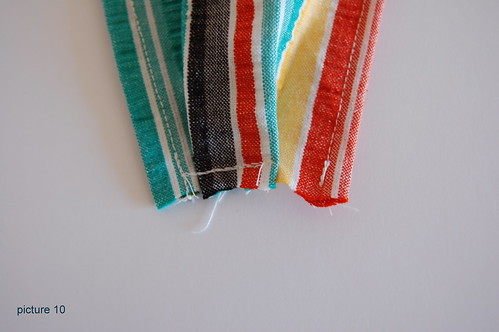
Step 4: Fold over the bigger piece as shown in pic. 9, such that its width becomes a little more than twice the with of the smaller piece with elastic. Secure by sewing a couple of stitches near the edge (pic.10).
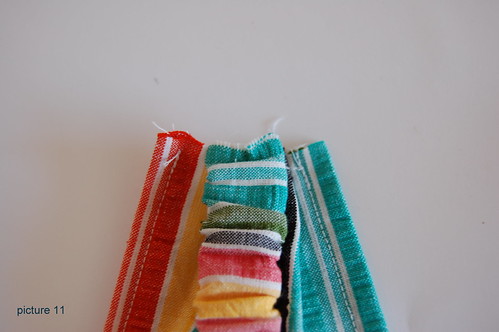
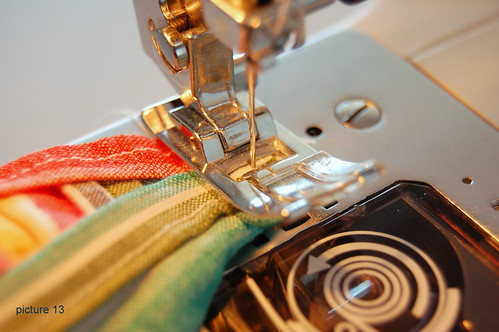
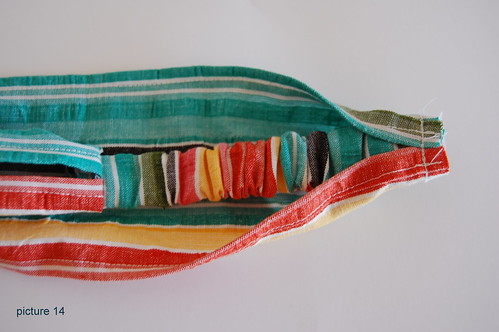
Step 5: On one end, put the elastic part on top of the bigger piece, the bigger piece being right side up (pic. 11). Squeeze the elastic part in between by folding over fabric from the sides and secure with pins (pic. 12). Next, sew it closed (pic. 13). Repeat at the other end (pic. 14) - before doing so check one more time for the size!

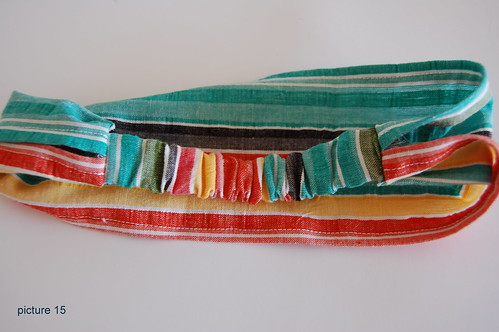
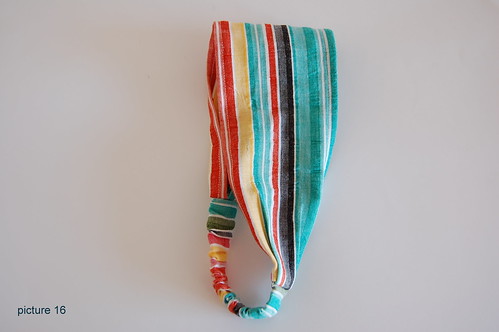
And... done! "Une serre-tête" as my girls would say! The result should look like shown in pic.15 and 16. Good luck with it. And please, let me know if you have questions or how they turned out!