I didn't pay too much attention to it until yesterday morning. I was working on something else when all of a sudden I remembered the bag. It didn't take me too long to think it through. All that I needed was a shirt.
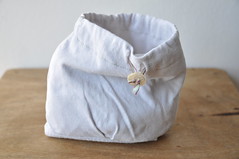
I found a shirt - an old favorite but hopelessly stained one (bleach* near the bottom hem). And after some cutting, sewing and some more cutting I ended up with this bag.
It's probably one of the fastest and easiest bags I ever made, but I do like it a lot!

In case you want to give this super fast and easy grocery bag a try as well, keep on reading as I wrote down some instructions for you.
What you need:
- an old T-shirt
- scissors
- matching thread
- a button
- a piece of ribbon
- sewing machine
Instructions:
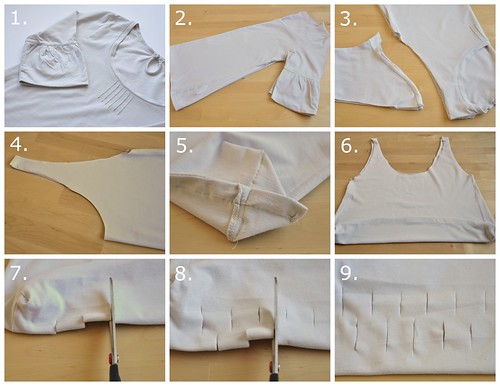
1. Take an ironed adult size T-shirt, right side out. (You could use a kid's T-shirt for a smaller sized bag).
2. Fold it in half as shown in picture 2.
3. Cut off the sleeves as shown in picture 3 and put them aside as you'll need them later to make a little pouch.
4. Cut around the neck-line as shown in picture 4.
5. Sew the bottom of the shirt closed using a French seam. If you're not familiar with the French seam check out this post. (Basically, you sew the hem closed on the right side, turn the bag inside out and sew another seam, sandwiching the first seam inside). Next, sew boxed corners, as explained here, in step 1. You could iron everything flat now, if you like.
6. Place the bag in front of you on a flat surface. Starting from the bottom, fold over the bag as shown in picture 6, about 2 1/2 inch, that is.
7. Now, starting about 3 inches from the side, with your scissors make 1/2 an inch to 3/4 of an inch cuts through all layers, leaving about 1 1/8 inch between every cut. Continue like this all the way to the other side and stop about 3 inches from the side seam.
8. Next, fold it over some more (an additional 2 to 2 1/2 inch) and repeat the cutting, but now right in between two cuts from the previous line, as shown in picture 8.
9. Go on like this a couple more times, depending on the size of your bag - I did 5 rows in total.
10. Optional - Pouch:

Take one sleeve and cut to size, such that the folded bag fits inside the sleeve (make sure to add seam allowance). The hem of the sleeve will be the top of the pouch (if its a tunnel, i.e. tubular all the way around so you could pass a ribbon through)- if not, sew a tunnel). Sew the cut-off sleeve closed at the other end using a French seam again - you can box the corners if you like. At the top: make two small incisions (front only) at the center of the hem. With a safety pin slide the ribbon through the tunnel, and pull the ribbon ends through the button. Make knots in both ribbon ends. To close the pouch just pull the button all the way up and vice versa to open.
As with all of my tutorials, please note, this tutorial is intended for personal use only. Therefore, do not reproduce, sell or commercialize in any form without permission. Thanks for understanding!
* the bleach stains ended up the in hem and one of the boxed corners!!

