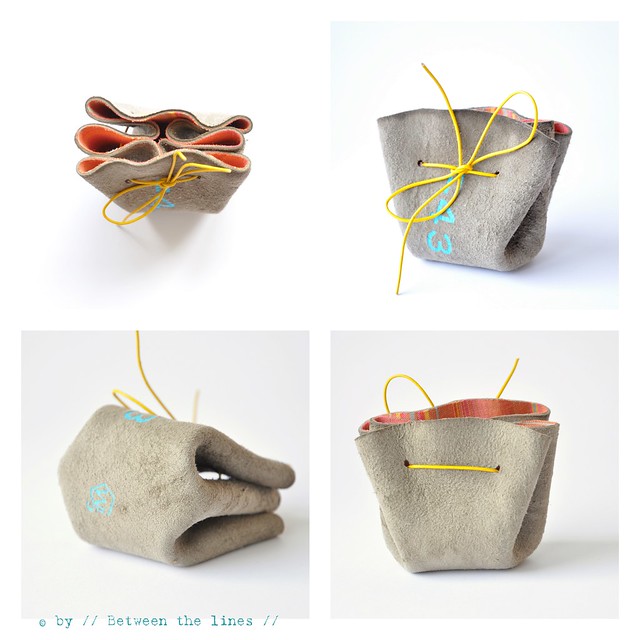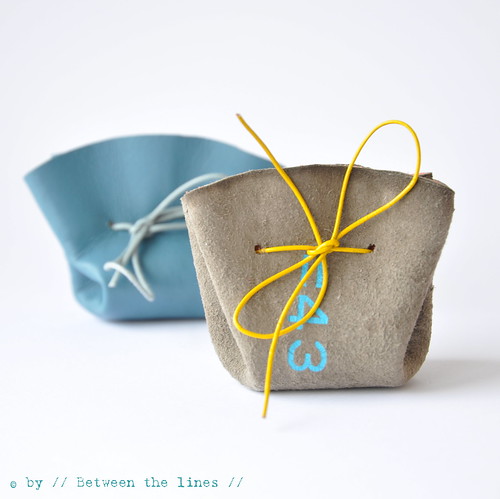
I hope you didn't mind the wait and are not disappointed - but I finally got my act together. So, here's a new tutorial for a very easy to assemble drawstring coin purse. As a matter of fact this is so easy it would make a nice little craft for kids too. Just have them use felt instead of leather, or why not oil cloth. I made a whole set of these in no time with just some leather scraps and left over fabric, because what I did is line them using some Vliesofix (I'm not paid by Vliesofix, in case you're wondering, I just like to use it). For the drawstring you can use basically anything you have: biais tape, ribbon, waxed cotton shoe laces, leather shoe laces, hemp string, ...
The nice thing about these coin purses is that you can make them in any size, really. Make them for keeping your change within reach, to keep little secrets, to hide baby teeth under your kid's pillow for the tooth fairy to come, or as an alternative gift wrap for jewelry, Easter eggs, or other tiny goodies.
Here's what you'll need:
- leather scraps - or alternatively, any other material that will hold up, like felt, oil cloth, heavy weight cotton (which won't fray much in my opinion since it's cut in a circle)
- optional: fabric scraps and Vliesofix for the inside
- a plate, a dish or a bowl to trace the circle if you don't have a compass handy Note: for the purse in the above pictures, which is about 6cm wide and 6cm high, I used a dish with a 16cm diameter.
- leather shoe lace, ribbon, biais tape, ... for the closure
- a hole puncher
- iron
- scissors
Steps
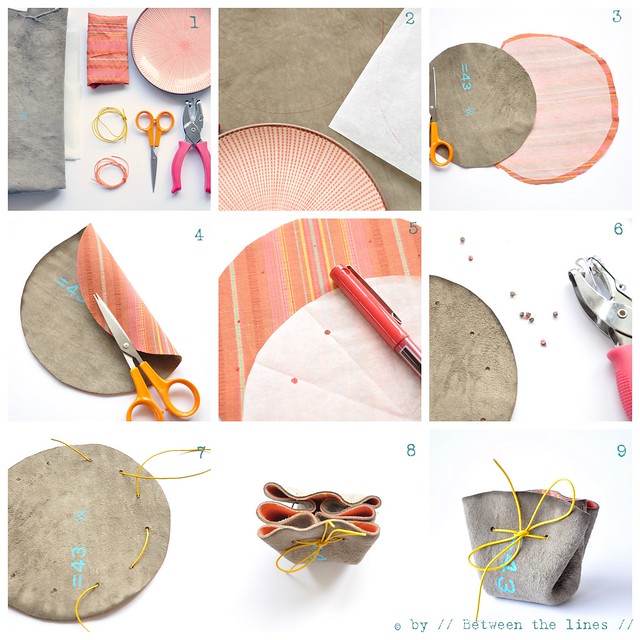
1. Trace plate, dish or bowl on the wrong side of the leather. Trace the same circle onto the paper backing of the Vliesofix, if you decide to line your little purse. ~ pic. 2
Note: for the purse in the picture I actually used the wrong side of the leather for the outside because I liked the number stamp on the back so much, the contrasting blue against the taupe color of the leather - and 43 also happens to be my age - double strike!
2. Cut out, however leaving an extra margin when cutting the Vliesofix. Iron Vliesofix onto the fabric. ~ pic. 3
3. Gently pull off the paper backing from the fabric. Do not throw away the paper backing as you'll still need it later. Iron the fabric onto the back of the leather. Next, trim the edges. ~ pic. 4
4. Take the paper backing and cut out the circle you traced onto it earlier on. You will now make 12 holes in it, about 1.5 to 2cm from the edge, and equally spaced out around the curve of the circle. In order to do this somewhat precisely, however without doing the math, what I did was fold the paper circle in half, next unfold again, punch holes at each end. Fold again, perpendicularly onto the first one (to make quarters), next fold open again and punch a hole on either side. Next, fold again, unfold, punch hole - basically you fold the paper same way you would cut a pie in 12 same size pieces. Once you've punched the twelve holes, place the paper on the wrong side (the lined sized, if you lined it) of your leather circle and mark the 12 holes with a pen. ~ pic. 5
5. With your hole puncher, punch the holes, using the marks as a guide. ~ pic. 6
6. Thread your ribbon, leather shoe lace, biais tape, ... through the holes. Pull both ends so to make folds and close the circle.
Et voilà! You just finished a cute little coin purse!
Please note, this tutorial is intended for personal use only. Therefore, do not reproduce, sell or commercialize in any form. Thanks for understanding!
If you made something using a tutorial found on this blog or if you got inspired by something you found here, make sure to post your pictures here.


