I'd been planning on this tutorial for quite a while, but somehow never came to it... But here it is at last!
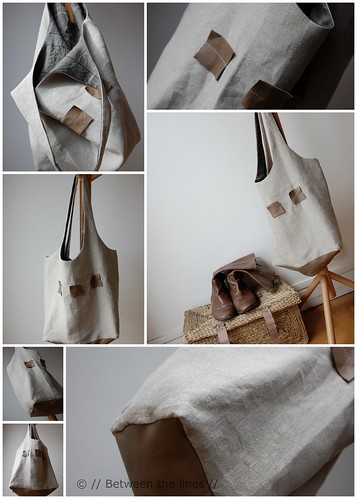
Some of you might remember my linen shopping bag with my signature leather squares from a wile ago. You also might remember how I said I found an elegant way to line the bag and piece things together with no more seams than needed. No cutting and sewing of the handles separately with this bag!
It's quite possible it's been described elsewhere (and better) already. In that case I apologize. I didn't check, I didn't Google it - I just wanted to find out on my own. More than the sewing as such, I like to find out how things are made, how I can put things together in a simple, yet effective way. Sewing is a mental process to me. It's all about techniques, and seeing through whatever I try to make. That probably explains why I don't like to make the exact same thing twice. Also, I like things to be as minimal as possible. Whatever can be left out I leave out. So, I actually felt quite pleased with myself when I figured this one out.
But enough bla-bla - here, at last, finally, a little how-to for lining that bag, keeping it all in one piece...
You'll need:
- two types of fabric, one for the outer bag (in my case oatmeal colored linen - what else...?) and one for the lining
- thread, pins, safety pin...
- sewing machine
- iron
1. Pattern

This is a sketch of the upper part of the bag - just to give you an idea. Feel free to use it. Just print it with 0 margins to its full size and add a rectangular to obtain the full size bag pattern. Alternatively, you could trace a bag you already have (which is actually what I did to obtain this one).
2. Cutting the fabric
Cut out the pattern twice from each fabric, so you obtain four identical pieces.
3. Take one of each fabric and pin the handles together, right sides facing. Sew the curved parts, but leaving the handles open at the very top (so you sew the two side curves and the middle U-curve).

4. Make small cuts around the curved edges, perpendicularly to the seam. This will result in a smooth curved edge when turning the fabric.

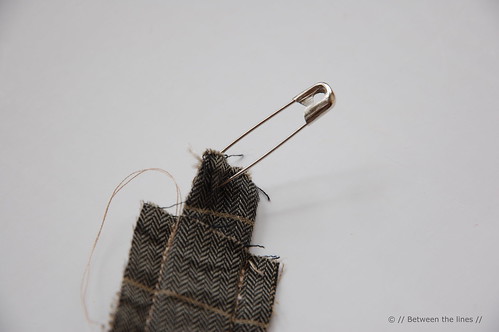
5. Attach a safety pin to the top of one of the handles an turn it inside out by sliding the pin inwards.
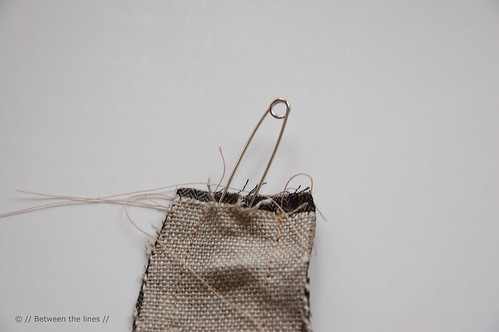
Next, with an iron press flat, shaping the handle.
6. Using the safety pin again, insert the handle you just turned and pressed flat into the other handle making sure outer fabric is facing outer fabric, and lining is facing lining, like shown in the pictures, and pull it all the way up, through the handle, and out again.
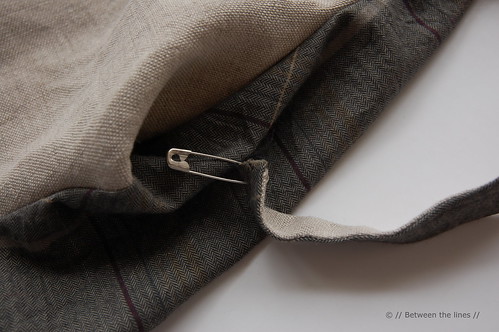
7. Secure by stitching back and forth a couple of times.
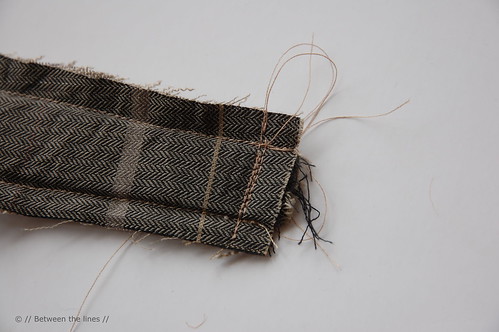
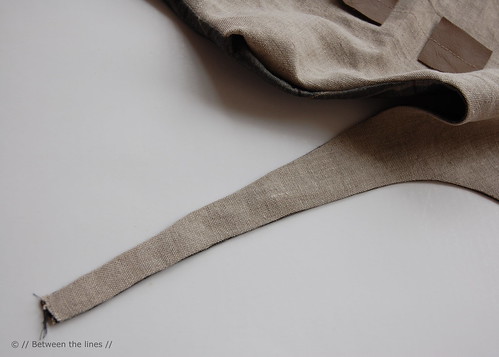
Remove the safety pin and pull the handle out again. It should look like this.
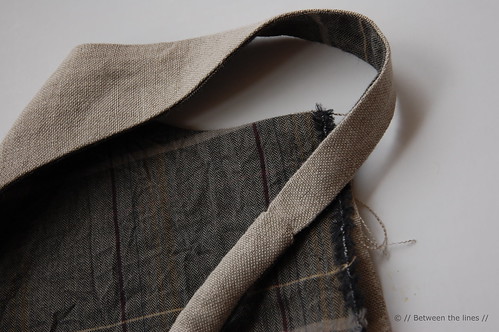
With the iron, now press the other side as well. You'll get something which looks like this:
8. Repeat with the other set of fabric and lining.
9. Fold open each set and put both sets on top of each other, right sides facing and lining facing lining, outer fabric facing outer fabric. Stitch the side and bottom seams together now, but leaving a small opening in the lining somewhere to turn inside out. Sorry, I have no pictures of this part - I knew I forgot something... But I'm sure you can figure this one out!
10. Turn the bag inside out through the opening you left, shape and iron flat all seams. Close the opening in the lining... and done!
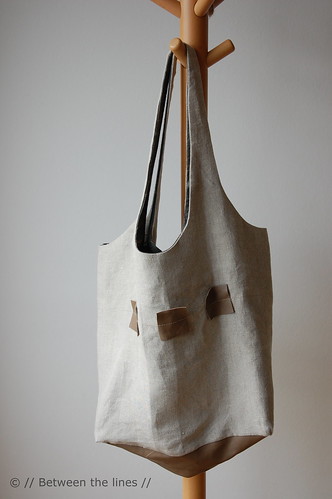
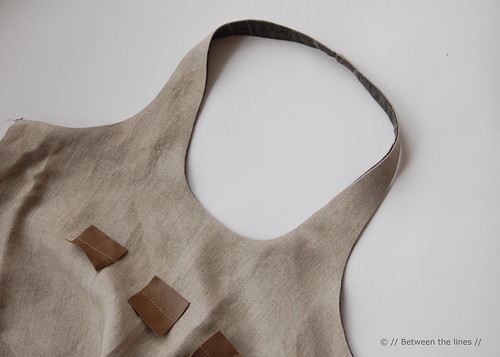
As you can tell from the picture, I finished my bag slightly differently than described in steps 9 and 10, in adding a rectangular (leather) bottom and making the bag slightly wider. The description does correspond however to the bag in my earlier post.
In terms of bag shape and size the possibilities are of course endless.
All I wanted to show with this tutorial, is how to line a bag in a very simple way. I hope I made myself somewhat clear. If not, let me know!
So now, I'm the happy owner of a new shopping bag, which matches last winter's boots perfectly.
I'm ready for the new season!
This post is dedicated to my grandmother. She was incredibly good at sewing and never sent me to the store without a shopping bag...
Please note, this tutorials is intended for personal use only. Therefore, do not reproduce, sell or commercialize in any form without permission. Thanks for understanding!

