You might start wondering if all is well with me...
Another clothes hanger tutorial?! Really!?
What's so interesting about a clothes hanger, you'd want to decorate it anyways?
I know, I know! Just one more to add to the list and then I'll stop, I promise... (hmm - I'm no so sure about the last part...)
But to be honest - I like these wire clothes hangers. Because of what they are, because of their simplicity, the bareness, the fact they're reduced to the essential. And yet they have so much potential. To hold clothes for one thing. But it's also a perfect frame to work around and to play with.
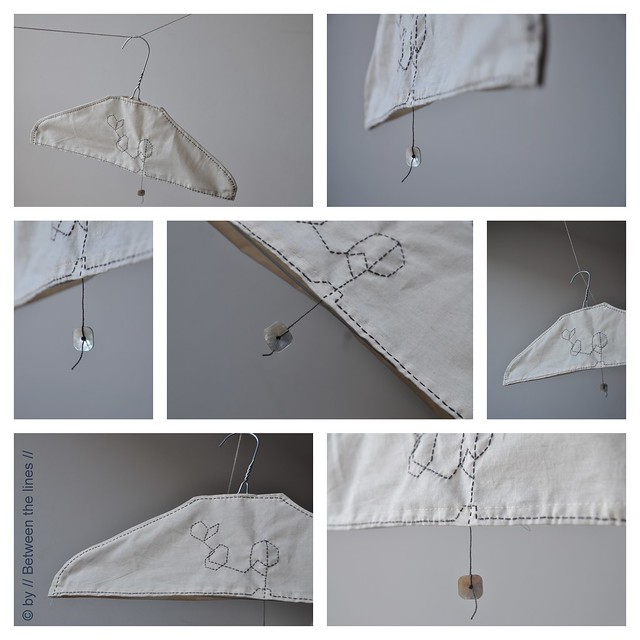
A couple of nights ago, my hands were itching - I felt the need for something creative but something slow (it'd been an eventful day - I'll spare you the details, but eventful it was). How about some embroidery with that hand dyed wool floss I got myself, I thought. I've been fascinated by Sachiko embroidery lately (for a nice tutorial, check out this post at the Purl Bee). I like the contrast between the little stitches and the fabric, the combination of simple straight lines into stunning patterns. I just wanted to give it a try. The clothes hanger cover that I had still in the back of my head seemed perfectly adequate for that matter.
You've probably seen these clothes hanger covers before. They are easy to make and I think they are useful for hanging slippery shirts or dresses. So, that's what I have for you today. Turns out that I'm not the kind of person for large symmetric pattern embroidery, so my Sachiko embroidery experiment soon became an exercise in free style embroidery. But it still was fun and definitely asks for more.
What you'll need:
- wire coat hanger
- piece of cotton or linen
- embroidery floss + needle
- sewing machine
- iron
- pins, scissors, ...
Steps:
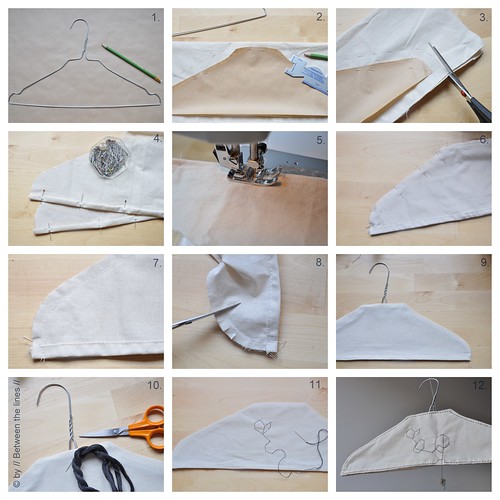
1. Trace your clothes hanger on a piece of paper and cut out (pic. 1.).
2. Transfer pattern to double folded fabric and cut fabric taking into account a 1-1.5 cm seam allowance (pic. 2-3).
3. Pin the bottom hem of both pieces (pic. 4.) and sew on sewing machine(pic. 5).
4. Pin the two pieces together and sew on your machine leaving an opening at the top (pic. 6-7). Make small cuts at the rounded parts, perpendicularly to the seam (pic. 8). Turn and press with iron (pic. 9)
5. Using some embroidery floss decorate the cover. Add a little button, if you like. And done.
You could of course decorate the cover in many different ways, embroider or applique names on it, have your kids draw on them with fabric markers or paint with fabric paint, tie dye, ... Or why not transfer one of your kid's drawings onto the cover and (have them) embroider the outlines. This could make a nice and easy, personalized gift for the holidays (holidays!? already?)...
I mentioned the new Flickr pool already a couple of times. If you made something with the help of a // Between the lines // tutorial or got inspired by something you found on this blog, don't be shy, and show us what you made! Check out this luxury version, for instance, of the clothes hanger covered with fabric strips, made by Cindy.Aren't these lovely/! And I think the hangers covered with Japanese masking tape are really clever! Thanks for adding these, girls!

