
Here's as promised part two of the message board tutorial.
This is what you'll need:
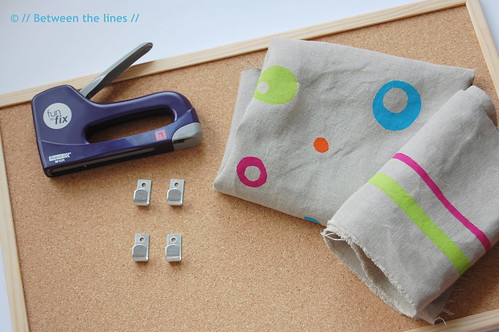
- a cork message board framed with wood - they come in several sizes and can be found in most crafts, office supplies or hardware stores. My message board measured 40cm x 60cm.
- fabric to cover the board with: roughly 60cm x 80cm (this is the size of the board + 10cm on all four sides - it's important to have enough "excess fabric" to make the pulling and stretching easy once covering the board)
- another rectangular piece of fabric for the pockets; in my case this was about 20-25cm x 60cm; roughly you'll need:
(the desired height of the pockets + 5cm) by (the width of your board + ((the overlap of the pockets times two) times the number of pockets) + seam allowance for both sides)
I know this looks a bit like a math equation... If this is not entirely clear to you right now, don't worry and just keep on reading - I'm sure you'll get what I mean later on!
- thread, pins, sewing machine
- metal hooks + screws; I used four of them
- a stapler
- a drill
- painter's tape or any other strong but re-positionable tape
- ruler + pencil
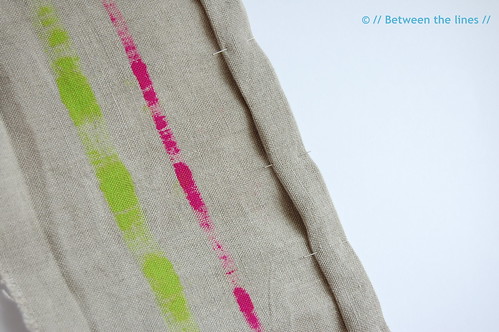
1. Seam the pockets: On the smaller piece of fabric, fold in the seam allowance of what will be the top of your pockets and pin with needles as shown in the picture. Next, sew on your sewing machine. Iron flat.
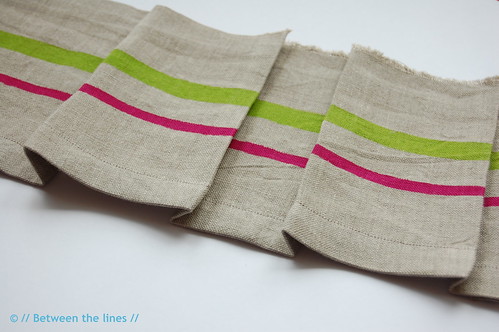
2. Fold the strip according to the width of the board, taking into account the number of pockets you want and the desired pocket size - the size of the overlap will determine the depth of your pocket. If you don't want "deep" pockets you can skip this step (note: in that case the width of your fabric strip should equal the width of your board + seam allowance on both sides, only). I did this step quite intuitively and just folded as I went, making sure, however, that every fold had the same size. I chose to have two deeper pockets and one flat pocket (see picture of the finished board, if this is not entirely clear). Fold in the seam allowances on the sides as well. Iron everything flat.
3. Place the now folded strip on what will be the cover of your message board - right sides together (!!) and such that the top seam of your pocket strip faces down - and the unfinished side about 3-4cm above what will be the bottom line of your board - keep in mind the hooks will be coming underneath, onto the wooden frame) . Secure with pins, as shown in the picture.
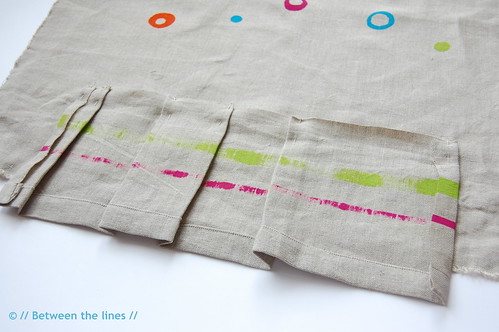
Sew, about 1cm from the side over the entire length. It will look like this:
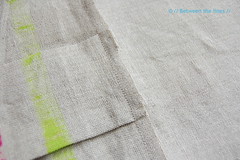
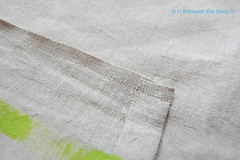
4. Flip over the pocket strip so the right side faces up and such that the sewing line is about 1cm inside the pocket (this creates depth). Secure with needles. Also, mark where the dividing lines of your pockets should come. I used painter's tape for this purpose (see picture). Sew along the sides and sew the dividing lines with your sewing machine.

Done? Congratulations! You've just finished the sewing part!
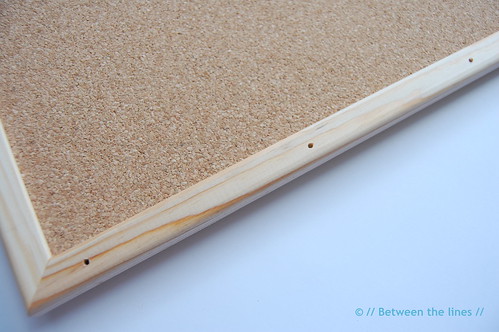
5. Drill holes: With a pencil, mark on the bottom part of the frame where you want the hooks to come. Next, drill holes in the frame, but make sure to use a smaller diameter drill than the diameter of the screws you'll use (you don't want the screws to come out).
6. Covering the message board: Place your fabric (with the pockets sewn on already) over the message board. Make sure to position it well, taking into account fabric designs and pockets seams. Flip over and, with some painter's tape, attach to the back. Note: Unfortunately, I have no picture of this step - simply forgot to take one, busy as I was with the pulling and stretching...
Turn over again, to check for the tension of the fabric, and adjust by pulling and stretching the fabric as good as you can. You don't want any ripples. Don't worry too much about the corners yet. Also, check the pocket lines again as you want them to be perfectly straight. When satisfied, start securing with the stapler (just a couple on every side, but stay clear from the corners, for now). Keep on pulling that fabric as you go! And be careful with that stapler for hands and fingers!!
When sufficiently secured for the fabric not to move any more, start "packing" the corners - just the way you would do when wrapping a present. Use tape, and when satisfied staple. Now, you can add some more staples on all four the sides and corners.
7. Adding the hooks: With a pin or needle, start searching for the holes in the frame, which are now hidden under the fabric, and mark them with pencil. This shouldn't be to difficult as you know approximately where they are. Place a hook over the mark and screw it into place (through the fabric). Repeat for all 4 (or any number) of hooks.
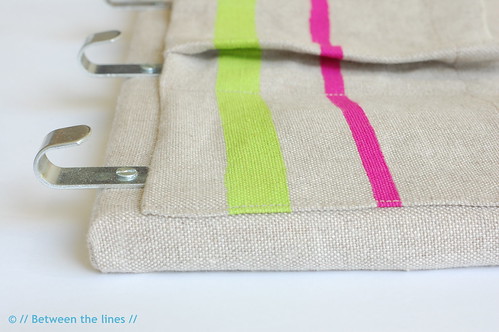
And that's it!!
Now, for the perfectionists among you, you can finish off the board by cutting some of the excess fabric - you could even line the back. I did trim the excess in the back but didn't add the lining, not on this one...
I'm not sure all this is clear.
I hope it is. Let me know if not!
Please note, this tutorials is intended for personal use only. Therefore, do not reproduce, sell or commercialize in any form without permission. Thanks for understanding!


