February 11, 2011

Time for a short break


It's been a crazy two weeks - I feel totally drained. Tired.

The girls are off from school now, until the end of the month, and I decided I needed a short break as well...

I wish you a - a bit early, I know - Happy Valentine's Day!
I didn't come up with much for Valentine's Day this year, but feel free to check out last year's and the year before's Valentine's Day themed posts!

I'll be back soon!

xo, P.

February 9, 2011

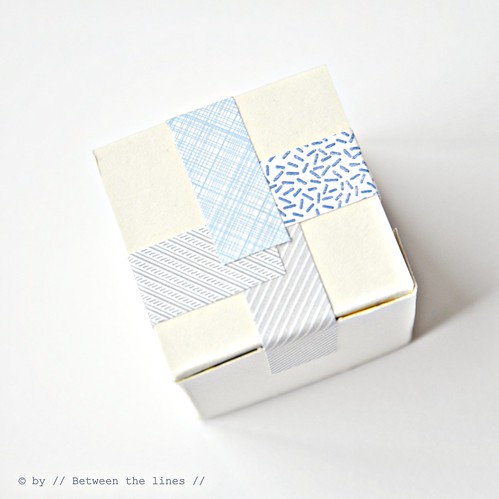
DIY Japanese tape

DIY Japanese masking tape


Ok - you may want to classify this DIY idea under 'totally ridiculous', 'totally irrelevant', 'totally useless', whatever... but please, do keep on reading.

This idea just popped to my mind while I was cleaning up my messy crafts table and my eye fell upon
- my double sided tape, which was still sitting there after doing this post and hence has started collecting dust already which is not so good on double sided tape
- and a stack of security envelopes (you know, these envelopes used by banks, insurance companies, telephone companies, utility providers which usually contain bills).

And since anything's better than cleaning up a messy table on your birthday, I said to myself:
'How about making some (not so) Japanese masking tape and writing a tutorial!'
Why would one make his/her very own tape, you ask me?
- because the real stuff doesn't stick
- because it's late at night, stores are closed, you ran out of fancy tape and you need to wrap that present, so you are desperate to find a tutorial to solve this problem this instant!

Well keep on reading then as I have something for you - As a matter of fact it won't take more than a couple of lines to explain.

What you'll need:

- double sided tape
- security envelopes, or by extension: paper with a nice print (magazines, origami, wall paper, ...)
- cutting board or if you don't have one, a ruler, pencil and scissors


DIY Japanese masking tape


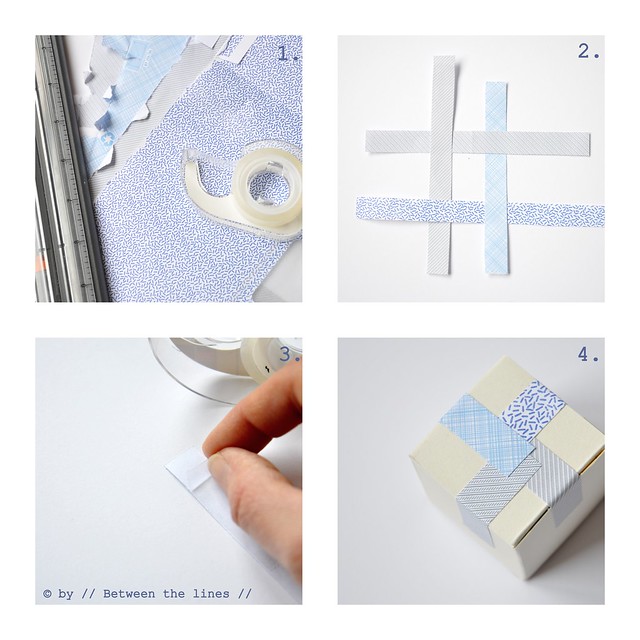
Instructions:

1. measure the width of your double sided tape
2. cut your paper in strips same width as your tape
3. make a guess of how much fancy tape you'll need
4. rip off a piece of tape, same length as your guess in step 3
5. stick tape to the back of your paper strip - cut off excess paper
6. Use to wrap your present!

That was easy, wasn't it!? And again the possibilities are endless.

Now, if you were wondering about those little boxes that I have used in at least two posts - I have twenty three (23!) left as they were part of an advent calendar we received from a big and generous company - some boxes still have a little chocolate inside as we made our own advent calendar and never got to finish this one.
I might try a couple of chocolates now, actually. It's my birthday after all, and since my table looks even messier now than it looked before anything's better than...

(munch, munch...)

Note: If you're interested in crafts using security envelopes check out this post with a non-exhaustive list of security envelope based crafts. Feel free to add more links to similar security envelope crafts in the comment section of today's post!

February 8, 2011

43


Me - I'm turning 43 today.

When I was a kid or even older, a teenager, I considered people aged over 40 old, accomplished.
Now, that I'm turning 43 myself it's different - I don't feel accomplished at all and wonder if I ever will.
I'm just on the road,
sometimes the road is bended, sometimes it's not.

I still like polka dots...

February 5, 2011

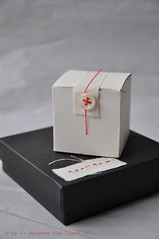
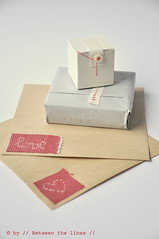
Valentine's Day :: DIY embroidered tape and a box

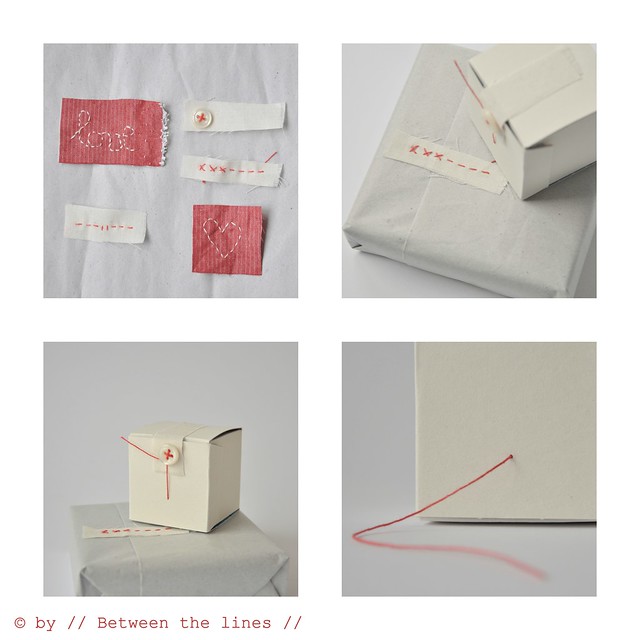
embroidered tape gift wrapping


I love Japanese masking tape - I have a small collection of tape in different colors and patterns. The only problem I have with Japanese tape is that it doesn't stick. At first I blamed it on the paper I was using, but I've tried it on several types of paper and every single time the tape was undone by the time I was to give my present. It doesn't exactly leave a good impression at the receiving end - Oh, I'm sorry but I started unwrapping it already for you...hope you don't mind - It makes you look like a toddler at a birthday party!

Now, as you may know, I've been experimenting with Vliesofix lately and fabric, embroidered or not, on paper. Contrary to masking tape, it sticks!  And while I was thinking of a way to wrap my little notebooks for sending them off, I thought why not use the very same technique for wrapping - a piece of embroidered fabric to stay within the theme and to add a little accent to envelopes or to adorn small gift boxes with and wrapping paper. (Mind the idea of fabric tape isn't new. Check out Annekata's tutorial, for instance, which you can find here and la.daridari's fabric tape which you'll find here) So, I embroidered little bits and pieces in the same fashion as the little note books, and it worked out really nicely, if I may say so. I was also lucky to find (in my own closet of all places!) narrow double sided tape from a big tape brand , which made the task even easier.  I've tried it a couple of times now and it works like a charm - the only thing that didn't make it was the button I attached onto an envelope sent across the Atlantic - which was risky, I know. The button didn't survive, but the rest did, as you can see here!

Valentine's Day :: DIY gift wrapping


If you want to give this a try, this is what you'll need:

- fabric scraps
- embroidery floss and a needle
- sewing scissors
- scraps of Vliesofix
- double sided tape
- gift boxes, wrapping paper, tissue paper, envelopes, greeting cards...
- buttons


General instructions:

- embroider the little scraps of fabric
- cut a piece of Vliesofix or double sided tape to size and stick it to the back of the fabric strip
- next, stick it onto envelope, wrapping paper, greeting card, gift box, ...


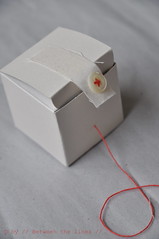
For the box:
- The little box  in the picture is a single chocolate box turned inside out - carefully undo the glued side of the box, turn inside out, and glue the side closed again.
- sew a button onto a strip of fabric
- put tape onto the back of the strip, leaving the button part of the strip, tape-free!
- stick strip to the top of the flap of the box - the button part is loose
- with a needle make a hole centered in the middle of the front of the box and pull through a piece of thread (make sure to tie a knot!)
- close the lid of the box and next twist the thread around the button


A couple of side notes:

1. When to use Vliesofix and when tape?:  use Vliesofix for sticking fabric onto an envelope or greeting card - use tape wherever you would use regular tape (on wrapping paper, gift boxes, etc.).
2. Why use Vliesofix and not glue?  Though glue might also work, I believe you get better results with Vliesofix - it's much neater to work with for one thing (no sticky fingers), dries instantly and doesn't leak through the fabric, blotting it or making it stiff.
3. Make enough of these at once and keep them in a little box, ready for immediate use.


Have fun creating!

Please note, these tutorials are intended for personal use only. Therefore, do not reproduce, sell or commercialize in any form without permission. Thanks for understanding!

If you made something using a tutorial found on this blog or if you got inspired by something you found here, make sure to post your pictures here.

February 1, 2011

Thank you


To my mom for posting the message on Good Housekeeping's Facebook fan page last week which led to an answer from the editor within half an hour...
To Good Housekeeping for adding credits and a link...
To all of you for the many comments, the e-mails sent out to GH, your suggestions and support, and for convincing me I'm not an idiot...

THANK YOU!

xo, Pascale

January 31, 2011

Eames

Eames

I'm sure most of you know these - at the moment immensely popular - Eames fiber glass shell chairs. I particularly like the ones with a wooden dowel base. They show up everywhere lately - online as well as in magazines, even in TV shows. The first time I saw one of these chairs, I fell in love - it took me a little while to figure out they were Eames, that the real vintage ones are quite pricey and that you can find replica's quite easily in different price ranges depending on the materials used (just Google Eames DAW - the list is long). For a while I considered buying a replica, but I decided to wait, not convinced the poly-i-don't-know-what material would look the way I wanted, and next, I completely forgot about it.

That was until a couple of weeks ago, when little H. and I went to a 'brocante' market a couple of blocks away from where we live. Little H. had already found a new addition to her little animal statues collection (a tiny porcelain penguin) and we were about to return back home when I suddenly spotted this chair. It looked suspiciously like an Eames, but I wasn't sure if it really was since the base didn't look familiar to me. I asked the seller - which is stupid, he could have told me anything and I probably would have believed him, since I'm by no means a Eames DAW expert. It was an Eames, he showed me the signature stamp on the bottom, and gave his price. Even with one screw missing, it was really cheap compared to the prices I'd seen online. Was it too cheap to be real? I decided to risk it, after little H. had tested it and assured me it sat really well and so, off we went, with an Eames under my arm! Back home I searched online for almost the entire afternoon - I couldn't find the base anywhere, and I started doubting about my purchase. Turns out this base is rare and that's why I couldn't find it at first. It's actually an original Herman Miller La Fonda base as shown here!
Initially, I was thinking of maybe keeping the shell but replacing the base with a wooden dowel base, which is what a lot of people do, check out Ebay or even Etsy, but now I think I will stick to my very rare but beautiful Herman Miller La Fonda chrome base!
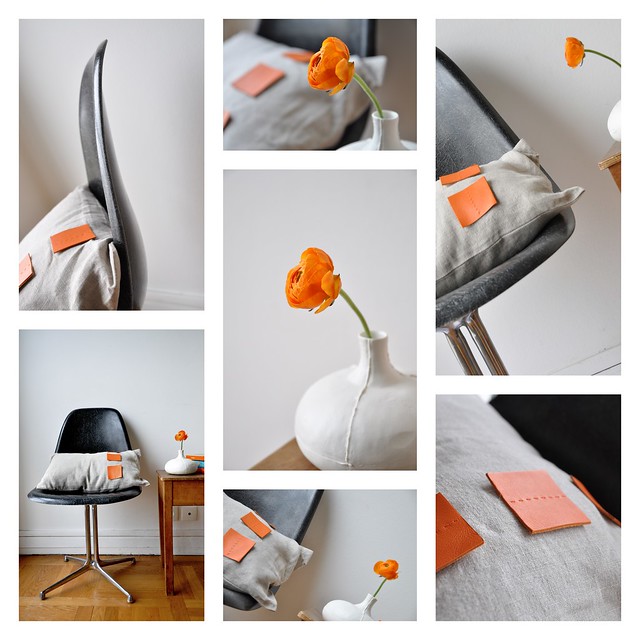
I really got to like the sleek lines and the minimalistic look of this base and I think it combines beautifully with the black slightly weathered fiber glass. I did find the fiber glass shell a bit cold to sit on, however, so I made a linen with leather squares pillow for it and I figured that's probably why almost always you find these fiber glass chairs depicted with a sheep skin, a throw or pillows on them - but no one of course would ever admit...

Oh, I feel so totally smitten with my Eames Fiber glass Herman Miller rare La Fonda base chair.

January 26, 2011

A new bag...

classic  // BTL //  bag

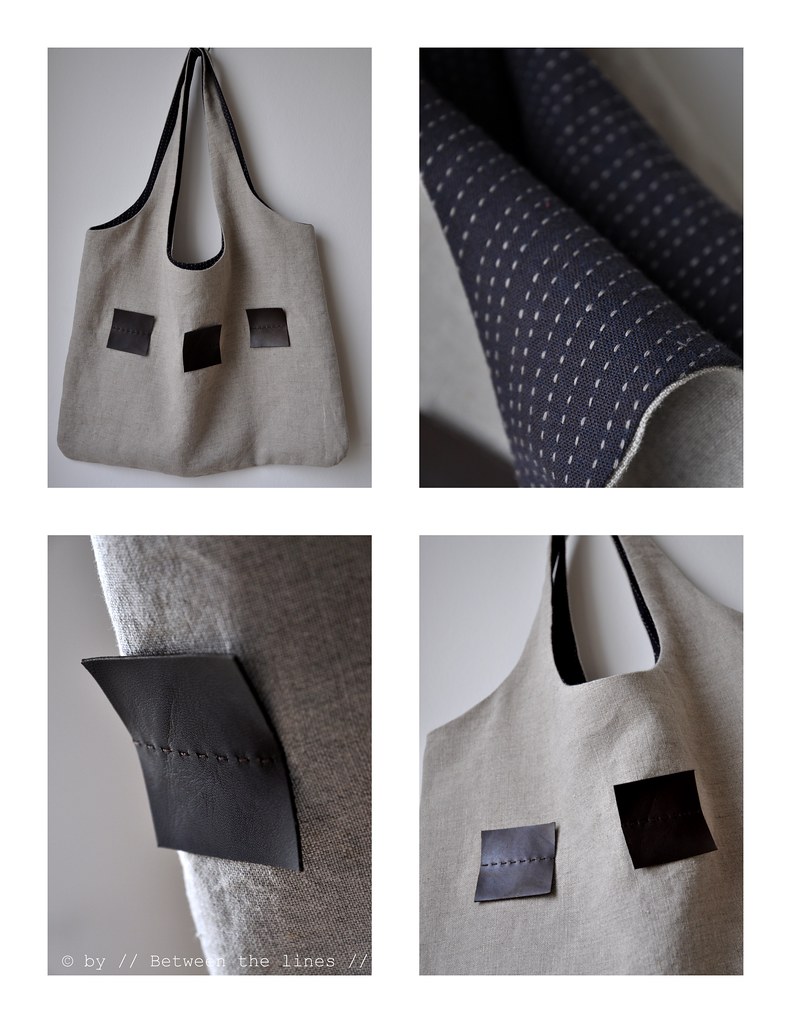
... made with recycled leather, from an old pair of leather boots which belonged to M. a long time ago, a very nice heavy weight Japanese cotton, and of course, natural linen.

I still love my little signature squares...
Related Posts with Thumbnails