March 12, 2011

Button up for Spring! # 2


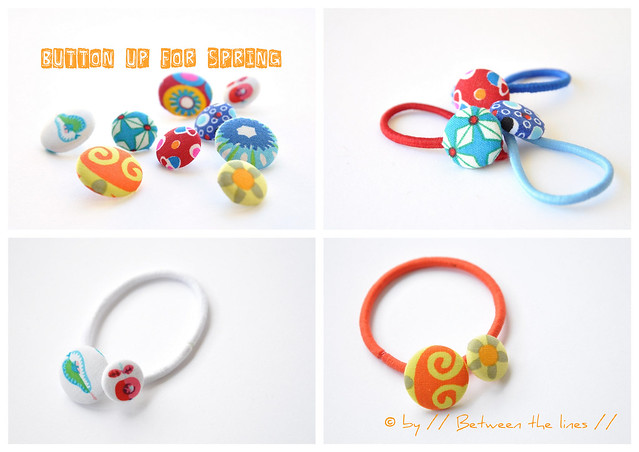
I may have sounded a bit too enthusiastic when I announced there would be a second part to the Button Up for Spring from last post. So, let's hope you're not too disappointed. It's just what is: another set of hair accessories for my poor girls, whose mom can't do more than make a pony tail or two, or a braid if she's in a good mood, ... LOL
Blame it to my own miserable hair and the fact I never ever had long hair as a child just because of that reason. In those days it was widely believed that keeping hair short would make it stronger and thicker in the end, just like covering it in egg, while shampooing, would make it stronger, as would rinsing it with beer and shampoo it again - I can tell you: these remedies don't work, my hair's still miserable, but no longer short!

Anyway, when I made these fabric covered buttons, all I could come up with to attach them too was elastic hairbands. Because you see, I had to make my own fabric covered buttons. You see them showing up everywhere and I just had to try it! And they're fun to make!

I bought two kits for covering buttons - I bought the first one a while back but forgot about it and then I had already bought a second one when the first one showed up again in one of my many not so well organized boxes. Good thing (or is it a bad thing - I guess it doesn't really matter) they were of a different size. Anyway!
Last week, I also bought a bag or two of Petit Pan fabric scraps. All excuses are good. Here's mine: I like their designs, I just have a little trouble with color in my own projects. Colors intimidate me. I like colors and colorful fabric, but it also scares me. I can't deal with it, it seems like, too afraid to overdo things, to create chaos or to waste my pretty fabric. The advantage of working with scraps, however, is that with little pieces you can add a little touch of color here and there without it becoming too overwhelming (for me). And I like buying scraps because of the surprise aspect too - it's like unwrapping a present. So, now you know everything!

And how did I make the hair accessories?
It's very simple: First, start by  covering your buttons, however, keeping in mind:

1. to cut your fabric big enough otherwise it will stick out on the sides - I know this because I made that mistake twice (!). Luckily, I managed to open up the button again, bend the metal to its initial form with my mini pliers, after witch I started all over again with a bigger piece of fabric - too bad for that nice little detail that went lost...

2. when using a print where orientation matters, make sure to attach the plastic backing such way that the print points the right way (my apples and pears buttons have a slight twist...)

After covering your buttons, attach them to the elastic hairbands.
How? By sewing them on, of course! I wasn't that smart at first. For the single buttoned elastics, I cut open the elastic (!) and had the hardest time to slide the button on, after which I had to make an ugly knot in the elastic, which the button barely covers - it took me three buttons and a night of sleep to realize my stupidity, go figure! I guess I should stop doing this kind of things after midnight...

Well, that's a long post for just a set of simple hairbands! I hope you didn't mind...

Wishing you a great weekend!

xo, P.

March 10, 2011

Button up for Spring! # 1


A couple of weeks ago, we had another one of those brocante sales in our neighborhood. I didn't find any Eames chairs this time, unfortunately, but I didn't return home empty handed. I bought the cutest, teeny tiny mother of pearl buttons! I love mother of pearl buttons and buttons in general, though I must immediately add that I don't like making button holes very much, especially not if there are a whole bunch of them as on a shirt.
But who needs button holes anyway, if you can add buttons just like that as a little detail...


My mother of pearl buttons haven't been out of sight really since I bought them - I picked them up from time to time, thinking about the different ways I could use them. Michelle's bobby pins certainly were an inspiration.

So, here are a couple of the button ideas, I came up with so far. All very simple and involving very little supplies: fabric scraps, embroidery floss, elastic hair bands, hair clips, bobby pins, needle, glue and scissors...


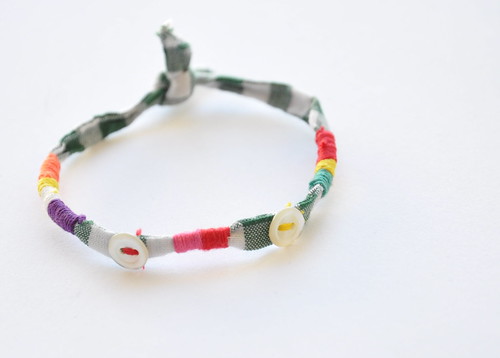
Bracelet:

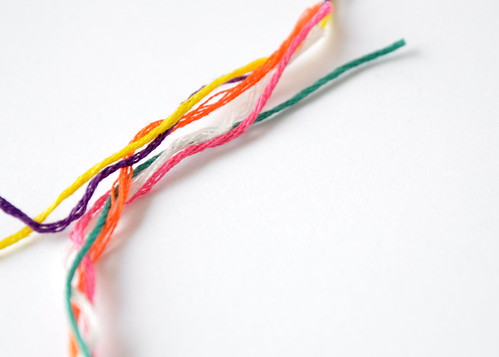
This is my favorite in the lot. Cut a piece of fabric, about 2cm wide and long enough to go around your wrist. Fold in the same the way you would do for making biais tape and sew closed with a whip stitch, if you like. Wind embroidery floss around it in different colors.
Sew on a couple of buttons - and there you have another bracelet...
As easy as 1,2,3 - perfect for the kids to make on a rainy Wednesday afternoon (leave out the whip stitch in that case).


Bobby pin:

Cut of a strand of embroidery floss and tie it at one end of the bobby pin. Start winding the floss around the bobby pin (winding over the loose end to secure, if you like, which I didn't). Change colors as you go. Make a knot when finished with one color and with a needle thread the loose end under the embroidery floss covered part. Next, sew on a couple of buttons, using different colors of floss. Finally, apply a tiny droplet of glue to all knots and loose ends, and to back of the buttons, to secure. Done!


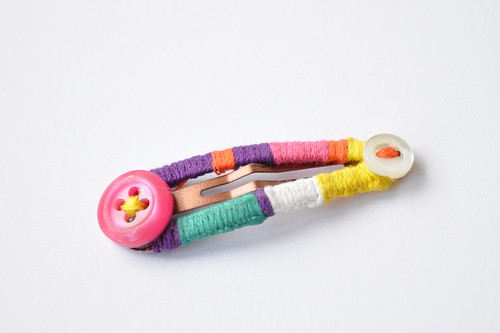
Hair clip:

Proceed in pretty much the same way as for the bobby pin - however, instead of winding the floss around the clip, use a blanket stitch. If you can't sew on the buttons, glue them on (the use of a hot glue is recommended here, as one of my buttons fell of with regular crafts glue).

This is as fancy as it gets when it comes to hair styles and accessories at our place. I have no talent or what so ever when it comes to styling hair. I'm afraid I'll have to disappoint my sweet girl M. as I really don't see how I could make her hair look like this hairstyle she'd spotted on One Pretty Thing... I wonder if a green and white hair clip would do?

Make sure to come back tomorrow, as I have a more buttons up my sleeve...

March 8, 2011

Spring's here...

Simple DIY coin purse


... and we love it!

There's lots of yellow everywhere.
Yellow forsythia - we got some in our living room,
yellow daffodils in the courtyard and in many parks, and sold by vendors at metro stations.

Simple DIY coin purse


And there's yellow in my craft room...
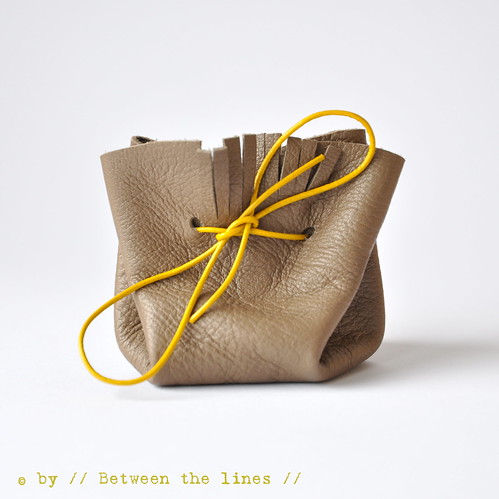
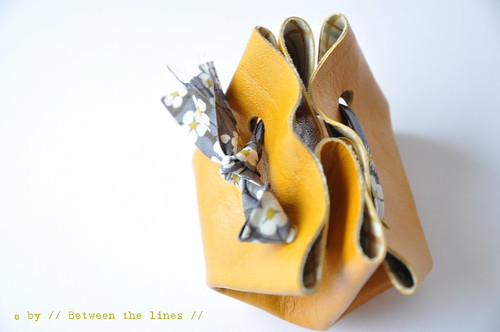
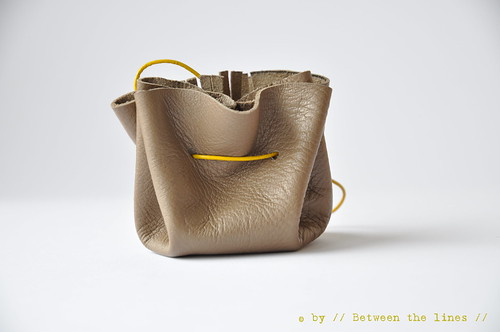
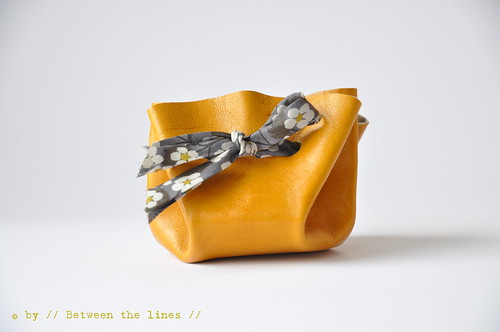
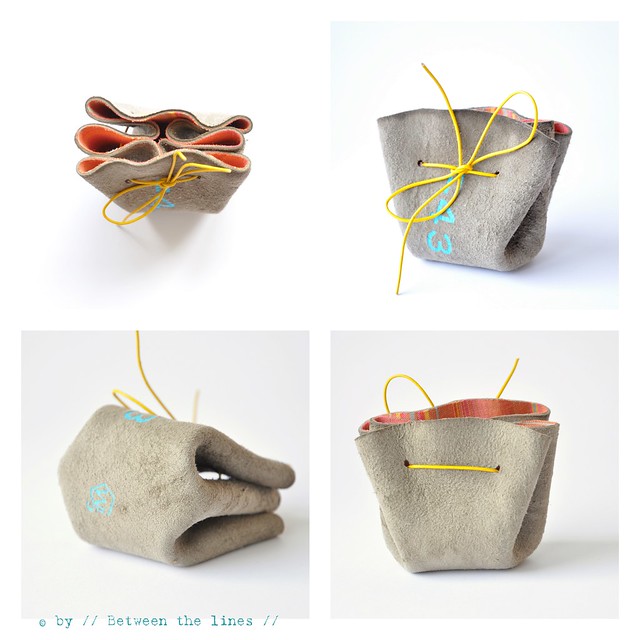
Inspired by this first splash of color after a long winter (is it really over!?): a yellow coin purse with a liberty of London drawstring with a cute daisy print and a moccasin inspired little purse with yellow leather drawstring.


The tutorial is still available here (thank you so much for the many positive comments!) with two additional notes:

Simple DIY coin purse


- for the moccasin version above: I didn't line this one (which means you can make this one really in no time) and just made a couple of incisions between the two front holes.
- if you're concerned everything might fall out when opening the purse: it pretty much depends on the quality of leather you use. The stiffer the leather the better the purse holds up and hence won't fold open completely upon opening. However, you can use a button or a piece of leather as a stopper if you really want to make sure (similar to the one shown here).

Simple DIY coin purse

Wishing you a sunny Wednesday, where ever you are!

Cheers,

P.

March 4, 2011

Three happy girls...

blue moss

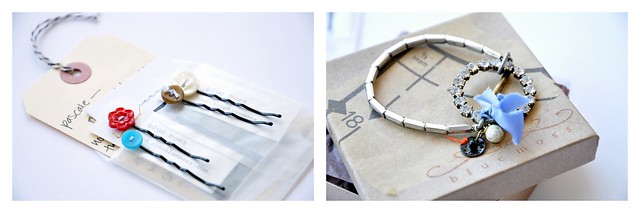
Last Friday when we came home from running errands we found the cutest presents in our mail box, sent to us by Michelle, from blue moss.
A bracelet for me, so precious! And oh! did you see that little snap!
And the cutest bobby pins ever for the girls.
Everything wrapped so beautifully (that old pattern paper on the box...so pretty!).

So, thank you, Michelle! Thank you so, so much!
This bracelet will be my Spring time, Summer time, anytime favorite!

You can find more from the wonderful blue moss here and here...

Wishing you all a happy, generous weekend!

xo, P.

March 1, 2011

Simple Drawstring Coin Purse :: a tutorial

DIY drawstring coin purse

I hope you didn't mind the wait and are not disappointed - but I finally got my act together. So, here's a new tutorial for a very easy to assemble drawstring coin purse. As a matter of fact this is so easy it would make a nice little craft for kids too. Just have them use felt instead of leather, or why not oil cloth. I made a whole set of these in no time with just some leather scraps and left over fabric, because what I did is line them using some Vliesofix (I'm not paid by Vliesofix, in case you're wondering, I just like to use it). For the drawstring you can use basically anything you have: biais tape, ribbon, waxed cotton shoe laces, leather shoe laces, hemp string, ...

The nice thing about these coin purses is that you can make them in any size, really. Make them for keeping your change within reach, to keep little secrets, to hide baby teeth under your kid's pillow for the tooth fairy to come, or as an alternative gift wrap for jewelry, Easter eggs, or other tiny goodies.

DIY drawstring coin purse


Here's what you'll need:

- leather scraps - or alternatively, any other material that will hold up, like felt, oil cloth, heavy weight cotton (which won't fray much in my opinion since it's cut in a circle)
- optional: fabric scraps and Vliesofix for the inside
- a plate, a dish or a bowl to trace the circle if you don't have a compass handy Note: for the purse in the above pictures, which is about 6cm wide and 6cm high, I used a dish with a 16cm diameter.
- leather shoe lace, ribbon, biais tape, ... for the closure
- a hole puncher
- iron
- scissors

Steps

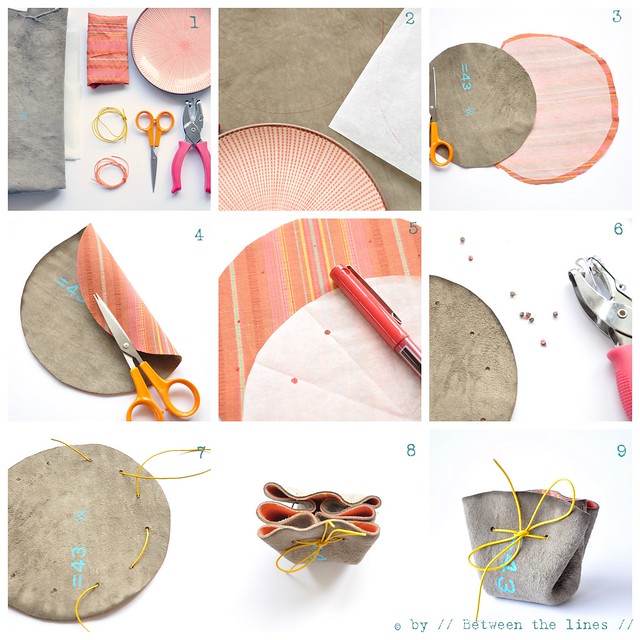
1. Trace plate, dish or bowl on the wrong side of the leather. Trace the same circle onto the paper backing of the Vliesofix, if you decide to line your little purse. ~ pic. 2
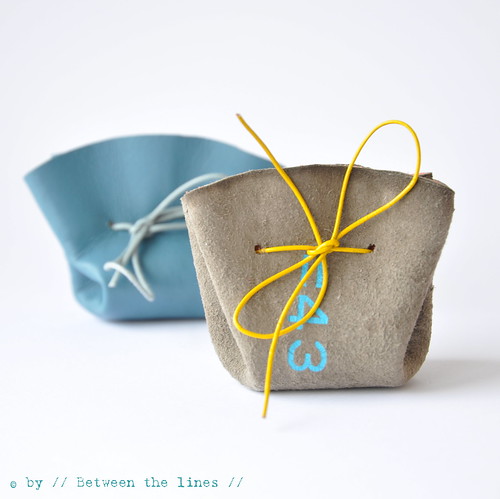
Note: for the purse in the picture I actually used the wrong side of the leather for the outside because I liked the number stamp on the back so much, the contrasting blue against the taupe color of the leather - and 43 also happens to be my age - double strike!

2. Cut out, however leaving an extra margin when cutting the Vliesofix. Iron Vliesofix onto the fabric. ~ pic. 3

3. Gently pull off the paper backing from the fabric. Do not throw away the paper backing as you'll still need it later. Iron the fabric onto the back of the leather. Next, trim the edges. ~ pic. 4

4. Take the paper backing and cut out the circle you traced onto it earlier on. You will now make 12 holes in it, about 1.5 to 2cm from the edge, and equally spaced out around the curve of the circle. In order to do this somewhat precisely, however without doing the math, what I did was fold the paper circle in half, next unfold again, punch holes at each end. Fold again, perpendicularly onto the first one (to make quarters), next fold open again and punch a hole on either side. Next, fold again, unfold, punch hole - basically you fold the paper same way you would cut a pie in 12 same size pieces. Once you've punched the twelve holes, place the paper on the wrong side (the lined sized, if you lined it) of your leather circle and mark the 12 holes with a pen. ~ pic. 5

5. With your hole puncher, punch the holes, using the marks as a guide. ~ pic. 6

6. Thread your ribbon, leather shoe lace, biais tape, ... through the holes. Pull both ends so to make folds and close the circle.
Et voilà! You just finished a cute little coin purse!

DIY drawstring coin purses


Please note, this tutorial is intended for personal use only. Therefore, do not reproduce, sell or commercialize in any form. Thanks for understanding!

If you made something using a tutorial found on this blog or if you got inspired by something you found here, make sure to post your pictures here.

February 24, 2011

Work in progress...

work in progress...

Leather confetti, the side product of something new I'm working on.
Something cute, I promise.
That something will come with a tutorial - that too, I promise.
Next week, most likely...
So stay tuned!

February 22, 2011

Relaxing, but not too much...


We're back from a short but relaxing (really? keep on reading!) break in the Alps. I decided not to ski this time, which I now somewhat regret, but had a great time reading and watching the others ski... The girls both got their 'Première étoile' this year, which made them proud and K. now really got the hang of skiing too and has started thinking about our next vacation in the mountains. We both took a laptop to work in the evenings, but neither one of them made it out of the suit case and isn't that exactly what a holiday should be like?!

To keep me from getting too relaxed, however, both girls decided to give me a scare, though it was totally unintentionally on their behalf, I must add. First little H., by disappearing under a safety (?) net and down the hill while sledding (at the designated area for sledding - no kidding!) - good there was a small tree on her way down which stopped her from going further down and hitting the rocks. It wasn't a steep cliff, but I didn't know that when I saw her disappear from my radar and heard her big sister scream after her. Surprisingly, she didn't get hurt, but was I glad they both were wearing helmets! We now have one more story to add to her quite lengthy, if I may say so, list of mishaps...

As if I hadn't had enough excitement with that already, M. fainted the next day while queuing for food at the restaurant. Well, she didn't faint right away, just told me she wasn't feeling well - so I took her to the bathroom (wrong choice!) - where she fainted as soon as we walked in... Air was what she needed! Still wearing her heavy ski boots I couldn't lift her so I dragged her between my legs through the restaurant yelling for help - which I did get, eventually. The people at the restaurant were great once they had noticed me, but getting noticed took me a while, in spite of M.'s limp body between my legs! - quite a sight, I bet. Anyway, she was fine once outside and after getting some fresh air and a sugar cube. As a matter of fact, she was back on her skis that very same afternoon and went ice skating after...

So, whoever thought in the mountains you need to be on skis for excitement is wrong, so wrong - all you need is two kids and they'll take care of the rest!

Related Posts with Thumbnails