Showing posts sorted by relevance for query leather. Sort by date Show all posts

March 22, 2012

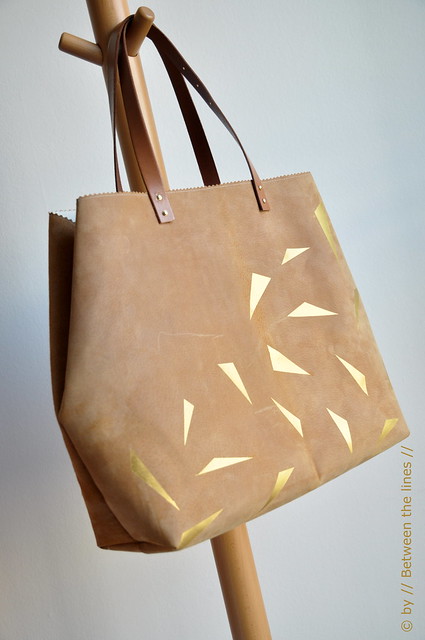
Leather and gold bag :: the DIY instructions

Leather and gold bag :: DIY instructions


Thanks for the nice comments on my previous post! I've used my new bag every single day now and love it!
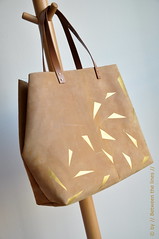
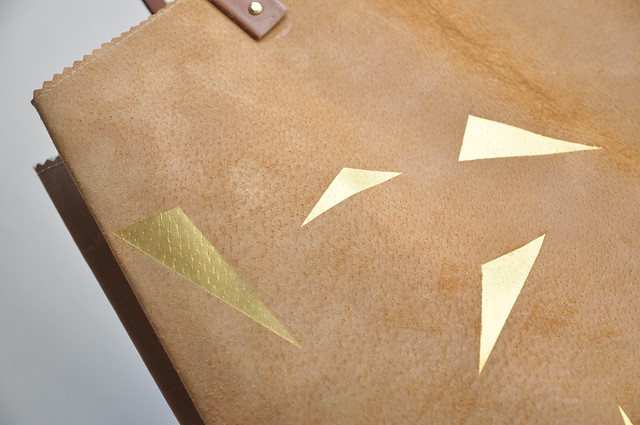
The gold triangles definitely amplify the first sun rays!!

As promised, I wrote down the entire process - for me, so I won't repeat my mistakes and for you, so you can give this a try, since really, as scary as it may seem, leather actually is  a very nice material to work with. In this DIY, you will find some general information, instructions on how to paint on leather (illustrated with  pictures) and step-by-step (written) instructions for putting the bag together. I included the bag pattern as well.
Leather and gold bag :: DIY instructions

Leather and gold bag  :: the DIY instructions.

A few remarks in general:

Before starting to paint on your precious leather skin, try a couple of samples first on a piece of scrap. This in order to see how well the paint works on the leather color wise as well as to determine the number of layers needed for a perfect coverage. Also, I tested several methods, from painters tape, washi tape, to Freezer Paper to set out the template on the skin and found freezer paper to work best. Both types of tape left marks on the leather and are more difficult to work with when you intend to repeat a certain pattern or have large surfaces to cover.

Before you start sewing the leather, again, try on a piece of scrap first, this to determine the correct tension and stitch length (avoid small stitches as this might result in ripped leather) and to get the right feel for sewing leather. Depending on your machine, you might notice you need to 'guide' the leather more than is the case with fabric as it doesn't slip that easily. The use of a special machine needle for leather is highly recommended.

Except for a leather sewing machine needle, a rotary hole punch and rivet setting tool, no special tools are required which makes this project really accessible.
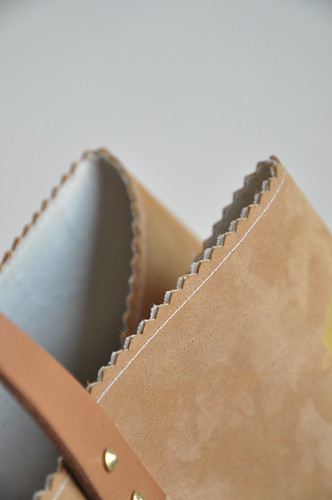
Leather and gold bag :: DIY instructions


What you'll need:

- leather: I used pigs leather - at least 110cm x 60cm, for this particular model. Please, note that there's always a part of the leather you won't be able to use as the edges are never straight on a skin (you can use these parts to test the paint). So, make sure to take your pattern pieces with you when going to buy leather. If you have trouble finding leather, you can try the following alternatives: old leather jackets from the thrift store, faux leather (I prefer the real stuff, but these days you can find really good quality faux leather), canvas (use fabric paint in that case),...

- acrylic paint - I used Pébéo High Viscosity Studio Acrylics #352 Iridescent Gold

- paint brush

- Freezer Paper (or if you can't find any: try contact paper or blue painter's tape, but test first)

- optional: fabric for the lining - I used untreated muslin.

- optional: Vliesofix, Bondaweb if you decide to line the bag

- a belt for the straps (mine is a cheap leather belt from H&M) - you could cut your own, or use sturdy woven fabric tape

- rivets

- rivet setting tool (which I didn't have and now regret as they they got slightly bended using pliers)

- rotary leather hole punch

- cutting tools: rotary cutter and Exacto knife

- cutting mat, or something else to protect your working surface

- a bone folder

- pencil

- ruler

- long metal ruler (optional but recommended as it makes the cutting of the leather easier)

- (optional) pinking shears

- glue (any crafts glue really)

- sewing machine equipped with a leather needle

- iron and ironing board.


Step 1: Preparing the leather
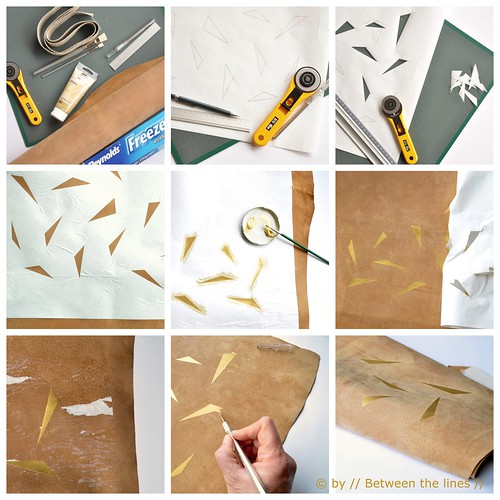

Leather and gold bag :: DIY instructions


  1. Make a rough sketch of your design
  2. Transfer your design onto the freezer paper - if you intend to repeat the pattern on both sides of the bag, fold your freeze paper in two in order to make two templates in one go.
  3. With an Exacto knife cut out your design making sure to cut through both layers when making two templates.
  4. Position your template on your leather.
  5. Iron the freezer paper onto the leather (test on a piece of scrap first), with special attention for the edges of the cut outs - you do not want the paint to seep under the freezer paper. You can skip the in between areas. Note: make sure to iron without vapor!
  6. Before starting to paint, check the edges once more - it will save you from a lot of trouble later.
  7. Paint the cut out areas - let dry in between layers and repeat if necessary.  I did 3 layers.
  8. Let sit until dry to the touch and then gently start peeling off the freezer paper. If there happens to be some freezer paper residue, cover the area with a piece of paper towel, heat with an iron and then gently (!) scratch the remains with an Exacto knife. Use the bone folder to 'polish'.
  9. If some paint did seep under the freezer paper, gently(!) scratch the excess paint with an Exacto knife.

Step 2: Cutting the leather

Leather and gold bag :: DIY instructions

Place the above template onto the (back of the) leather. Check and check once more, reposition if needed and then trace with a pencil or marker. Cut out with a rotary cutter.
Note: Seam allowances (1cm) are included unless stated otherwise. I made my bag in one piece so at the bottom there's a fold and not a seam. This implies that the cut out for the boxed corner measures 5cm x 6cm. In case you work with a bottom seam add a 1cm seam allowance (hence the cut out becomes 6cm x 6cm).


Step 3: Optional - Lining the leather 
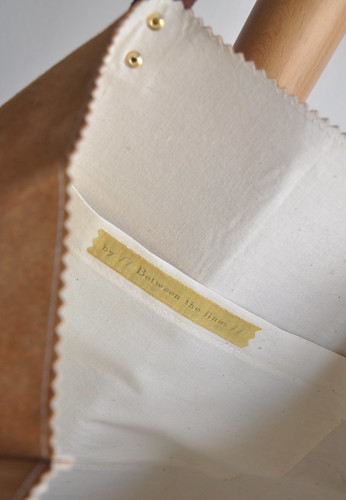

Leather and gold bag :: DIY instructions


Since leather skins often have stamps or writing on the back and since I wanted to have a small pocket on the inside as well, I decided to line my leather and to do so before the sewing. I'm not sure this was the best method as the fabric came loose at a couple of spots. Much depends on the quality and weight of the Vliesofix used, I guess. Again, test on a piece of scrap first if your fabric will adhere to the leather or not. 
  1. Iron the Vliesofix onto the muslin ( not cut to size yet!). 
  2. Next, place the muslin with the Vliesofix facing down onto the back of the leather. 
  3. Peeling off the paper backing as you go, iron the muslin onto the leather, making sure there are no air pockets or wrinkles.
  4. Now cut the muslin to size.

Step 4: Sewing the bag

  1. Sew the side seams together, right sides (leather) facing. Note: one advantage of lining the leather is that since fabric is on the 'outside' while stitching, the layers will move under the presser foot with more easy.
  2. Trim away excess with pinking shears - you can also apply a tiny bit of glue onto the leather over the entire seam length.
  3. Sew the boxed corners.
  4. Trim away excess seam allowance and apply a tiny bit of glue in between layers.
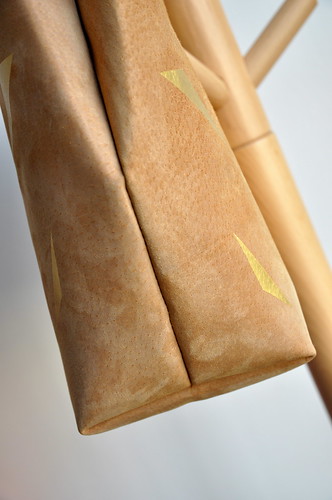
Leather and gold bag :: DIY instructions


    Step 5: Attaching the handles

    1. Cut the belt to size to make two same length straps. 
    2. Make two holes on either end of both straps, corresponding to the size of the rivets used (check the instructions which came with the rivets  - here's a good tutorial for setting rivets (I wish I would have looked at this prior to making the bag)).
    3. Determine where you want the straps to come on the bag and mark the holes for the rivets using the holes already made in the straps, as a guide. Punch holes.
    4. Finally, punch rivets through both layers (strap and bag).
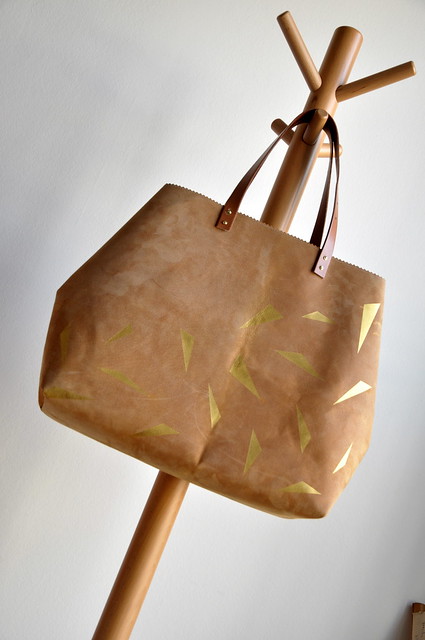
    Leather and gold bag :: DIY instructions


      Et voilà, un beau sac!!

      As with all of my tutorials, please note, this tutorial is intended for personal use only. Therefore, do not reproduce, sell or commercialize in any form without permission. Thanks for understanding!

      If you made something using a tutorial found on this blog or if you got inspired by something you found here, make sure to post your pictures here.
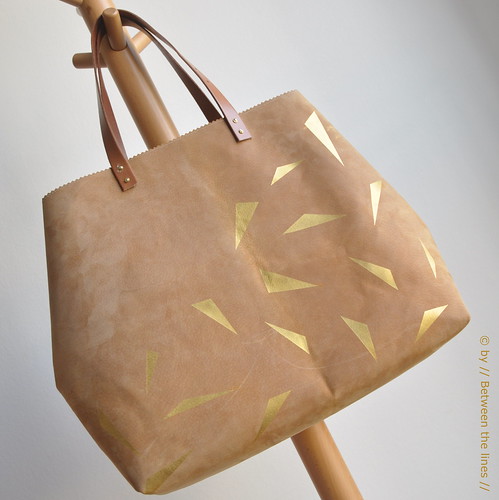
      Leather and gold bag :: DIY instructions

      September 23, 2012

      Leather key chain holder :: a tutorial

      Leather key chain holder :: tutorial


       Leather key chain holder :: tutorial

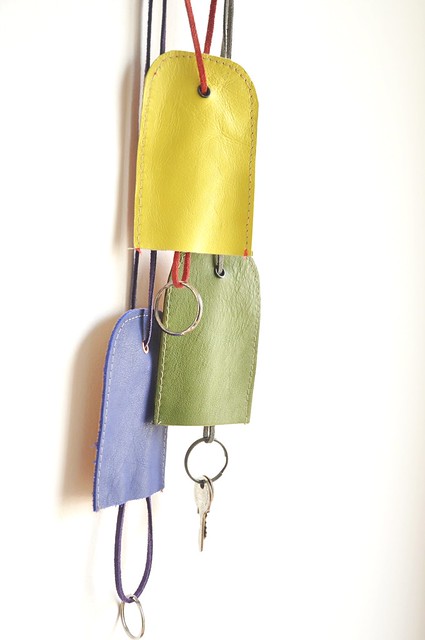
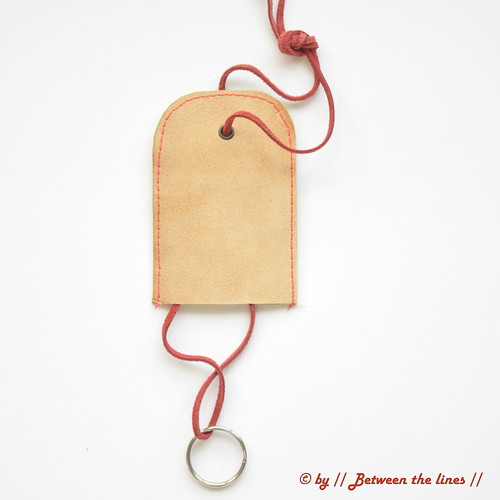
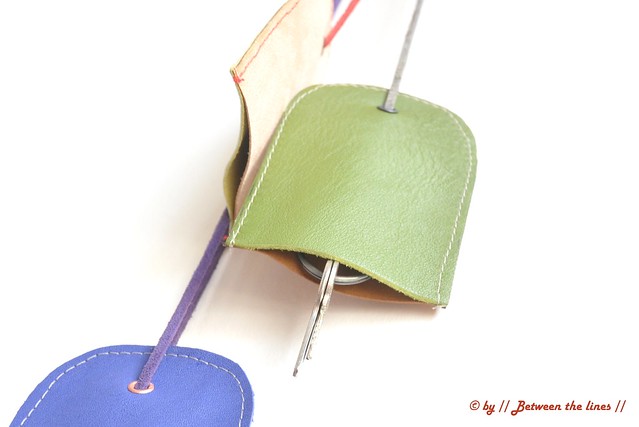
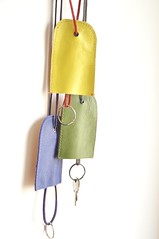
      Quite some time ago, I got M. a cute leather key chain. The design was very simple. What made it special was the combination of materials: leather and rubber, and the color: tomato red. I immediately regretted I only bought one and of course when I went back they were all gone. A good reason to try to make something similar myself. It took me a while before I found the time, but this week I finally got to it. I made several in different colors and color combinations. Since they're really easy to make, I decided to share this project with a short how-totutorial. It's a perfect beginner's project for sewing leather on the machine.


      Leather key chain holder :: tutorial


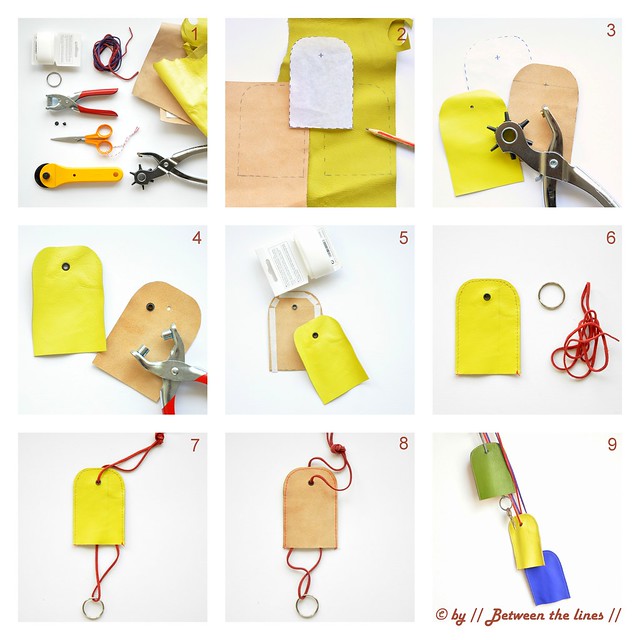
      Here's what you need:

      - small pieces of leather (or faux leather or any other material which doesn't fray)
      - (leather) shoe lace, ribbon, ...
      - key ring
      - 2 metal eyelets + setting tool
      - hole punch
      - adhesive hemming tape or vliesofix
      - rotary cutter, scissors, cutting mat
      - sewing machine, equipped with a special leather sewing needle
      - iron

      Leather key chain holder :: tutorial

      Instructions:

      1. Print and cut out the template, which you can download here.
      Note: the precise dimensions are given on the template. Make sure the scale of the print-out corresponds to the measurements given, before cutting leather.
      2. Trace template on the back of the leather and cut (x2).
      3. Punch holes in each piece according to template.
      4. Set eyelets.
      5. Cut small strips of hemming tape and iron onto one of the two cut pieces. The hemming tape will keep the pieces into place while sewing. Remove paper strips. Position the second piece on top of the first one - make sure to align precisely and iron into place. Next stitch the two layers together, about 0.5cm from the edge. Trim edges if necessary.
      Note: (i) if you work with leather pieces of different thickness, iron the tape onto the thickest quality.
       (ii) ironing leather: test on a piece of scrap first or use a cloth to protect leather from the heat of the iron.
      6. Thread shoelace through the eyelets while slipping on ring. Attach keys and done!

      Optional: you can add a closure at the bottom, if you like (snap closure, button, ...).

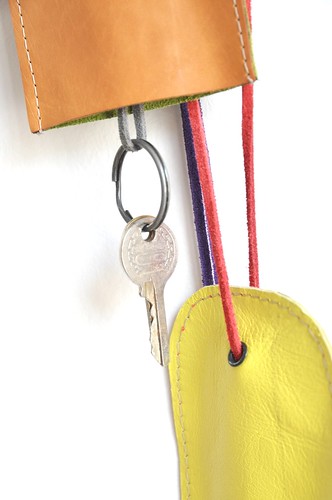
      Note: From the comments and messages I received, I realize I should have explained how to use this key holder. The design is such that you can wear it around the neck - the keys don't show as the leather pouch covers them. To get to the keys, just slip the leather cover up while still wearing or take off and give the holder a shake so the keys come down... I hope this helps!

      Leather key chain holder :: tutorial

      As with all of my tutorials, please note, this tutorial is intended for personal use only. Thanks for understanding! 

      If you made something using a tutorial found on this blog or if you got inspired by something you found here, make sure to post your pictures here.

      June 30, 2013

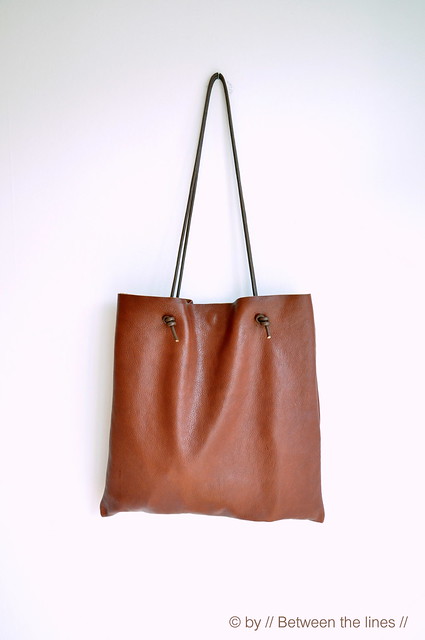
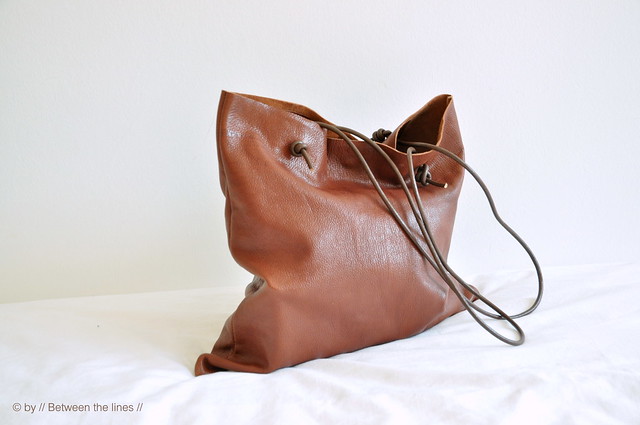
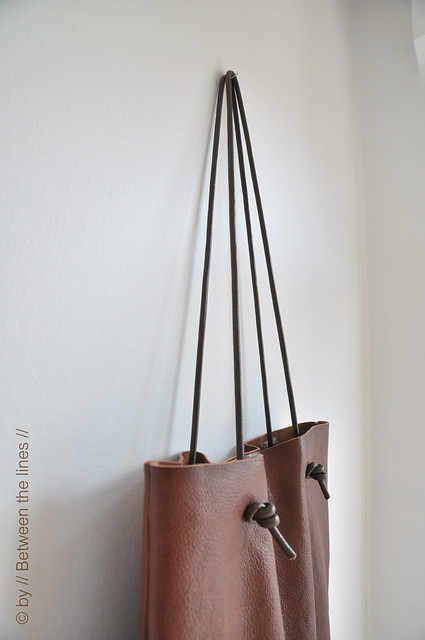
      Simple leather bag tutorial

      Simple leather bag tutorial


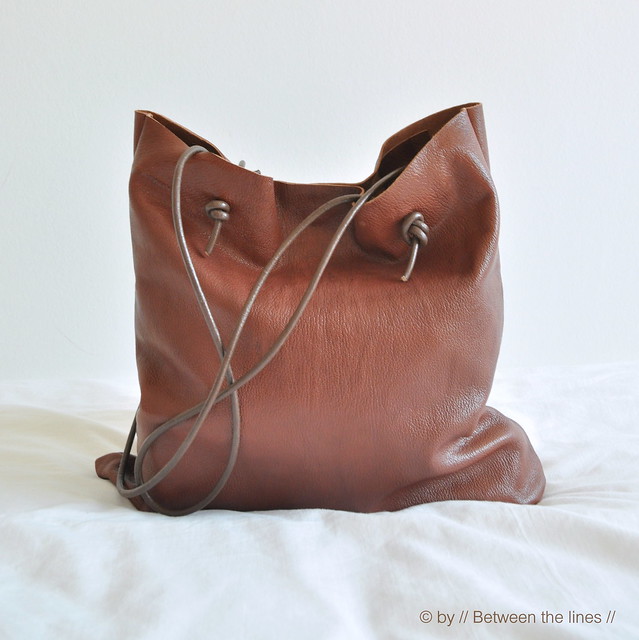
      I just finished another leather bag this afternoon and I love it.
      As a matter of fact, I just put it to the test and I find it perfect - very basic - very simple - just the way I like it.
      And you know what?!
      The instructions are down below, so you can make one too!
      This is an entry level project, so no special skills, nor tools are required.

      Simple leather bag tutorial


      Simple leather bag tutorial

      Simple leather bag tutorial


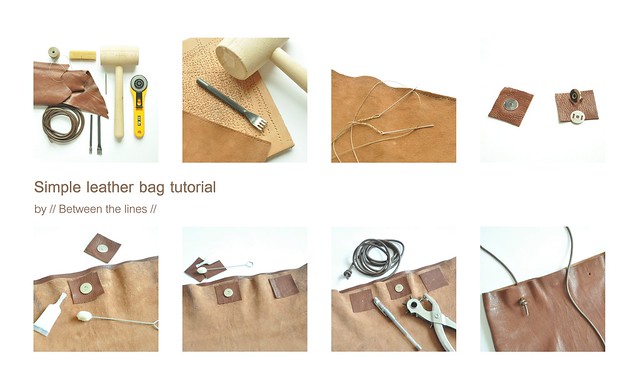
      Here's what you will need:

      The dimensions of the finished bag are: 38 cm by 40 cm

      - leather - I used a leather hide of approx. 0.55 m² but any large (combined) piece of leather would do
      - leather cording for strap (determine how long you want your straps to be, and add an extra 15 cm to each strap for knotting - so, if one strap measures x you will need 2(x + 15 cm) in total.
      - thread, linen or nylon, as long as it's strong
      - magnetic snap
      - 2 needles
      - pricking iron or a stitching awl
      - mallet, rubber or wooden hammer
      - hole punch
      - glue, a standard crafts glue is fine
      - optional: beeswax to wax sewing thread

      Simple leather bag tutorial


      Instructions:


      1. Cut a rectangle (or two rectangles of equal size if working with smaller pieces of leather) - in my case the rectangle was 39 cm x 80 cm. Next, make stitching holes along the long side for the side seams using a pricking iron, stitch punch or awl, about 0.5 cm from the side.
      2. Cut a piece of thread about 5 times the length of the seam you're going to sew. Thread a needle at each end and 'lock the needles' as is very well explained here. Next, sew the side seams using a saddle stitch, explained here. Note: in most stitching videos you'll notice people are using a stitching pony. I don't, for the simple reason I don't own one and I don't find it necessary. However, you could squeeze your leather in between two hardcover books held together with a a rubber band or belt. This should work equally well in my opinion.
      3. From the left over leather, cut six 5 cm squares.  Put four aside. Attach male and female part of a magnetic snap to the two remaining squares. If you don't know how to fix a magnetic snap check out this tutorial. Next, generously apply glue to the back of the magnetic snap squares and glue them into place onto the wrong sides of the bag, perfectly in the middle and about 3.5 cm from the top (measuring from the center of the snap). To make sure the glue/ square adheres, lightly hammer the square. Dab away any excess glue. Let dry.
      4. Determine where you want the straps to come. Then, position and glue  into place each of the four other squares which will serve to reinforce the leather where the strap holes come. Hammer lightly, dab away excess glue and let dry. 
      5. Mark the center of each square. Next, punch a hole with the leather punch. Repeat for the other squares. 
      6. Cut the leather cord to size, to make two straps. Tie a  double fisherman's knot at one end, thread through the hole as shown, thread through the other hole and finish off with another double fisherman's knot. Repeat with the second strap. And that's it!
      Simple leather bag tutorial


      As with all of my tutorials, please note, this tutorial is intended for personal use only. Therefore, do not reproduce, sell or commercialize in any form. Thanks for understanding!

      If you made something using a tutorial found on this blog or if you got inspired by something you found here, make sure to post your pictures here.
      September 22, 2010

      Finding leather

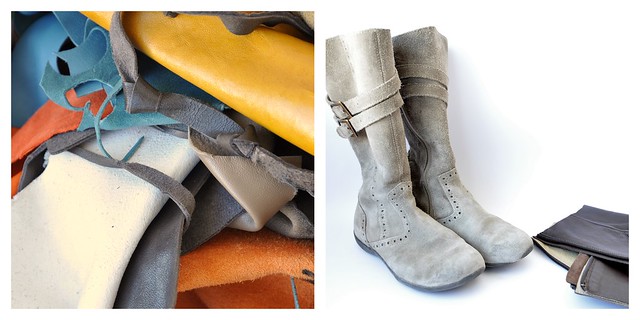
      leather scraps
      Part of my stash. I can't wait to cut little H's boots from last year to pieces - i like the little belts on them. M's boots have met my scissors already...

      Often I'm asked where I find the leather I'm using in my crafts. I consider myself lucky to be living in Paris for many reasons. One of them is that I have easy access to everything imaginable related to making and creating. I have a couple of addresses at the Marché Saint-Pierre where they sell leather in any size going from full skins to just pieces of  scraps. I've been told these skins and scraps are actually leftovers from big labels like Hermès, Chanel, ... I'm not sure if this is actually true, but I like the thought that I do carry a Hermès bag after all! The department store BHV also carries a nice selection in its hardware department, near the shoe repair supplies. Knowing that this information doesn't help a single bit if you don't live in the Paris area, I have come up with a couple of alternatives. The good thing about these is that they might turn out to be a lot cheaper as well because chances are you might own them already.

      1. Leather boots: Did you grow tired of  last year's boots? Are they beyond repair? Did your kids outgrow their favorite boots? Don't throw them out yet! Just cut off the shafts and you'll end up with two nice pieces of leather. 
      2. Leather jackets: Having an outdated jacket you don't know what to do with? Cut it to pieces. If you don't own an old jacket try to find one at a thrift store. You'll have plenty of leather to work with. The same applies to leather skirts and pants. Get out those scissors!
      3. Purses and bags: You might be done with that old purse or book bag but before you throw it out, check if there aren't any parts you could still use. I'm not only thinking of pieces of leather but also of possible straps,  belts and buckles which might come in handy.
      4. Belts: by nature perfect as a strap, the buckle being a nice detail.
      5. Sandals (and shoes): because of the straps and often also because of their decoration. They could be transformed in some nice accessories like a bracelet, a brooch, a hair clip, or could be used to add detail to a plain bag.
      I'm sure you can add a couple more to the list. Now, if working with leather scares you but you do like the idea of recycling leather, then check out this site for quite some stunning bags and purses made from recycled leather jackets. You can find a selection of recycled leather bags on Etsy as well. I especially like this one here.

      And now, go check out your closets!

      November 29, 2012

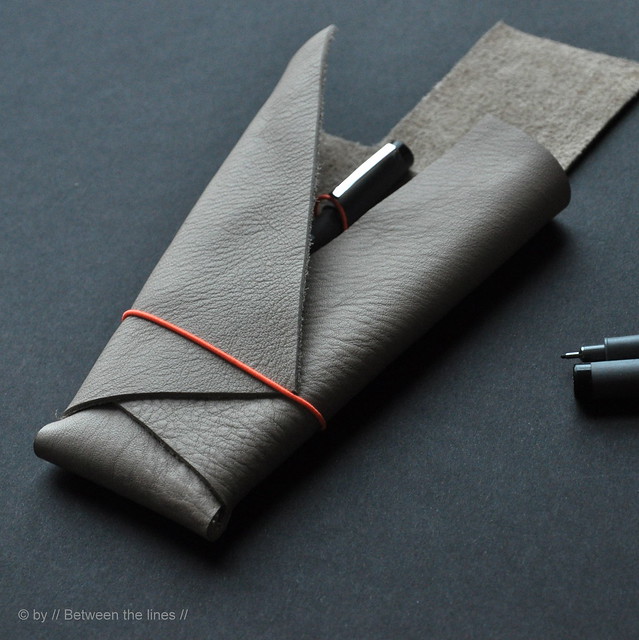
      No-sew Leather Pencil Case :: a DIY

      No-sew Leather Pencil Case
      I have been feeling slightly under the weather this week. A lack of energy, a cold, sleepy, headachy... and I got slightly frustrated about it. So many things I wanted to do. So many unfinished projects on my table and in my head...

      No-sew Leather Pencil Case

      At least, yesterday, I managed to get this one out of the way. Taking pictures, scanning and transferring the template actually took me much longer than finishing the project. [I actually enjoyed taking the pictures. Yesterday was a dark and grey day, a bit of a challenge if you want to take natural light pictures. Especially, when doing so past five o'clock. An opportunity to get my Lastolite screen out, which had been collecting dust ever since I got it, about two years ago. A shame, really, as this thing works!!] But let's get back to the pencil case:

      No-sew Leather Pencil Case

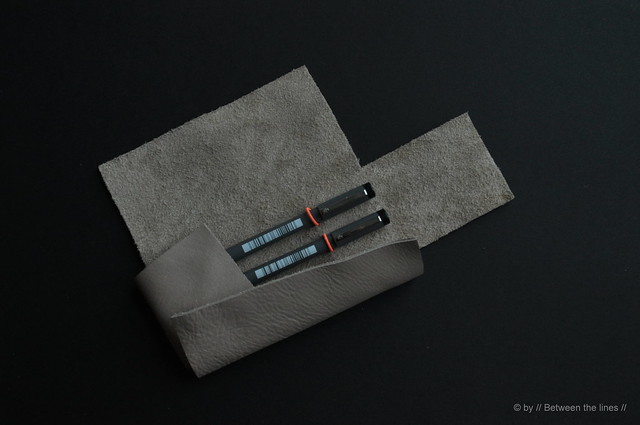
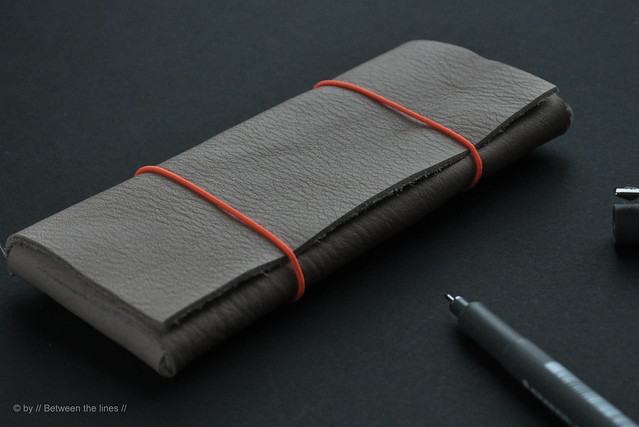
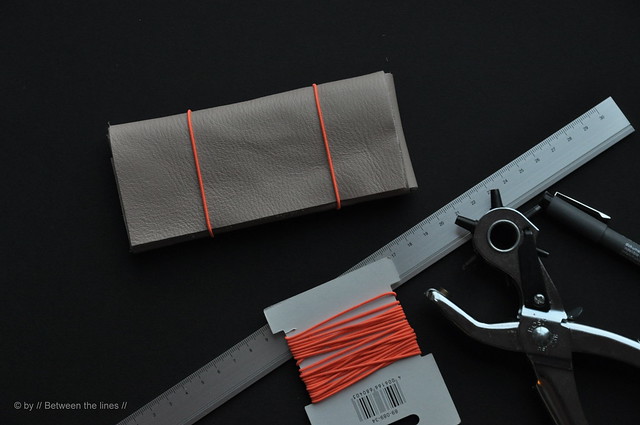
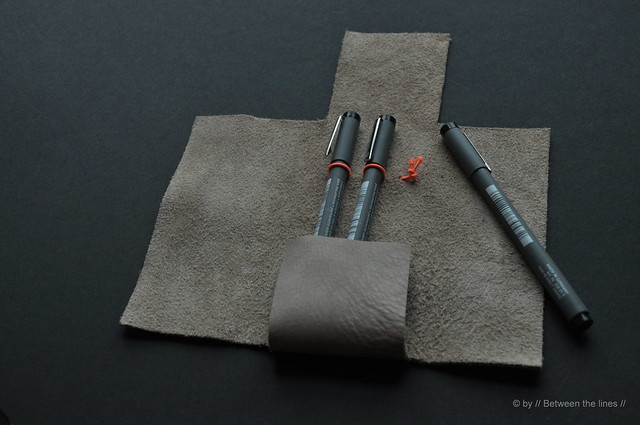
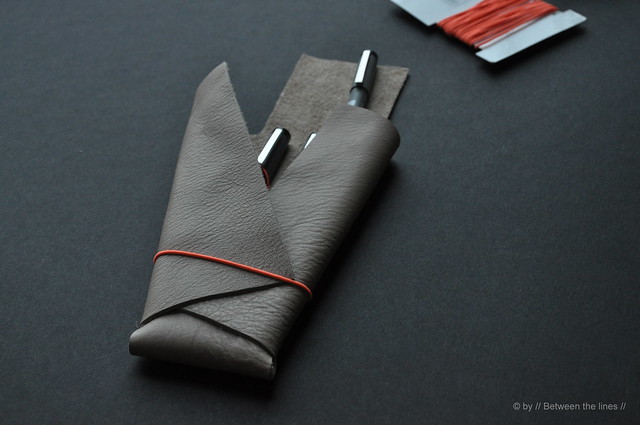
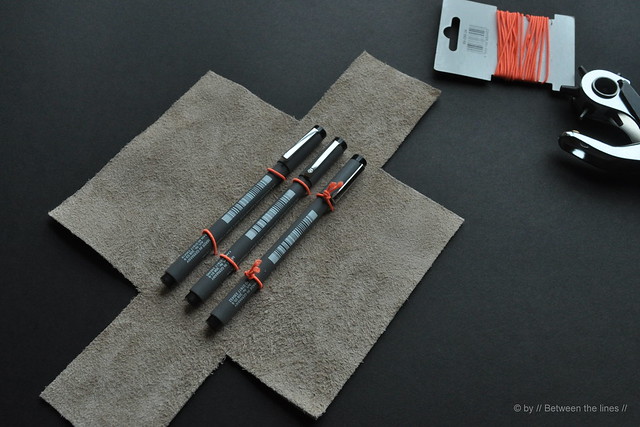
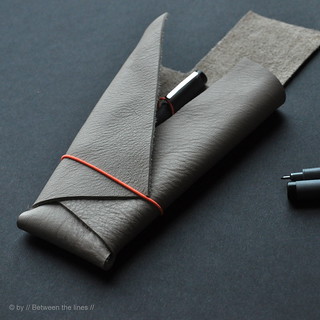
      This no-sew leather pencil case makes a perfect last minute gift. As usual, I chose for a minimalistic and sleek design. I used a sample of coffee with cream heavy weight leather and added my favorite fluo elastic thread (Rayher Gummifaden)to spice things up a bit. And it turned out just the way I like it, holding my favorite drawing pens! The elastics have a double function: they hold the pens into place as well as keep the pencil case closed. You can alter the template to fit bigger pens, or only two pens, you can add a slot to hold an eraser... You can just play around with it.

      If you want to make one too, here are the - very brief - instructions.

      No-sew Leather Pencil Case

      You will need:

      - a piece of leather, big enough to fit the template (note: if you can't find leather, you could also use heavy weight felt, a sheet of foam or vinyl)
      - a hole punch or awl
      - elastic thread
      - a rotary cutter or scissors

      No-sew Leather Pencil Case

      Instructions:

      1. Print and cut out template, which you can find here.
      2. Transfer template onto leather and cut out.
      3. Using template, transfer the positioning of the holes. Next, make holes with hole punch.
      4. Thread elastic through the holes and tie a knot. And done!!

      Ok and now let's get moving and catch up!!

      Cheers,

      P.

      No-sew Leather Pencil Case

      No-sew Leather Pencil Case

      April 18, 2013

      Chains and leather

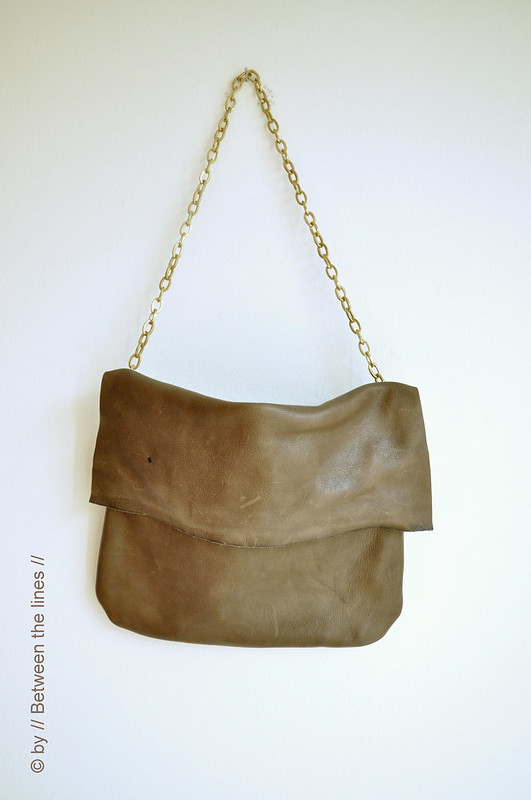
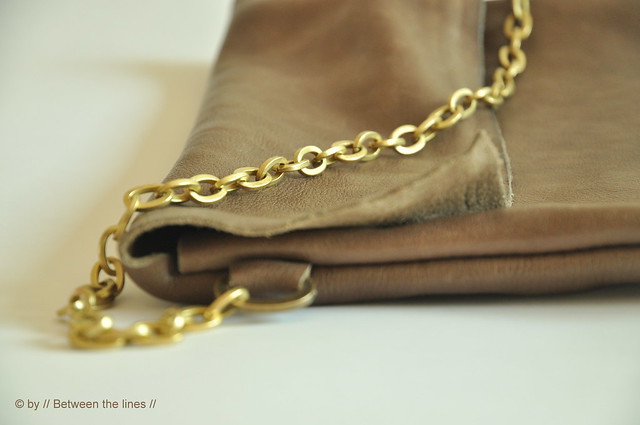
      My latest creation: a purse with a chain strap.

      Chain and leather purse


      Chain and leather purse

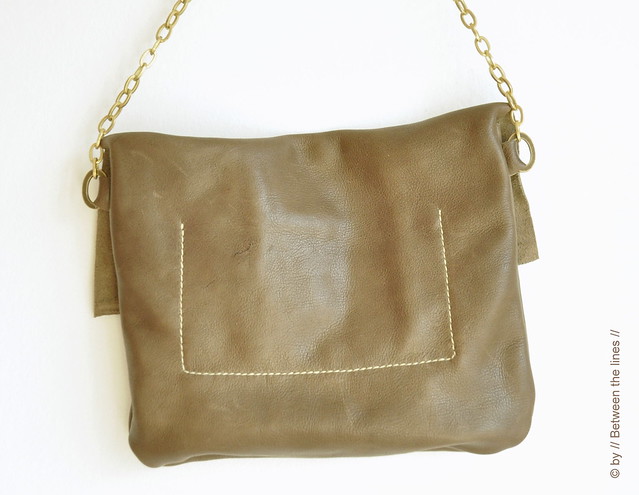
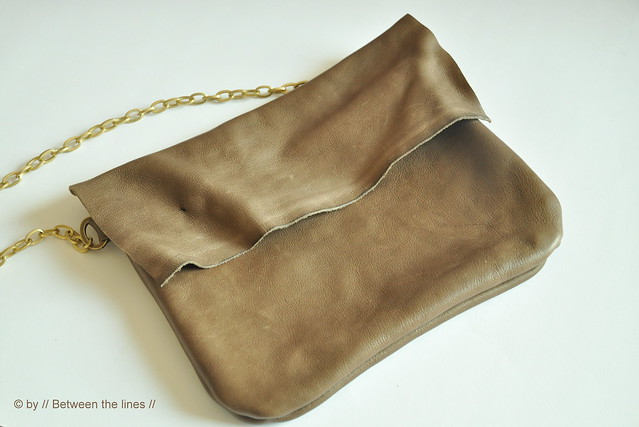
      I made this purse from two pieces of leather scrap I had, in a nice weathered brown. The leather is heavy weight, but turned out to be buttery soft - a dream to work with!
      For the shape I chose a simple rectangle as I was limited by the small amount of leather I had.
      For the flap I kept the rough selvedges and I didn't mind the tiny whole the leather had.
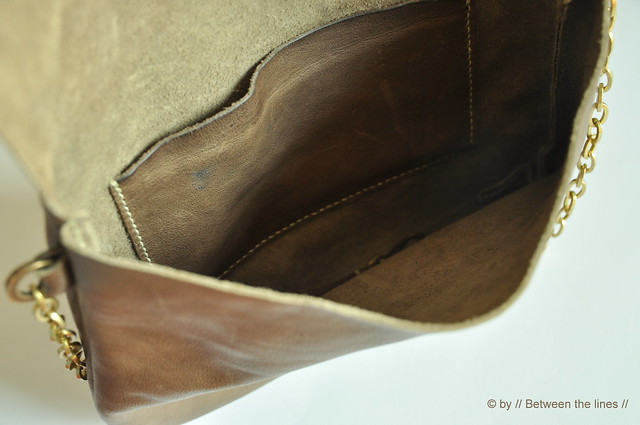
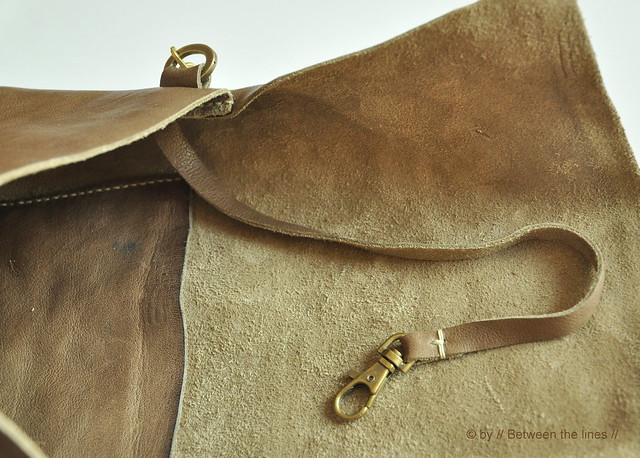
      On the inside, I made a small pocket (the right size to hold my cell phone) and I added a strap with clasp for holding keys as well.

      Chain and leather purse

      Chain and leather purse

      I found the heavy and well made brass chain, at a local jewelry making supply store. It wasn't cheap but well worth it.
      The tabs holding the chain are integrated in the side seams.

      Chain and leather purse

      Chain and leather purse

      I'm not sure if I should add any detail on the flap or not, nor if I should add a snap or other closure. I think I will do a test run with the purse as is. I like simplicity and a minimalistic look, especially with nice leather like this.

      The purse is entirely hand stitched with linen thread. Since the thread wasn't waxed I used beeswax to wax it myself, which worked really well.

      I will do a post on how to hand sew leather some time soon, going deeper into some tricks and skills and addressing the tools needed.

      June 10, 2011

      Flower power :: a tutorial

      flower power :: a tutorial

      I most definitely did not need another purse. As a matter of fact, this week while carrying around a way too heavy purse I made the remark I would so much like to be "free" - I want to live a purse-free life. Why is it that men can leave the house with just a wallet and a set of keys and we carry around entire survival kits? Do I really need all this stuff? Let's face it: right now, I have in my purse

      - a wallet
      - another purse with change
      - keys
      - car keys
      - sunglasses
      - small pencilcase
      - handsanitizer
      - paper tissues
      - several packs of chewing gum
      - paper wrappers
      - loose change
      - organizer (although small, really heavy!)
      - MOO cards (that's right! I didn't mention them yet but I ordered some MOO Mini Cards a little while ago - so cute!)
      - pass Navigo (Metro travel pass)
      - cell phone - which I usually can't find when it rings, because obstructed by all of the above
      - a small umbrella
      - card holder for store fidelity cards, membership cards ...
      - a notebook
      - a little pouch with medication and band aids

      Surprisingly, I do not carry around any make-up, not even a lipstick.

      But seriously: do I really need all of this? When I take out the umbrella you can rest assured it will start raining. And the girls only fall or get hurt when I don't bring any band aids. But one pen would do, wouldn't it, instead of a pencil case. And how about all the plastic cards from stores where I come only once in a while. And the organizer?

      With that in the back of my mind and the upcoming vacation I thought I should try to go light again. And is there a better way of doing so with a brand new, cute little purse?

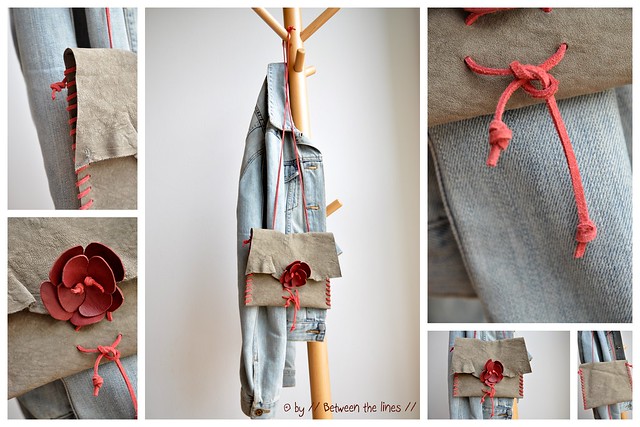
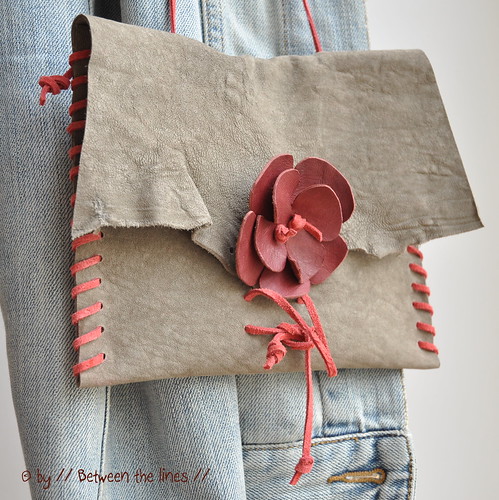
      The inspiration for this one comes from a little purse my dad brought me from a business trip to Ohio - I was about twelve when I received it and I still have it. It was just the perfect size to hold a wallet and a set of keys and I used it way into adult life. It was handmade and all seams where sewn with leather strips - something you see showing up everywhere again lately (see also my bohemian belt). Hence the leather shoelace stitched seams. In addition, I decided to have a flower closure and since I liked the rough edges of the leather I chose to integrate these as well into the design. The body of the purse is made out of a single rectangular piece which makes it a really easy project.

      What you'll need:

      - a rectangular piece of leather
      - leather scraps for the flower
      - leather shoe lace for binding the edges (2), strap (2), closure and flower attachment (1)
      - leather punch
      - scissors, rotary cutters
      - ruler and marker

      flower power :: a tutorial


      Instructions:

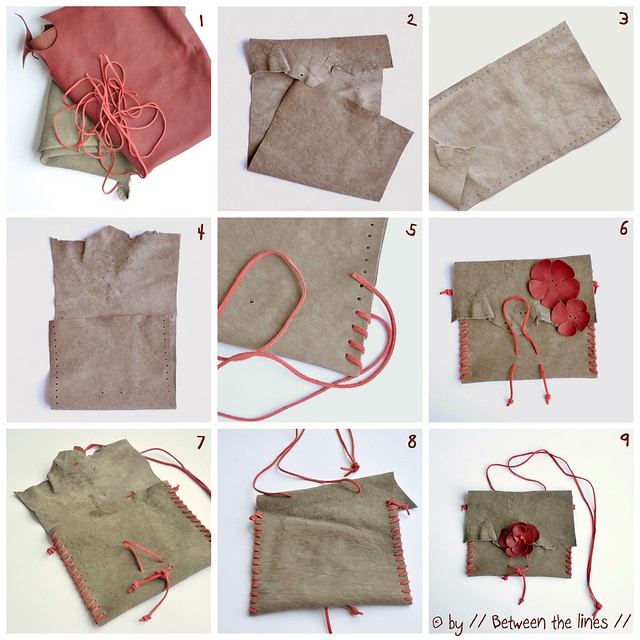
      1. Cut your leather to size for the body of the purse. ~ pic.1

      2. Make flower from leather scraps by cutting two flower shapes, one slightly bigger than the other. Punch two holes in each one (make sure they correspond to each other).

      3. About 1 cm from the edge, mark where the holes should come, one every cm. Also punch two holes at the top fold (for the strap), four holes (two by two) near the bottom center for the closure loop, and two near the bottom of the flap for the flower (same distance between holes as in flower). ~pic.3

      4. With leather punch, punch holes as marked. However, on the side seams skip the one at the bottom fold (marked with a cross in pic.3 - enlarge picture) on either side (left and right). ~ pic.4

      5. Sew seams with shoe lace. Start and finish with a knot ~ pic.5

      6. Attach the loop for closure as shown ~ pic. 6-7

      7. Attach flower to the flap and secure with a knot at each end. ~ pic.7 and 9

      8. Attach strap (I used two shoe laces for that, knotted together) ~pic.8

      Designer notes: Except maybe for the punching part, this would be a perfect craft for the (older) kid. If you don't have any leather handy or do not want your kid to ruin some precious leather, try using felt or denim. In the latter case, no punching is required as one can just sew the seams with needle and thread. The flower can be made out of any material, really or replaced by a button.
      Use your imagination and more importantly - have fun!

      This little purse has exactly the right size to hold a small wallet, keys and a cell phone and will keep me company on the beach, hopefully soon!

      Flower power :: a tutorial


      As with all of my tutorials, please note, this tutorial is intended for personal use only. Therefore, do not reproduce, sell or commercialize in any form without permission. Thanks for understanding!


      If you made something using a tutorial found on this blog or if you got inspired by something you found here, make sure to post your pictures here.
      January 1, 2006

      // Tutorials //

      Please note, these tutorials are intended for personal use only. Therefore, do not reproduce, sell or commercialize in any form without permission. Thanks for understanding!

      Triangle bag :: a tutorial
      Triangle bag :: a tutorial

      No-sew Leather Pencil Case
      No-sew Leather Pencil Case

      fluo ombre
      ombre-bunting-flags

      Fluo linen bag :: a DIY
      Fluo linen bag :: a DIY

      denim snack bag :: a recycling project
      denim snack bag :: a recycling project

       Folded leather basket :: a minimalistic DIY
      Folded leather baskets

      Animal Key Chain :: DIY
      Animal key chain

      Leather key chain holder :: tutorial
      Leather key chain holder

      Cow-boy hat
      No-sew appliqué

       denim flowers :: a DIY
      denim flowers

      Mesh Beach Bag
      Mesh beach bag

      Leather and gold bag :: DIY instructions
      leather and gold bag


      Repurposing an old pair of jeans :: a DIY
      Repurposing an old pair of jeans


      Bias tape from T-shirts


      A year in scraps :: bias tape"
      A year in scraps bias tape


      Origami paper cubes :: a DIY
      Origami Paper Cubes


      DIY infinity scarf
      Infinity scarf


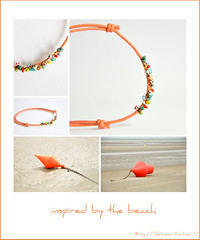
      Inspired by the beach bracelet


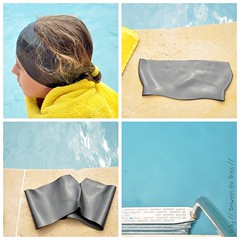
      DIY Swimming Ear-Band
      DIY Swimming Ear Band

      plastic bag flower slippers
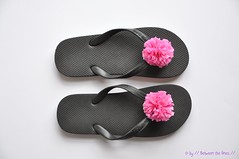
      Recycled plastic bag pompom slippers
       
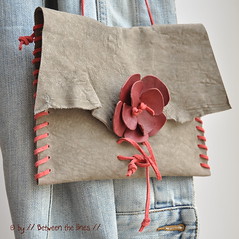
      Flower power :: a tutorial
      Flower Power Purse

      Kids flower petal shoes :: DIY
      Flower petal shoes :: the kids version


      Creative with espadrilles :: a DIY
      Creative with espadrilles :: a DIY

      Bohemian style belt
      Bohemian style belt


      Fabric and wire flower
      Fabric and wire flowers


      DIY drawstring coin purse
      DIY Simple drawstring coin purse


      DIY Japanese masking tape
      DIY Japanese masking tape


      DIY Embroidered tape and a box


      fabric necklace
      Fabric Necklace


      DIY Gift Idea #5 :: Fabric covered notebook
      Fabric covered notebooks


      Whimsical pillows :: a tutorial
      Whimsical pillows


      berries and roses
      fabric roses - DIY Gift Ideas
      fabric roses - DIY Gift Ideas
      Say it with flowers


      DIY Gift Ideas :: a polar fleece poncho
      Polar Fleece Poncho

      100% Easy Single Seam Poncho
      Easy single seam poncho

      denim bag
      Denim with leather tote

      Embroidered coat hanger cover
      Embroidered coat hanger cover

      free style crochet coat hanger
      Free style crochet coat hanger

      Enhanced wire clothes hanger
      Colorful wire clothes hanger

      Easy braided bracelets
      Easy Braided Bracelets

      Triangles and polka dots
      Triangles and Polka Dots


      Easy lace trimmed scarf


      recycled shirt bag
      Recycled shirt bag


      Quick fix grocery bag


      quick fix leather bracelet
      Quick fix leather bracelet


      polka dots garland
      Polka dots garland


      the cutest tutorial ever - finger puppet


      Valentine's Day - Wire wrapped photo holder


      Valentine's Day - Crocheted Hearts Drawstring Bag


      Valentine's Day crocheted hearts - part 1


      Crocheted Valentine's Day Heart
      Valentine's Day crocheted hearts - part 2


      Tote bag for beginners


      Baker's twine :: Fake itDIY Christmas tree ornaments
      Baker's twine - DIY ornaments


      Ruffled Messenger Bag
      Ruffled Messenger Bag


      Shopping Bag


      pic16
      Headband


      Drawstring bag
      French seam drawstring bag


      water bottle holder
      Water bottle holder


      3-way laundry bag


      Wire wrapped needle felted heart 2
      Wire-wrapped felted heart


      Valentine garland 5
      Valentine's day garland


      Message Board - Part 1
      Message Board - Part 2


      Egg Warmer
      Egg Warmer


      Wire-wrapped bird nest with felted eggs
      Wire-wrapped nest with needle felted eggs


      Braided necklace with portrait


      valentijntje
      Valentine's Day Waldorf puppet


      Gri-gri 2
      Gri-Gri


      DIY Christmas Trees
      Related Posts with Thumbnails